
This manual guides the user through the steps required to use the SDWAN screen in Kognitive Cloud. The SDWAN screen can be accessed after selecting an individual site. It enables the user to view the key metrics of the different WAN interfaces associated with the devices in the site. Each device deployed in the site has different WAN interfaces depending upon their type. These WAN interfaces have different key metrics to measure their performance.
-
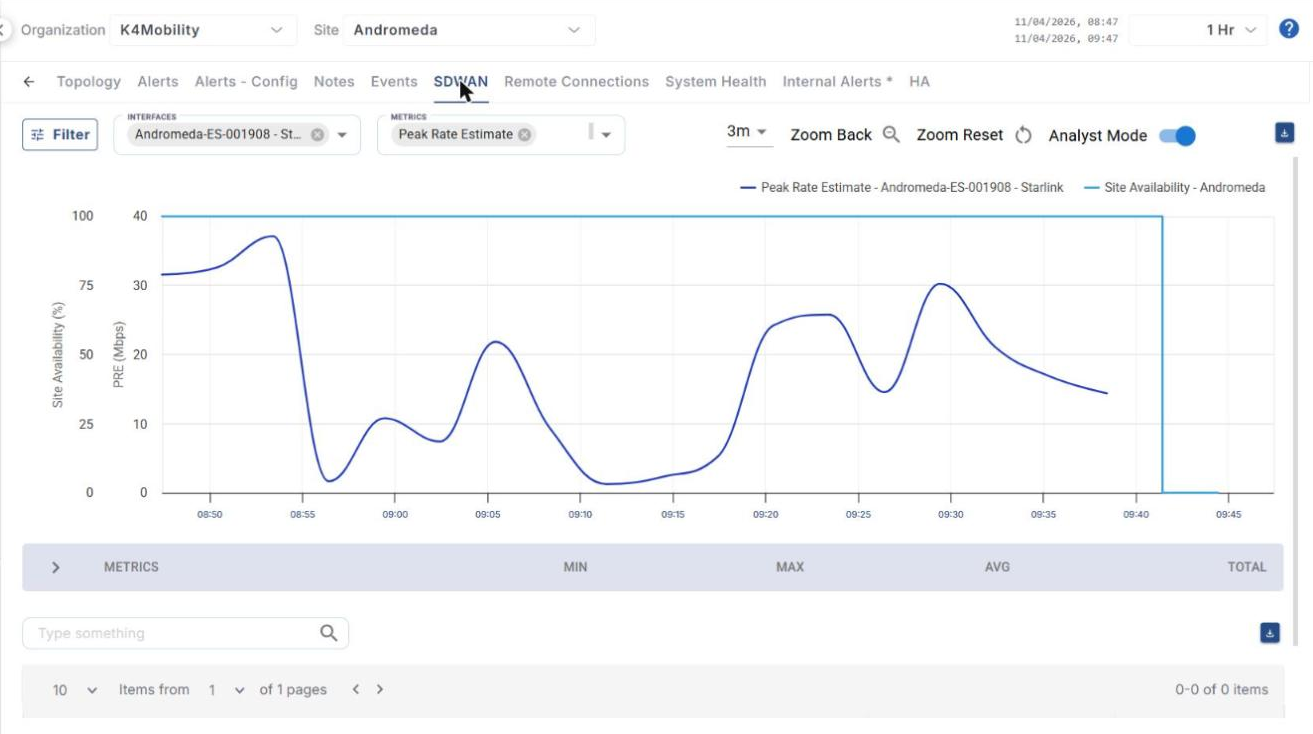
Click the SDWAN tab.
-
Select the Period from the dropdown menu. The available options are Last 15 min, Last 1 Hr, Last 6 Hr, Last 12 Hr, Last 1 Day, Last 7 Days, Last 30 Days and MTD (Month to Date).
-
The user can also select a custom time interval using the From and To fields.
-
Click the Interfaces field to open the dropdown menu. In this dropdown, the WAN interfaces associated with all the devices deployed in the site will be listed.
-
Select the required WAN interface.
-
In the Metrics field, select the required metrics from the dropdown menu. The metrics listed depend on the type of the selected WAN interfaces and the services enabled on the site. For example, the following metrics are available for a Starlink interface:
-
Link Uptime, Peak Rate Estimate, Latency & Jitter, Throughput
-
Clients, Usage, Site Availability, LAN Status
-
MPK Flows, MPK Speed, MPK Latency, MPK Status, MPK Probe Pass (for sites with MPK enabled)
-
Speedtest, Native Probe Pass, QOE
Interface specific metrics are listed for the corresponding interface types, for example SINR and RSSI for Cellular interfaces and VSAT SNR, VSAT TX Power, VSAT Power and VSAT Symbol Rate for VSAT interfaces.
-
-
Select the chart interval (1m, 3m, 10m, 20m and so on) from the interval dropdown. The interval determines the granularity of the data points plotted in the chart. The available intervals depend on the selected Period.
-
The Site Availability of the selected site is also plotted on the chart along with the selected metrics.
-
Click the Download icon at the top right corner of the chart to download the chart data.
-
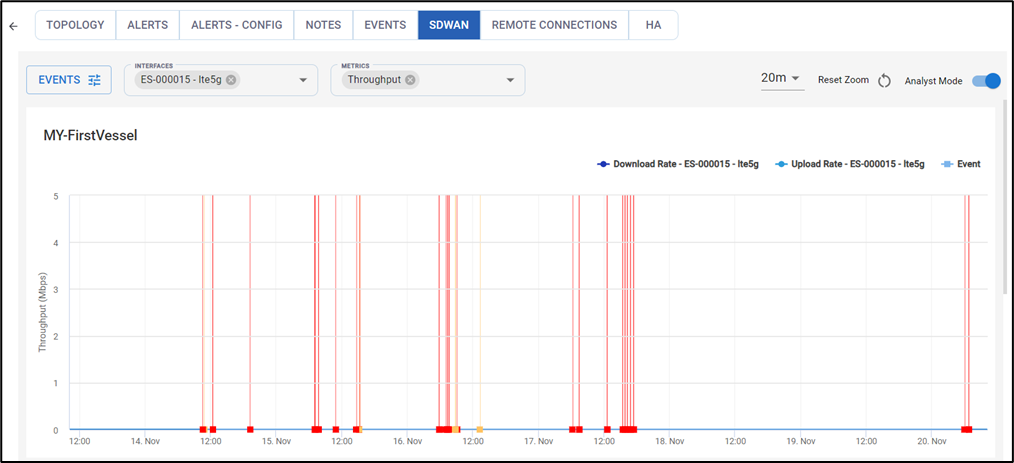
The performance of the device based on the selected metrics is shown in the format of a chart. The horizontal axis contains the time instances, and the vertical axis contains the metric values in their corresponding SI unit.
-
The graph between these two axes gives the user a clear understanding of how the device has performed during the selected time interval.
-
The user can select multiple WAN interfaces at the same time and compare their performances.
-
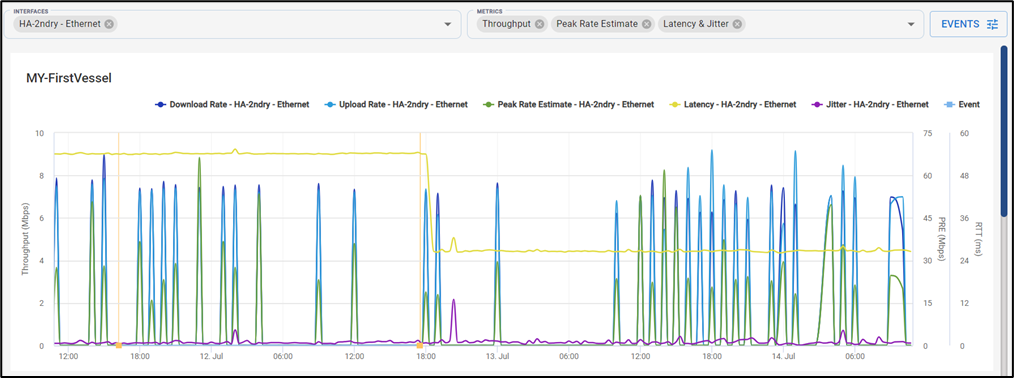
The user can also select multiple Metrics at the same time and view their values.
-
The Legend provided below the Chart helps the user to differentiate between the various types of metric values plotted in the chart. It also shows the Minimum value, Maximum value, and Average value of the selected metric.

-
Hover the cursor at any point on the chart to view the value of the metric at that time instance.
Events
-
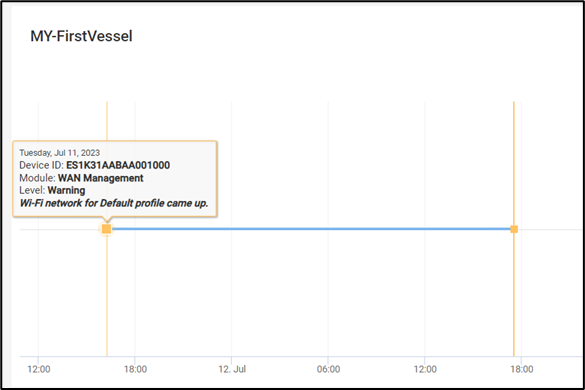
Along with the metrics, the chart also plots the Events happening in the WAN interfaces.
-
The square points marked on the chart denote the events. Hover the cursor on the square point to view the details of the event.
-
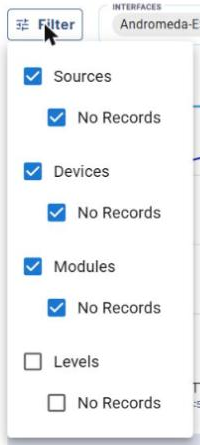
Click the Filter button to select the type of events that will be plotted in the chart and listed in the Events table.
-
Select the checkboxes of the Sources for which the user wants to view the events.
-
Select the checkboxes of the Devices for which the user wants to view the events.
-
Select the checkboxes of the Modules for which the user wants to view the events.
-
Select the checkboxes of the Levels for which the user wants to view the events.
-
If there are no events for a section, No Records is shown.
-
-
The Events table also lists all the events that are happening in the WAN interfaces. It shows information such as:
-
Timestamp – Date and Time of the event
-
Source – Source of the event
-
DID - Identification Number of the device
-
Level – Level of warning
-
Module – Module in which the event has occurred
-
Description – Description of the event
-
Metadata
-
-
When there are many events to be listed in the table, the pagination helps the user navigate to each page by using the < > buttons.
-
Use the Items from dropdown at the top of the table to choose the number of events to be seen in a single page (10 by default).
-
Enter the required text in the Type something search field to search the Events table. Click the Download icon above the table to download the events.
Disable Analyst Mode
-
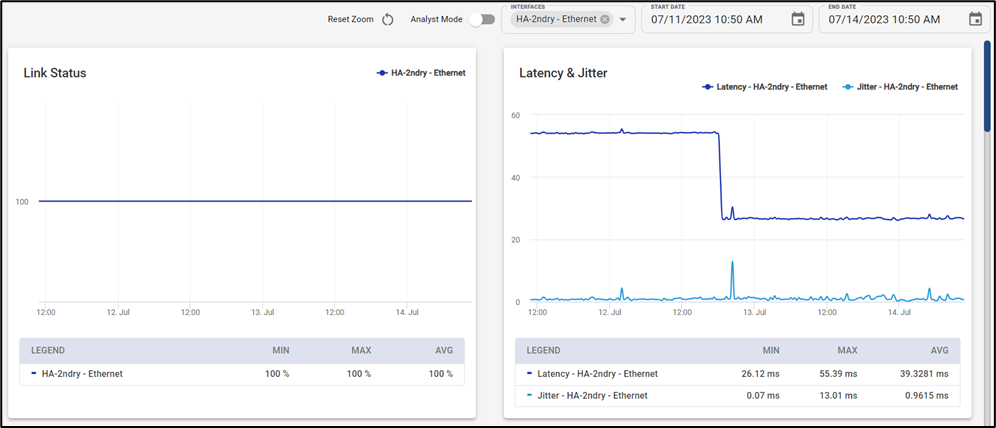
By default, the Analyst Mode will be switched on. The Analyst Mode displays all the charts in the same screen.
-
Click the Analyst Mode toggle button to disable the Analyst Mode.
-
Now, all the charts will be shown individually.
Zoom Back and Zoom Reset
-
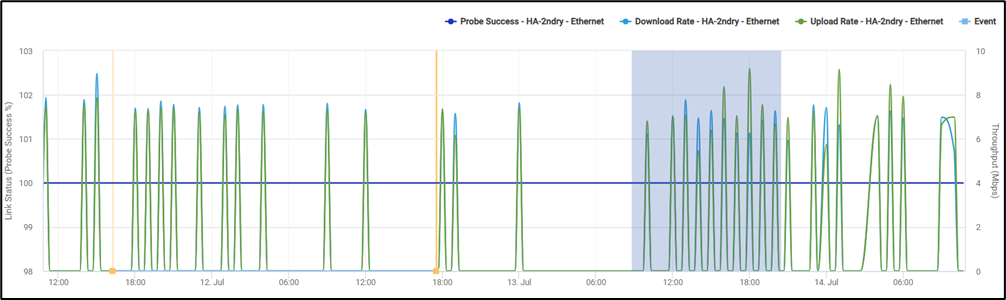
The charts have pinch and zoom functionality. Click anywhere on the chart and drag the cursor to select a specific area.
-
Release the cursor. The selected area will be zoomed in.
-
Click Zoom Back to return to the previous zoom level.
-
Click Zoom Reset to reset the zoom and return to the full chart.