Tickets is a restricted feature (marked with an asterisk (*) in the menu). It is available only to users who have been given access to it.
Overview
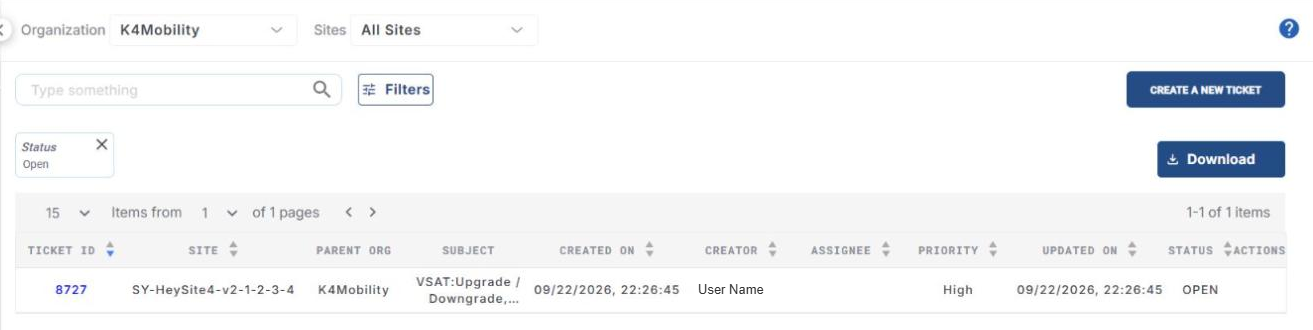
The Tickets screen shows a summary of all the tickets raised for the organization. Select Tickets * from the left menu of Kognitive Cloud to open it.
-
In the Organization field, select the organization or sub-organization. The organization of the logged-in user is selected by default, and the list contains all of its sub-organizations.
-
In the Sites field, select the required sites (default All Sites).
-
By default, the table shows only the Open tickets. The applied filters are shown as chips above the table (for example Status: Open). Click the x on a chip to remove that filter.
-
The table shows the following information:
-
Ticket ID – unique ID of the ticket. Click it to open the ticket details.
-
Site – name of the site.
-
Parent Org – organization the site belongs to.
-
Subject – subject of the ticket.
-
Created On – date and time of creation.
-
Creator – name of the person who created the ticket.
-
Assignee – name of the assignee.
-
Priority – priority level of the ticket.
-
Updated On – date and time of the last update.
-
Status – status of the ticket.
-
Actions
-
-
Use the search field to find tickets.
-
Click Download to download the table data in CSV format.
Filters
-
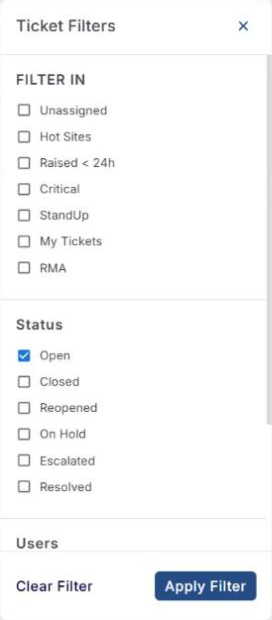
Click the Filters button to open Ticket Filters:
-
Filter In – Unassigned, Hot Sites, Raised < 24h, Critical, StandUp, My Tickets and RMA.
-
Status – Open, Closed, Reopened, On Hold, Escalated and Resolved.
-
Users – select an Assignee or a Creator to see their tickets.
-
-
Click Apply Filter to filter the tickets, or Clear Filter to remove the filters.
Create a New Ticket
-
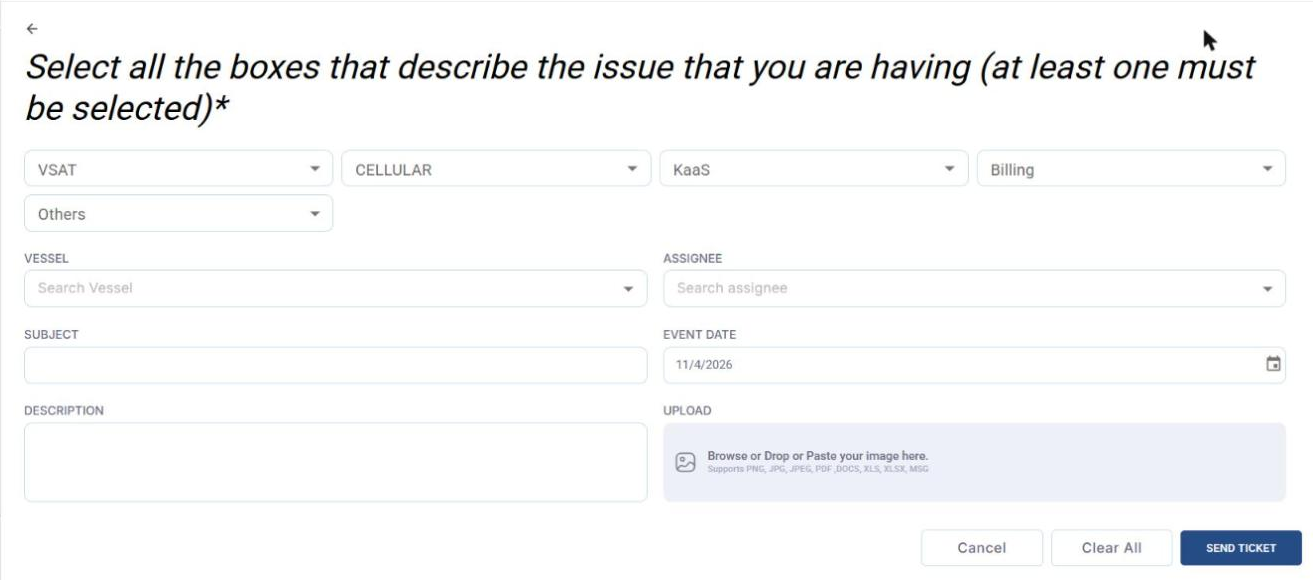
Click CREATE A NEW TICKET. The new ticket form opens. Click the back arrow to return to the list.
-
Select at least one option that describes the issue:
-
Click the VSAT field and select one or more of: Upgrade / Downgrade, Slow / No Service, Modem, Antenna, Others.
-
Click the CELLULAR field and select one or more of: Upgrade / Downgrade, Slow / No Service, Modem, Antenna, Others.
-
Click the KaaS field and select one or more of: Server SW, Mobile APP, Outbound Calls, Inbound Calls, Others.
-
Click the Billing field and select one or more of: Invoicing, Payment, Others.
-
Click the Others field and select one or more of: Network Issues, LAN, WI-FI, AV, Others.
-
-
Select the site in the Vessel field.
-
Select the Assignee.
-
Enter the Subject.
-
Select the Event Date (default: today).
-
Enter the Description.
-
In the Upload area, browse, drop or paste any supporting files. Supported formats: PNG, JPG, JPEG, PDF, DOCS, XLS, XLSX and MSG.
-
Click SEND TICKET to create the ticket, Clear All to clear the form, or Cancel to cancel.
Ticket details
-
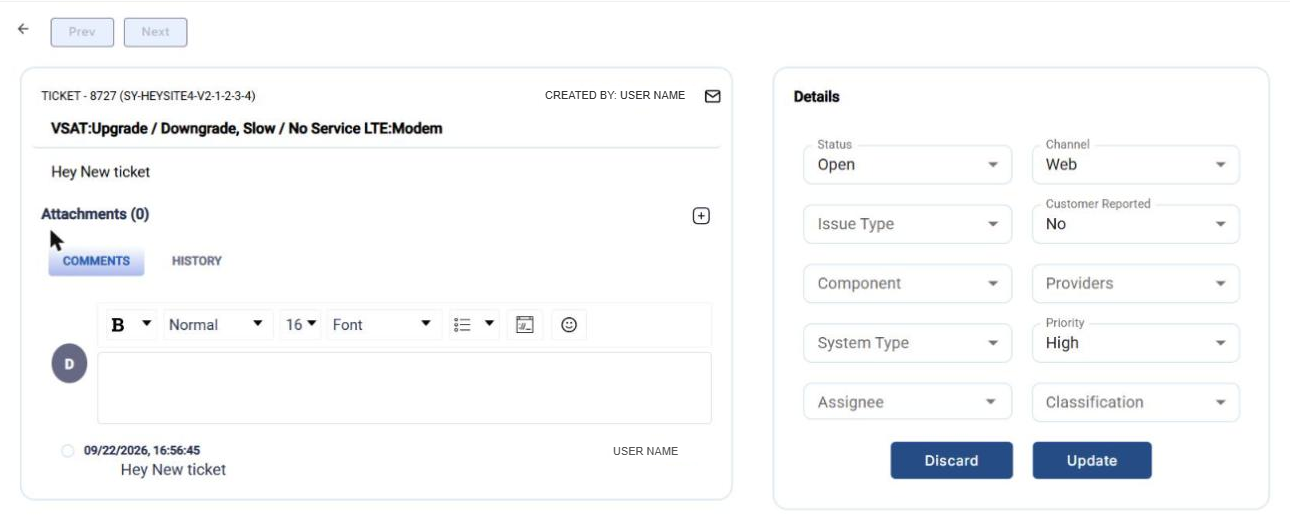
Click a Ticket ID in the table to open the ticket. Use Prev and Next to move between tickets, or the back arrow to return to the list.
-
The left side shows the ticket number, site, creator, subject and description, and the Attachments. Click the + icon to add an attachment.
-
The Comments tab lets you add comments using the text editor. The History tab shows the changes made to the ticket.
-
The Details panel on the right lets you update the Status, Channel, Issue Type, Customer Reported, Component, Providers, System Type, Priority, Assignee and Classification of the ticket.
-
Click Update to save the changes, or Discard to discard them.