
ES515 - Rack Server
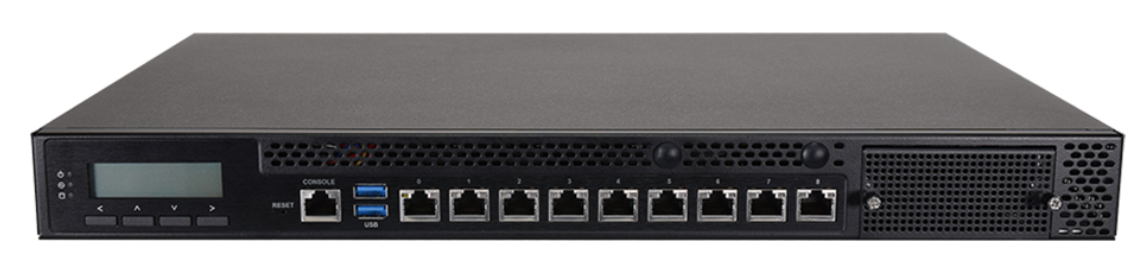
The ES515 system is a 1U rackmount network appliance designed for edge computing, networking, and security applications. The system provides multiple high-speed Ethernet interfaces, a dedicated management interface, USB connectivity, console access, and optional network expansion.
This guide provides step-by-step instructions to help you set up and access the ES515 system efficiently.
The primary components of the ES515 system are:
-
ES515 appliance
-
AC power cable
-
RJ45 console cable
-
SATA cables
-
Short-ear rack mount kit with screws
The ES515 is based on the Lanner NCA-4240 platform. The standard system provides one 1GbE RJ45 management port and eight 2.5GbE RJ45 LAN ports. The system also provides two USB 3.0 ports, an RJ45 console port, a reset button, and an LCD module with four keypad buttons.
Steps to bring the system online
1. Device Power & Connectivity
-
Connect the AC power cable to the ES515 device and plug it into a power outlet. Use an appropriate UPS for site deployments with unstable power.
-
Connect an Ethernet cable from a WAN source to the ES515 port provisioned as the WAN interface. The WAN source should have DHCP enabled so that it can assign the ES515 device an IP address.
-
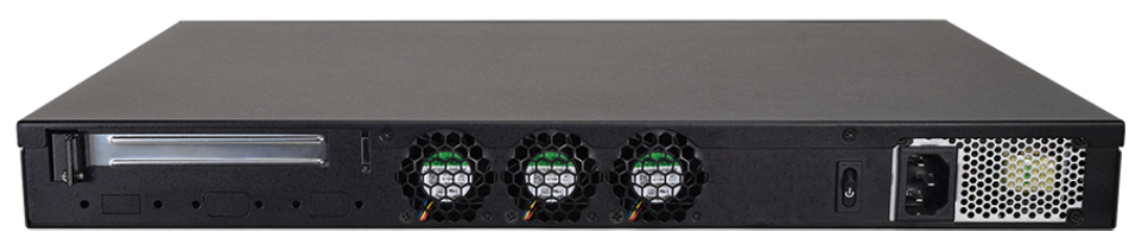
Press the power button on the rear panel to power on the system.
-
The system will power up and be online in a few minutes.
The ES515 has a dedicated 1GbE RJ45 management port and eight 2.5GbE RJ45 LAN ports. The specific interface used as the WAN interface depends on the device configuration.
If a WAN source with internet access is not available, the ES515 can still be configured using the On-Premises instructions below.
The configuration can also be built in the cloud and will sync with the ES515 when it connects to the internet.
2. Registration
Every ES515 device, regardless of license type, needs to be registered. Registration includes assigning the device to an Organization and Site, creating a unique Device Name, and selecting a License.
All newly procured devices should be listed in the Inventory > Warehouse tab of the Kognitive Cloud Portal.
-
Log in to the Kognitive Cloud Portal with valid credentials.
-
Select Inventory from the left menu bar.
-
Select the Warehouse tab.
-
Open the Warehouse tab for the appropriate Organization and find the device to be registered by matching the Device ID (DID) printed on the device with the corresponding row in the table.
-20250904-134037-20260813-145313.png?cb=238156667f24a93f9bf52a3bc9676bf6)
-
Select the
-20250904-134249.png?cb=3652d71281effb4cd3d3e0a29dccd725)
-
In the Select Organization field, select the required organization from the dropdown menu.
-
Select the required Site. A Site represents the physical location where the Edge System remains deployed and can be reliably identified by the management system. Multiple Edge nodes can be assigned to a single Site.
-
In the Create/Search Site field, enter the name of the required Site.
-
Select an existing Site from the list.
-
To create a new Site, enter the Site name and click Add.
-
Enter a Device Name.
-
In the Select License field, select a License type from the dropdown menu.
-
Select the required Term.
-
In the Upgrade EOS field:
-
Select Yes to update the EOS version of the device.
-
Select No to continue with the existing EOS version.
-
-
In the Apply Default Config field:
-
Select Yes to apply the default configuration for the selected Site.
-
Select No to let the device continue with its current configuration.
-
Select Other to select a configuration from the available backup configurations.
-
-
If Other is selected, choose the required configuration in the Select Configuration field.
-
Click Register to assign the device to the selected Site and complete the registration process.
-
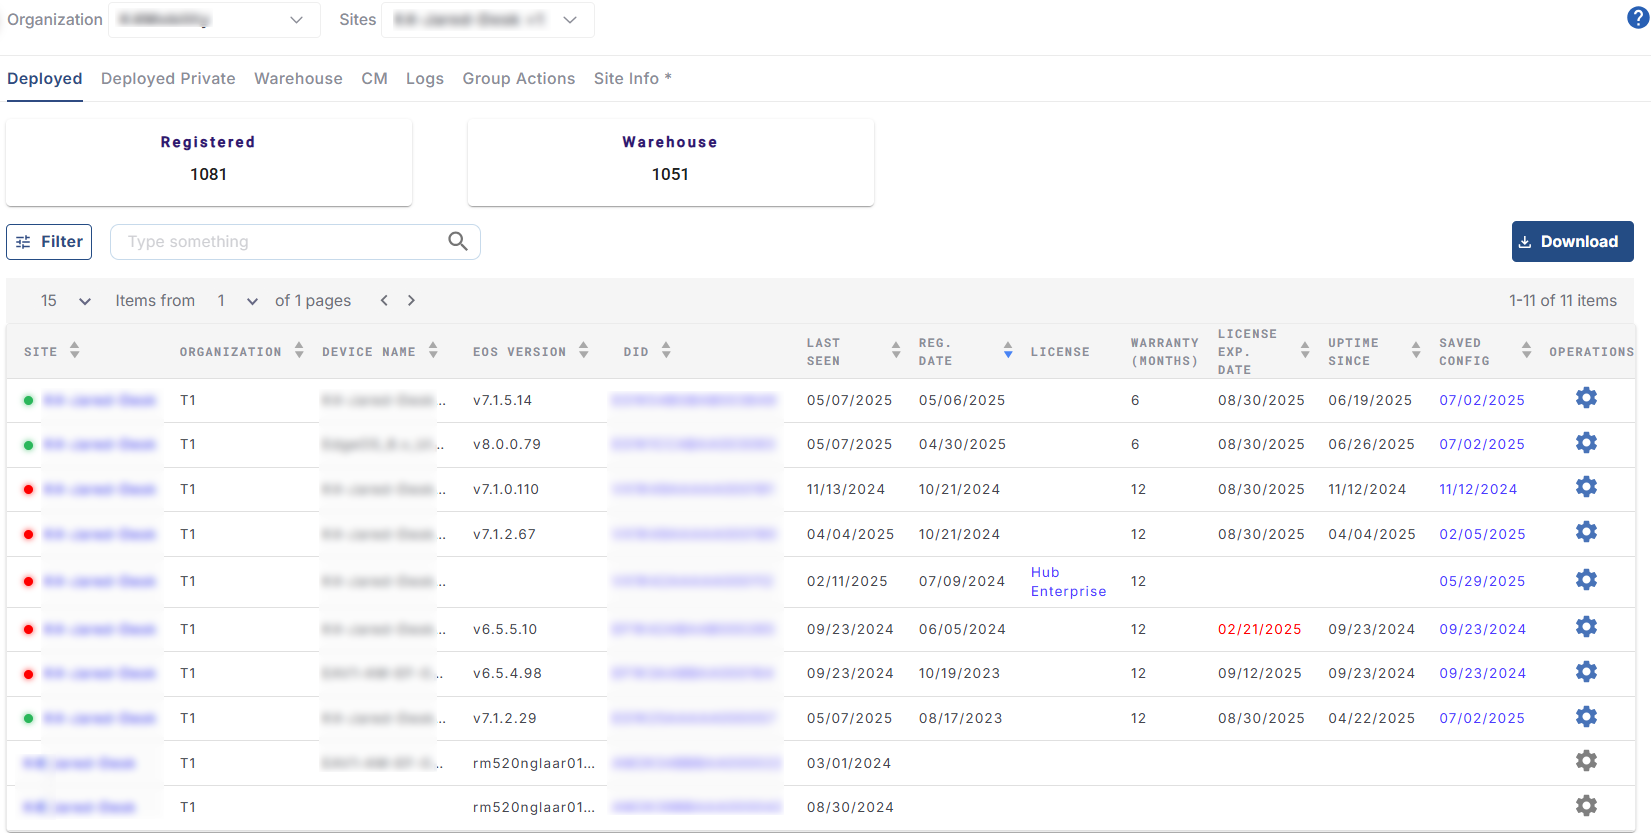
Once registered, the device moves from the Warehouse tab and appears under Inventory > Deployed.
-
The newly registered device also appears under Sites > Topology.
-20250904-134444.png?cb=cbc6c0b2a42048ab4285d7decd1d3046)
-
After successful registration, power on the ES515 and connect it to the internet.
3. Configure ES515
After the ES515 is powered on and connected to the internet, it can be accessed either from the cloud or physically, on-premises at the Site.
Option 1: Access the device using an Ethernet connection
-
Connect a laptop Ethernet interface to an available ES515 LAN Ethernet port.
-
Configure the laptop Ethernet interface to Obtain IP address automatically (DHCP).
-
The laptop should receive an IP address from the device's configured LAN network.
Option 2: Access the device using the management interface
-
Connect the laptop Ethernet interface to the dedicated 1GbE RJ45 MGMT port on the ES515.
-
Configure the laptop Ethernet interface to Obtain IP address automatically (DHCP).
The ES515 provides a dedicated 1GbE RJ45 management interface in addition to its eight 2.5GbE LAN interfaces.
-
Open a web browser on the laptop.
-
Enter the management URL provided for the ES515 deployment and press Enter.
-
The KonnectOS Web Portal login page appears.
-
Enter the provided username and password.
-
The Portal Dashboard appears.
-20250904-134829.png?cb=e7458ee99dab180e28d5fa851c70670d)
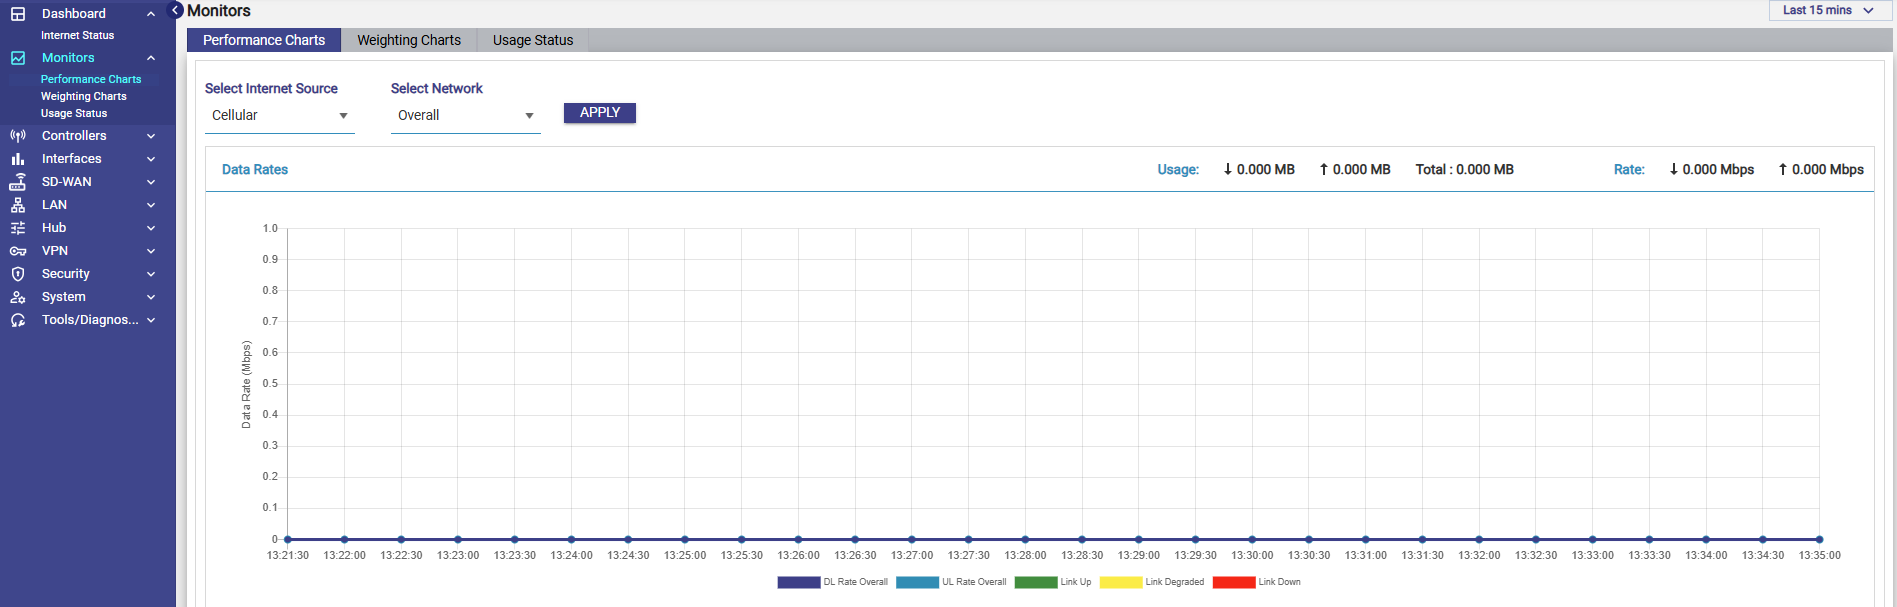
The dashboard provides access to device status and monitoring information. Depending on the deployed configuration, you can use the available sections to monitor the internet connection and device performance and update configuration settings.
Configuration can be updated using the applicable sections such as Controllers, Interfaces, SD-WAN, LAN, Firewall, and System.
4. Troubleshooting
-
Ensure that the ES515 is connected to a stable AC power source. A UPS is recommended for on-site deployments where the power supply may be unstable.
-
Verify that the Ethernet cable is connected to the correct interface.
-
Verify that the WAN source provides DHCP if the ES515 is expected to obtain its initial network configuration automatically.
-
If the device cannot be accessed locally, verify that the laptop Ethernet interface is configured to obtain an IP address automatically.
-
Verify that the device is registered under Inventory > Deployed in the Kognitive Cloud Portal.
-
If the device is not visible in the Warehouse inventory, verify the Device ID (DID) printed on the device.
-
If the device is registered but does not appear online, verify the WAN connection and internet connectivity.
-
The ES515 provides an RJ45 console port for device-level troubleshooting and maintenance. The NCA-4240 documentation specifies configurable console communication speeds up to 115200 bps.
-
The ES515 includes a reset button on the front panel and a power switch on the rear panel.
-
User Manuals are available at: Kognitive Networks Knowledge Base
-
For detailed steps of the registration process, reference the How To: Register A Device guide.