
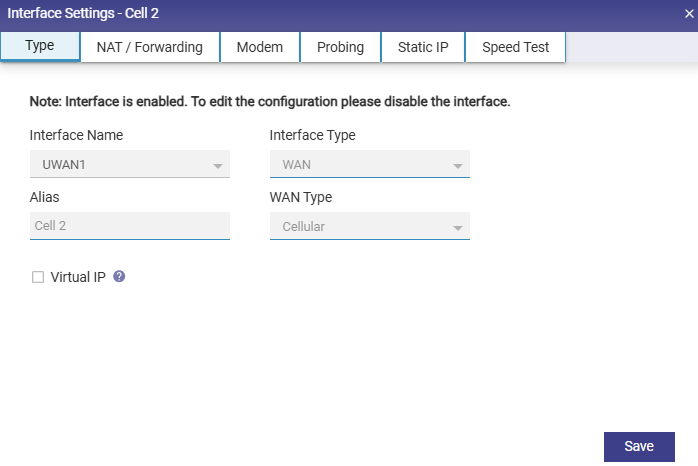
Updating a WAN Interface
To update a WAN Interface, perform the following steps:
-
Remove the WAN Interface to be updated from all WAN Profiles.
-
Click on the Toggle icon and disable the WAN Interface.
-
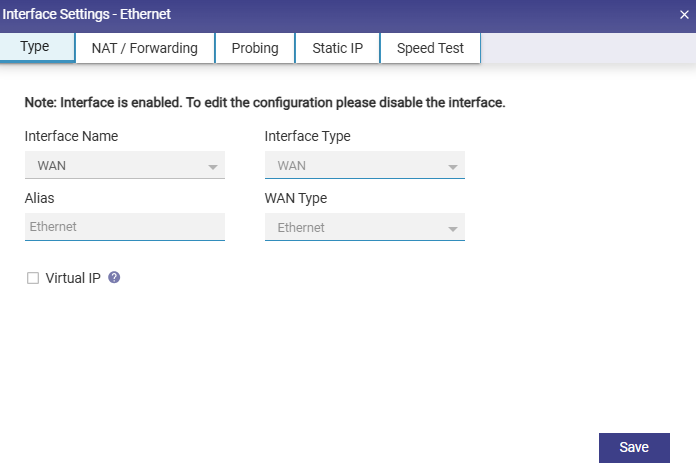
Click the Gear icon next to the Interface. A popup appears, see Figure Update WAN Interface.
-
Enter the Alias Name.
-
Select the desired WAN type from the drop down, see Figure Select WAN Type.
-
Click Save.
-
Click on the Toggle icon and enable the WAN Interface.
-
The Interface is updated as required.
|
Fields |
Description |
Configuration |
|---|---|---|
|
Interface Name |
This indicates the network interface that is available on the site, along with some pre-configuration. User can edit the network interface by disabling it and then clicking on the ‘gear’ icon. |
To edit the interface, perform the following steps. Steps
In this dialog, they can modify: The Interface Type: WAN, LAN or VSAT Mgmt. |
|
Interface Type |
|
|
|
Alias |
The ‘Alias’ is a name for the interface. |
|
|
WAN Type |
|
If the Interface Type is ‘WAN’, user can also configure the WAN Type, which is one of:
If Interface Type is ‘LAN’, user can also configure the LAN Type, which is one of:
|
|
If the LAN Type is ‘LAN Access’, user must further specify the ‘Sub I/F id’. |
||
|
If Interface Type is VSAT Management, user can also additionally configure:
|
||
|
Virtual IP |
Assign a virtual IP Address to the Interface to hide the given WAN IP. This is useful to manage the redundant IP addresses in the system. |
|
|
NAT / Forwarding |
No NAT - Pass the traffic out the WAN Interface without any Source NAT translation. |
|
|
Port Forwarding |
Traffic coming from Source IP (If not specified, traffic from any IP accepted) to port ‘WAN port’, will be forwarded to Natted IP:Natted Port. |
|
|
Static IP |
User can configure the static IP address of an Interface as the Static IP has advantages and the following are a few advantages.
|
To configure the static IP of an Interface, perform the following steps. Steps
|
|
Speed Test |
|
Unknown Attachment
|
|
|
|
|
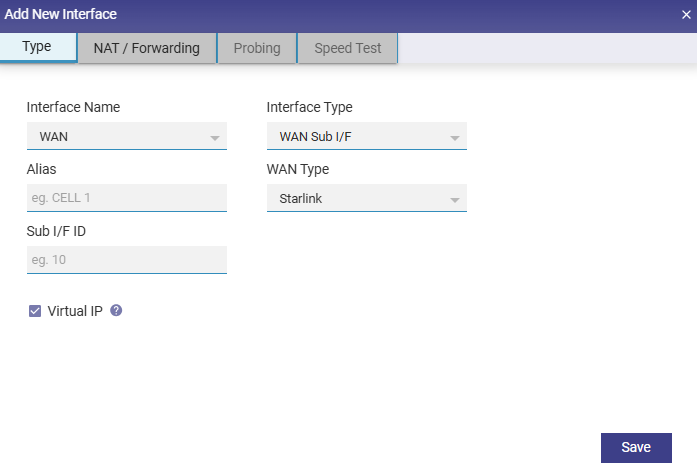
Configuring a WAN Interface as Starlink
To configure a WAN Interface as Starlink, perform the following steps:
-
Remove the WAN Interface to be updated from all WAN Profiles.
-
Click on the Toggle icon and disable the WAN Interface.
-
Click the Gear icon next to the Interface.
-
Select the WAN type as Starlink from the drop down.
-
Enter the Alias Name for the Interface.
-
Click Save.
-
Click on the Toggle icon and enable the WAN Interface.
-
The Starlink Interface is configured.
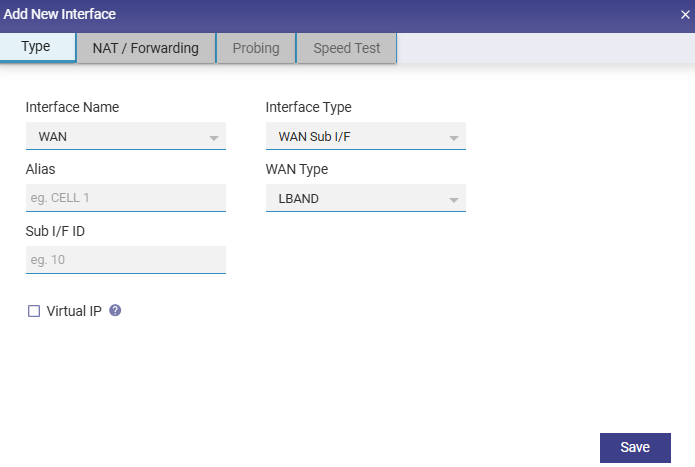
Configuring a WAN Interface as L-Band
To update a WAN Interface, perform the following steps.
-
Remove the WAN Interface to be updated from all WAN Profiles.
-
Click on the Toggle icon and disable the WAN Interface.
-
Click the Gear icon next to the Interface. A popup appears.
-
Select the WAN type as LBAND from the drop down.
-
Enter the Alias Name for the Interface.
-
Click Save.
-
Click on the Toggle icon and enable the WAN Interface.
-
The L-Band Interface is configured.
Configuring UWAN1 Interface as Ext5G
KonnectOS System variants having Ext5G modem connected, need to be configured on the Interfaces Screen. Make sure that the Ext5G modem (Peplink 5G Adaptor) is connected to the EdgeServer uWAN1 USB3 port.
To configure the UWAN1 Interface as Ext5G, do the following steps:
-
Click on the Toggle icon and disable the UWAN1 Interface.
-
Click the Gear icon next to the Interface.
-
Select the Interface Type as WAN from the drop down.
-
Select the WAN type as Cellular from the drop down.
-
Enter the Alias Name for the Interface.
-
Click Save.
-
Click on the Toggle icon and enable the WAN Interface.
-
The Ext5G Interface is successfully configured.
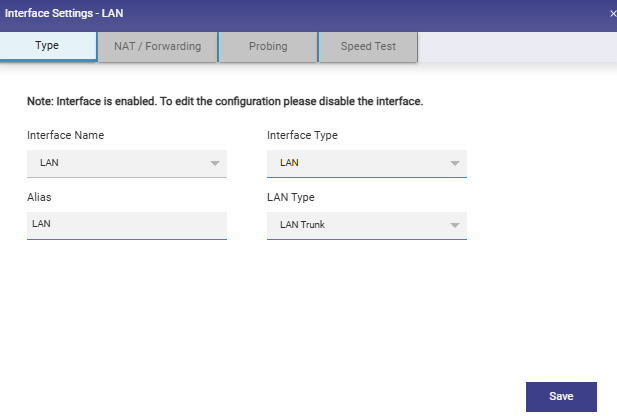
Updating a LAN Interface
To update a LAN Interface, perform the following steps:
-
Click on the Toggle icon and disable the LAN Interface.
-
Click the Gear icon next to the Interface.
-
Enter the Alias Name.
-
Select the LAN type from the drop down. If the LAN Type is ‘LAN Access’, then additionally enter the Sub I/F ID.
-
Click Save.
-
Click on the Toggle icon and enable the LAN Interface.
-
The LAN Interface is updated as required.
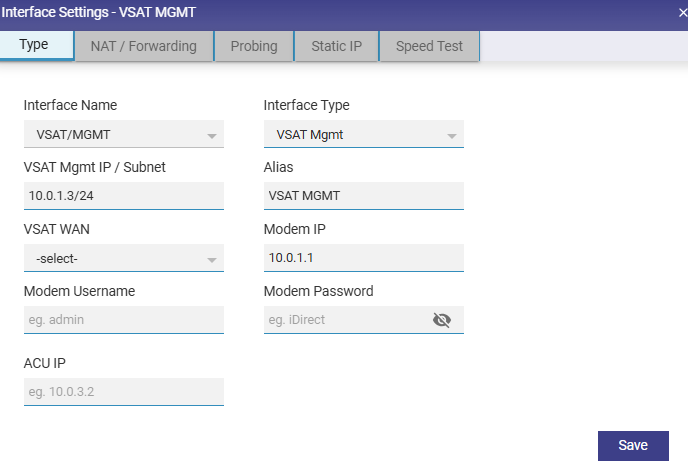
Updating a VSAT Mgmt Interface
To update a VSAT Mgmt Interface, do the following steps:
-
Click on the Toggle icon and disable the Interface.
-
Click the Gear icon next to the Interface. A popup appears.
-
Check the Interface Name.
-
Select the Interface Type as VSAT Mgmt from the dropdown menu.
-
Enter the Alias Name for the Interface.
-
In the VSAT WAN field select the corresponding VSAT interface for which this interface acts as the management interface.
-
Enter the Modem Username and Modem Password.
-
Click Save.
-
Click on the Toggle icon and enable the VSAT Mgmt Interface.
-
The Interface is updated as required.
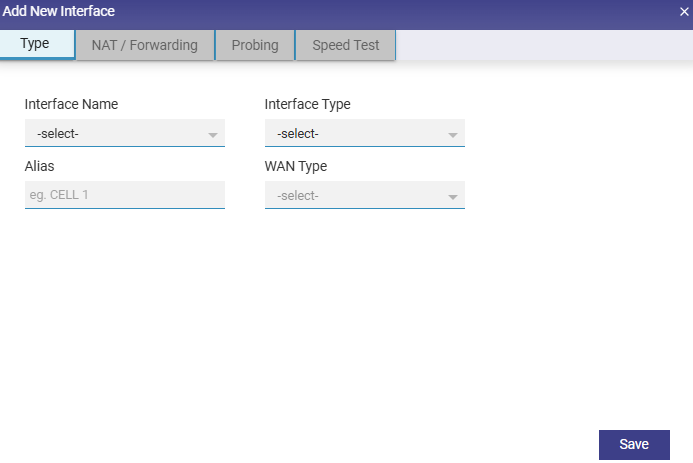
Adding a New Interface
The WAN Interfaces can also be called WAN VLAN. To add a new Interface, do the following steps:
-
Click on the Add New Interface button on the top right of the Interfaces screen.
-
The user is prompted with add new interface dialogue box. See figure below.
-
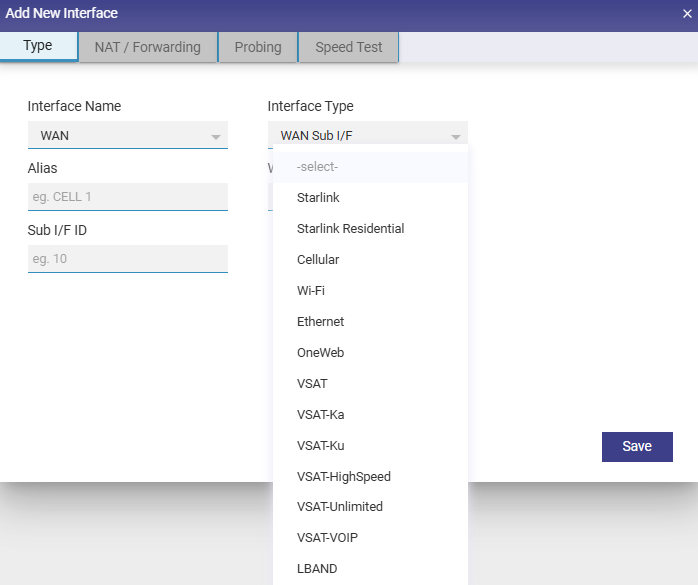
Select the Interface Name from the Interface Drop-Down Menu. See figure below.
-
Select the Interface Type of the new Interface (WAN Sub I/F option is available) See figure below.
-
Type the Alias Name.
-
Select WAN Type of the new Interface from the drop-down menu.
-
Type the Sub Interface ID (Sub I/F ID). See figure below.
-
Click on Save.
The interface is successfully created, and the related interfaces appear together in a common color background, see figure below. The original WAN Interface (WANx) under which the new Interface is created appears disabled and a new native Interface is created with the name WANx_0 (here WANx is WAN2). The new Sub Interface is disabled by default and must be enabled after creation.
-
Uncheck the All Interfaces check box to view only enabled interfaces. The new Interface creation is complete.