Paywall Configuration
Paywall feature can be used to enable the captive users to buy the plan according to their need. To use the Paywall feature, the Payable Plans must be created in the Plans tab and added to be used in the Portal tab. Once the Plans are created, they can be associated with the user when creating the user in the Users tab. This process should be done by the Admin in the Admin Portal.
Plans Tab
1. Create the Required Plans
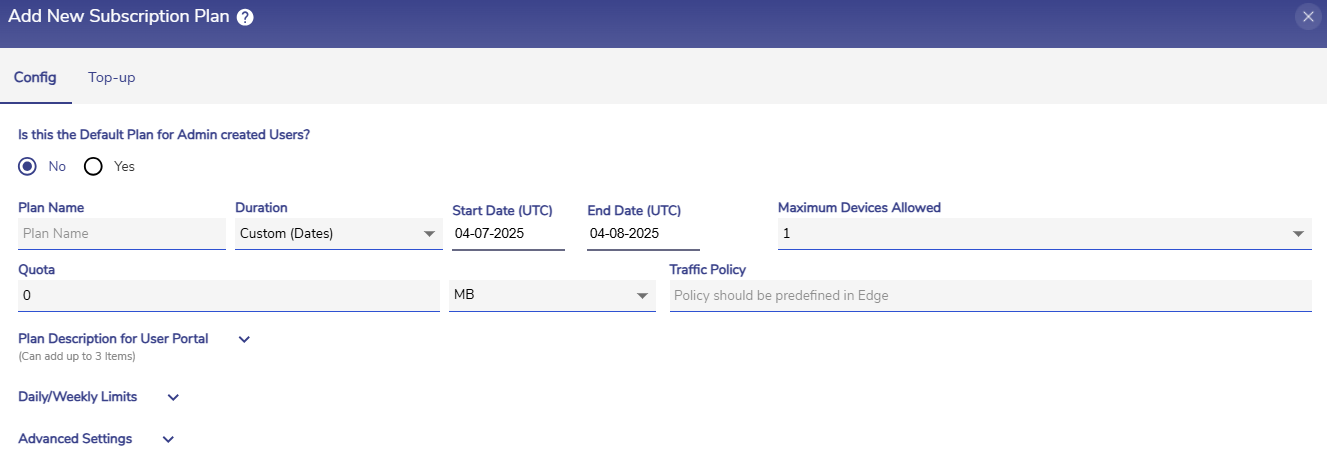
Select the Add New Plan button from the Plans tab.

Add New Plan
Enter the required plan details such as Plan Name, Quota and Duration.
In the Payable Plan field under the Advanced Settings section, select the Yes radio button. Only the plans configured as Payable plans can be used for the Paywall feature.
In the Price field, enter the required price of the plan.
If the plan should be free of cost, enter 0 in the Price field.
Click Submit button to save the plan.
Create all the required plans that should be displayed to the user as their options.
2. Creating Plans
Select the Portal tab from the Captive Access Network Homepage.
Select the Plans Page option from the side bar to create the Plans for the Paywall feature.
Set the Welcome Message. The welcome message will be displayed in the Available Plans tab for the Paywall enabled organizations.
Set the Post Login Page Message. This message will be displayed when the user successfully logs in into his account. The admin can view the preview of the setup in real-time in the right panel.
%20(1)-20241211-115413-20241211-172126.png?inst-v=f7c198dc-21df-487c-8ac0-bf85ed638519)
Plans Page
The Plan(s) - for Admin created Users section is used to add a set of Plans that can be associated with the Admin Created Users. This feature can only be used by Paywall enabled organizations. The Paywall feature enables the end user to buy the plans from this set according to their need. Once the plans are added, this can be associated with the user account when creating the user in the Users tab.
Enter a Name for the Paywall Plans.
In the Plan(s) field, select the plans that should be displayed to the end user as their options. Only the plans configured as Payable plans will be allowed to be added in this set of Plans.
When multiple plans are selected, all the selected plans will be shown to the user while logging in and the user can buy the plan of their choice.
The Plan(s) - for Self Sign Up Users section is used to add a set of Plans that can be associated with the Self Sign Up Users. This feature can only be used by Paywall enabled organizations. The Paywall feature enables the end user to buy the plans from this set according to their need. Once the plans are added, these plans will be associated with all the self sign up users automatically when they sign up.
In the Plan(s) field, select the plans that should be displayed to the self signed up user as their options to buy. Only the plans configured as Payable plans will be available in the dropdown menu.
When multiple plans are selected, all the selected plans will be shown to the user while logging in and the user can buy the plan of their choice.
Click the Save button to save the configurations.
Users Tab
1. Admin Created User
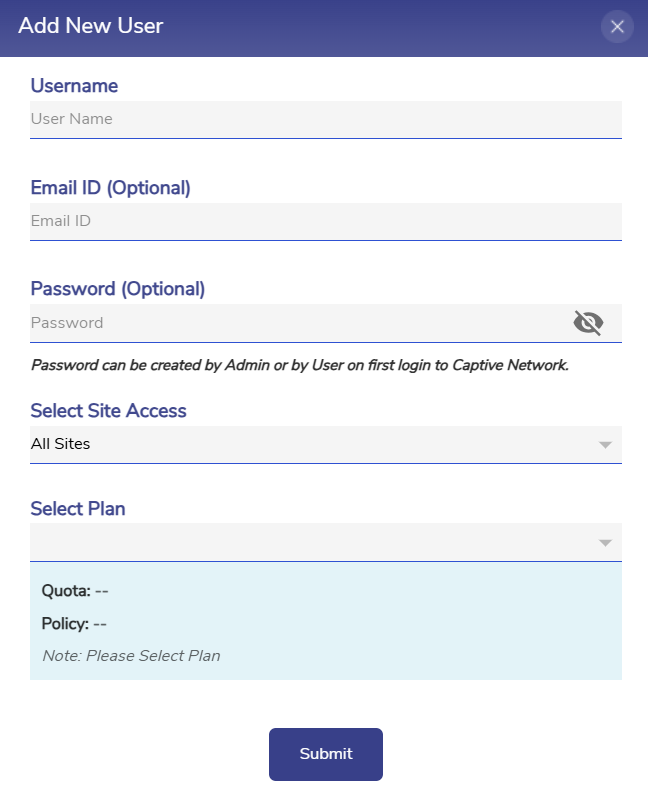
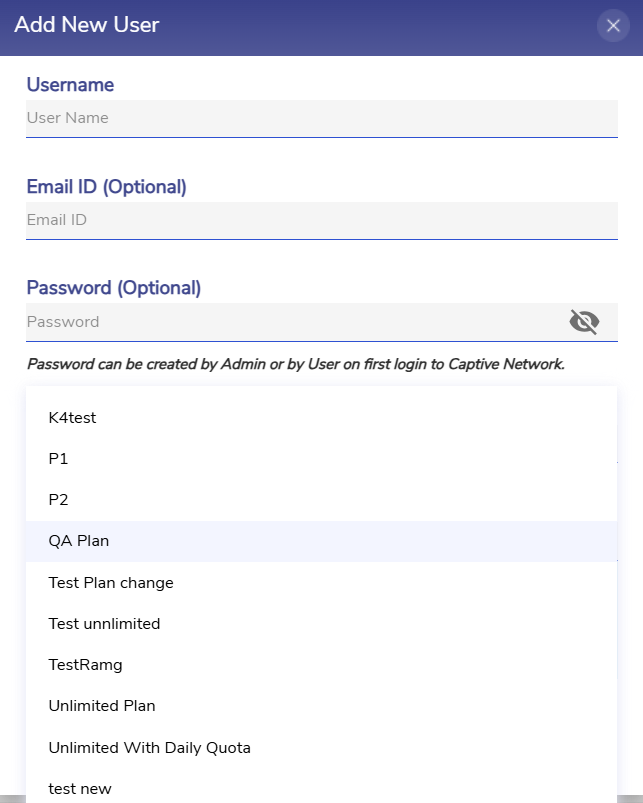
When creating a user account from the Users tab, select the name of the set of plans in the Select Plan field. This set of plans was created in the Plan(s) - for Admin created Users section of the Portal tab.

Add User

Select Plans
Click Submit to save the changes.
Now when the user logs into their account, they will have the option to buy any one of the plan from the selected set of Plans.
2. Self Sign Up User
When a self sign up user logs into their account, they will have the option to buy any one of the plans that the admin has already configured for Self sign up users.
