Skip table of contents

Events Tab

  • Click Events tab from the Captive Access Network Homepage to view the Events table.

  • The Generic tab is selected by default.

  • The Events table shows the list of all events done by the Admin and the User between any time interval.

1 (35)-20241125-201948.png

Events

  • Select the dropdown menu at the top right corner of the screen to select the required Organization or sub-organization. The logged in admin organization is populated by default here. This is the organization corresponding to the email ID used to login.

  • The dropdown list consists of all the sub-organizations under the logged in admin organization.

  • Select the Last 24 hours radio button to view the Events occurred in the past 24 hours.

  • Select the Custom Search radio button to view the Events occurred between a specific time period.

  • Select the Start Date and Time. Select the End Date and Time.

  • Click Apply button.

  • The table shows the Events occurred during the selected time period.

  • It shows the below information:

    • Event Time - Date and Time of the event

    • Organization - Name of the Organization

    • Site Name - Name of the Site

    • Event Type - There are two types of events (Admin/User)

      • Events that are done by the Admin are called Admin events

      • Events that are done by the User are called User events

    • Action - The type of action done by the event. Refer the Actions section below for more information.

    • IP Address - IP address of the system in which the event was done

    • MAC Address - MAC address of the system in which the event was done

    • Username - Name of the user or admin account that did the event

    • Description - A short description of the event. Hover the cursor over the Description to view the metadata.

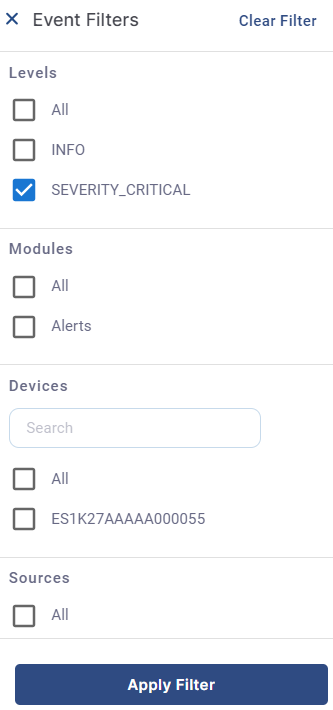
  • Click the Filter button to filter the Events table based on their Type / Level / Action.

    • Type filters

      • Admin

      • User

    • Level filters

      • Info

      • Warning

      • Error

    • Action filters

      • Login

      • Logout

      • Password Recovery

      • Adding User

      • Deleting User

  • Click Apply Filter to filter and view the required Events.

image-20240409-120159.png

Filter

  • The Search field can be used to search for the Events based on the Username/IP Address/MAC Address.

  • The pagination helps the admin navigate to the next page by using the < > buttons.

  • Click the dropdown given next to the Pagination to change the number of sessions displayed in one page. The admin can choose between 10/25/50/100/150/200 from the dropdown menu.

Actions

  • Refer the below table to know about the different Actions that can be done by the Admin.

Action

Description

Sub description

Adding User

{Username} added Successfully

--

Error while adding User

Error encountered while Error while adding User

User already exists

Deleting user

Error while deleting User

--

{Username} deleted Successfully

--

Updating user

{Username} updated Successfully.

{Username} updated Successfully.

Adding topup

Topup Added Successfully

TopUp plan processed for User

Daily limit reset

Daily Limit Plan reset successful

User daily quota limit reset done

Anonymous user configuration

Anonymous User Configuration updated Successfully

--

Plan reset

Plan Reset Successful

Plan Reset Successful

Password recovery

Password Reset Successful

--

Enable/disable user account

User Account enabled Successfully

--

User Account disabled Successfully

--

Adding plan

{Planame} plan added successfully.

{Planame} plan added successfully.

Delete plan

{Planame} plan deleted successfully.

{Planame} plan deleted successfully.

Generate report

Report generated successfully

Report is generating

  • Refer the below table to know about the different Actions that can be done by the User.

Action

Description

Sub description

Login

Login successful for {Username}

Login successful for {Username}

Login failed for {Username}

DB Connection Error

Your plan is expired or No plan is associated with this account!\nPlease contact Admin for support.

Invalid request. Required information is missing.

Logout

Logout successful for {Username}

User ${username} logged out successfully

Logout failed for {Username}

Error in updating login status

Error while logout

Logout was UserAction

Password Recovery

Password Recovery successful for ${username}

--

Error while Password Recovery

Password is not present

UserId is not present

Purchase

  • Select the Purchase tab to view the purchase events.

1 (34)-20241119-152505.png

Purchase Tab

  • Select the Last 24 hours radio button to view the Purchase Events occurred in the past 24 hours.

  • Select the Custom Search radio button to view the Purchase Events occurred between a specific time period.

  • Select the Start Date and Time. Select the End Date and Time.

  • Click Apply button.

  • The table shows the Purchase Events occurred during the selected time period.

  • It shows the below information:

    • Event Time

    • Organization

    • Site Name

    • Action

    • Username

    • Description

  • The Search field can be used to search for the Events based on the Username/Payment ID/Checko ID/Site/Description.

  • The pagination helps the admin navigate to the next page by using the < > buttons.

  • Click the dropdown given next to the Pagination to change the number of sessions displayed in one page. The admin can choose between 25/50/100/150/200 from the dropdown menu.

JavaScript errors detected

Please note, these errors can depend on your browser setup.

If this problem persists, please contact our support.