
EdgeVX - VMware Installation Guide
Before you begin:
You will need to download the latest VMDK file from the cloud. After logging in, on the S/W Configuration page, click the CURRENT EOS tab and download the latest virtual image under the Virtual EOS tab.
Preperation
Download the VMDK Image
Access the latest VMDK image from the Kognitive Cloud under the S/W Configuration section.
Under Current OS, select the latest VMDK.
Register the DID to a Site
Log into the Kognitive Cloud and locate the VX DID on the Inventory > Warehouse page.
Next, you will need to register the DID or Device Identifier. For more details about registration please follow this registration guide.
Convert the Disk Image
Extract the Disk Image
Use appropriate tools (e.g., 7zip for Windows,
gzipfor Linux/Mac) to extract the QCOW2 or VMDK file.
Upload and Convert the Disk Image
Now you will need to transfer the VMDK to the ESXI host. This can be done via SCP or using the VMWare Web Client.
Once the file is uploaded to the ESXI host, log into the host via SSH and run the following command to convert the file to VMware compatible VMDK format:
CODEvmkfstools -i source.vmdk destination.vmdk -d thin
This step assumes you have SSH access enabled on your ESXI host. Please consult the VMWare documentation for the proper steps to enable SSH.
VM Creation
Before you begin building the VM, you should create the necessary port groups to support network communication. You will need one WAN, LAN, and Management network. Configuring port groups is outside the scope of this document.
The port group attached to the LAN interface must have Promiscuous Mode and Forged Transmits set to Accept.
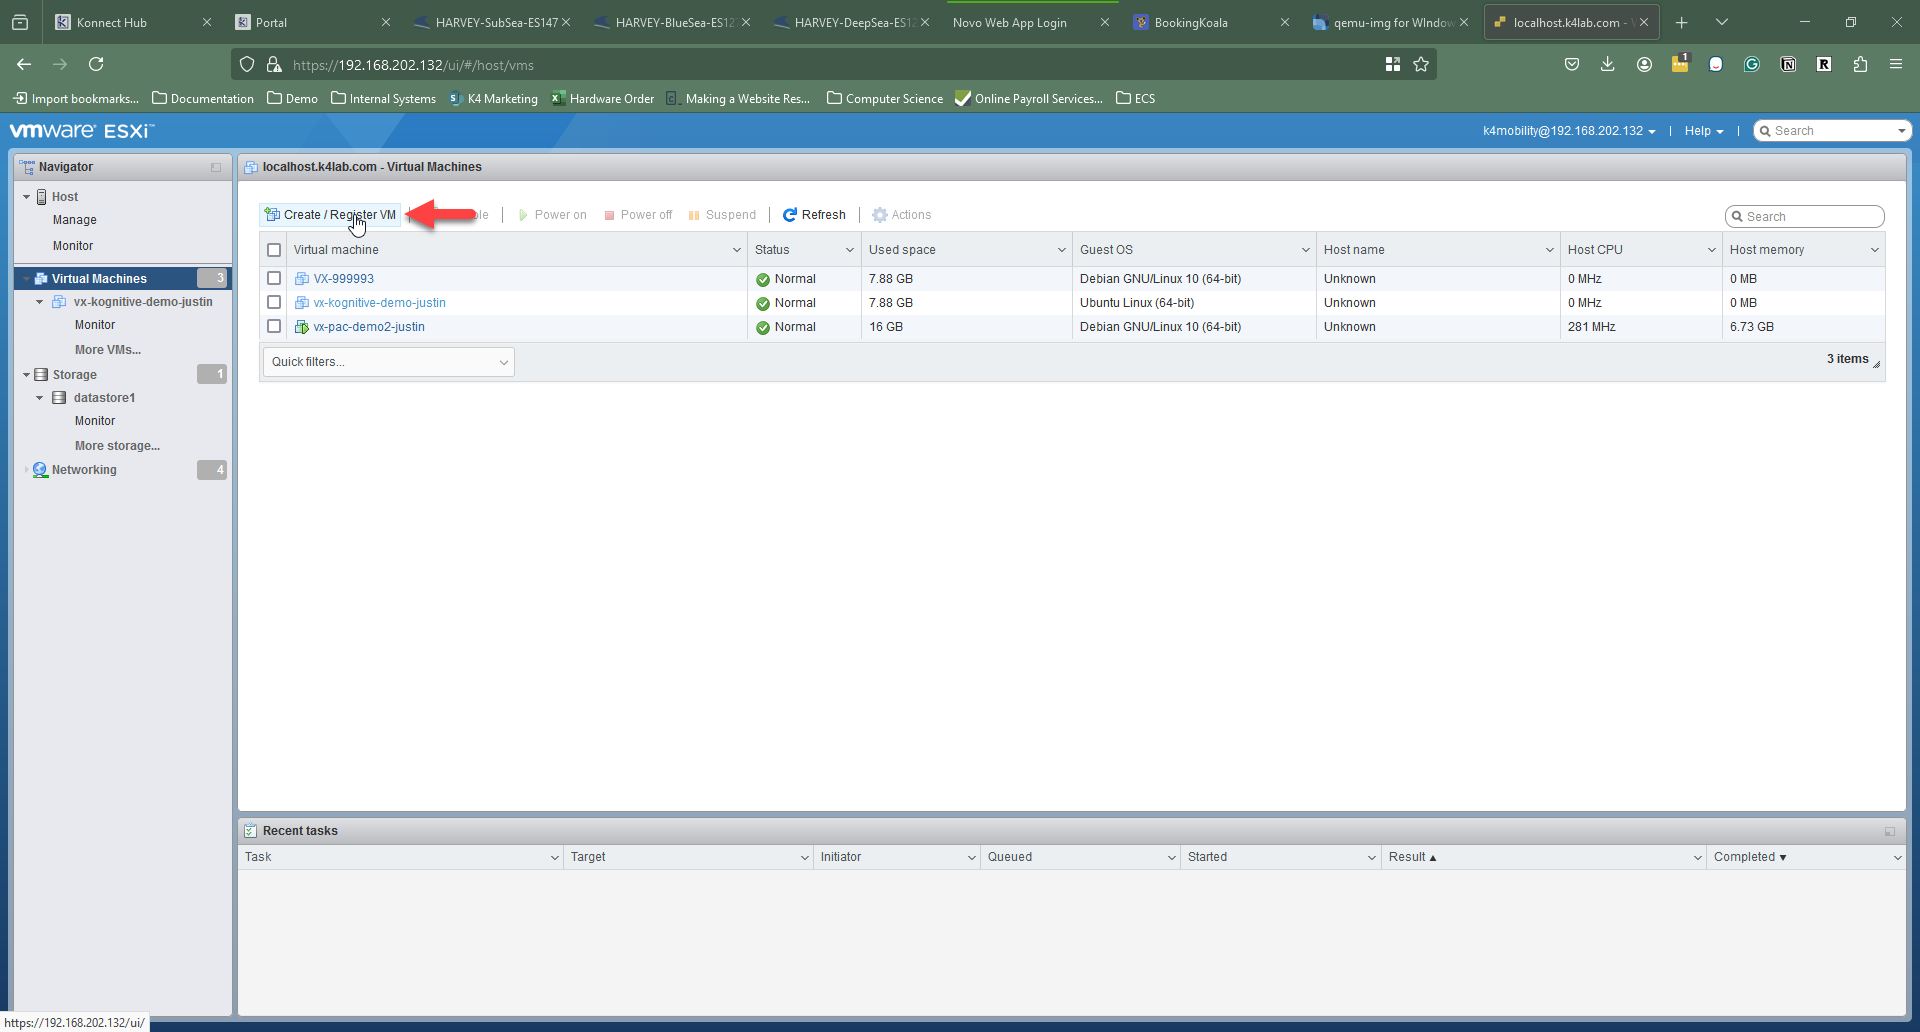
Log into your VMWare environment.
Click Create / Register VM
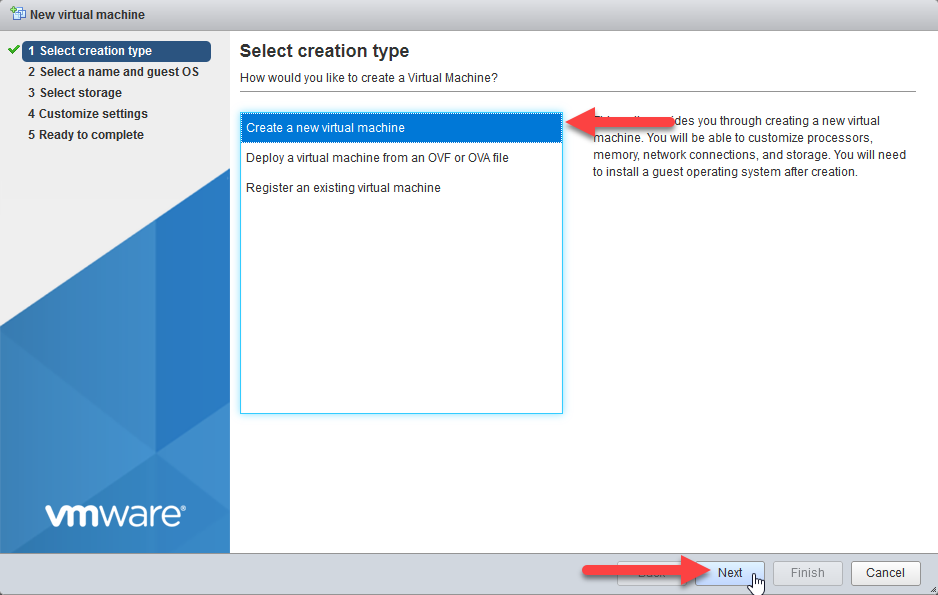
Click “Create a new virtual machine” and then Next.
You will need to create a name for your virtual machine and set the Compatibility, Guest OS Family and OS Version. The Compatibility setting should reflect the latest for your version of VMWare. The Guest OS Family and Guest OS Version should be Linux and Debian GNU/Linux 10 (64-bit) respectively. Click Next to continue.

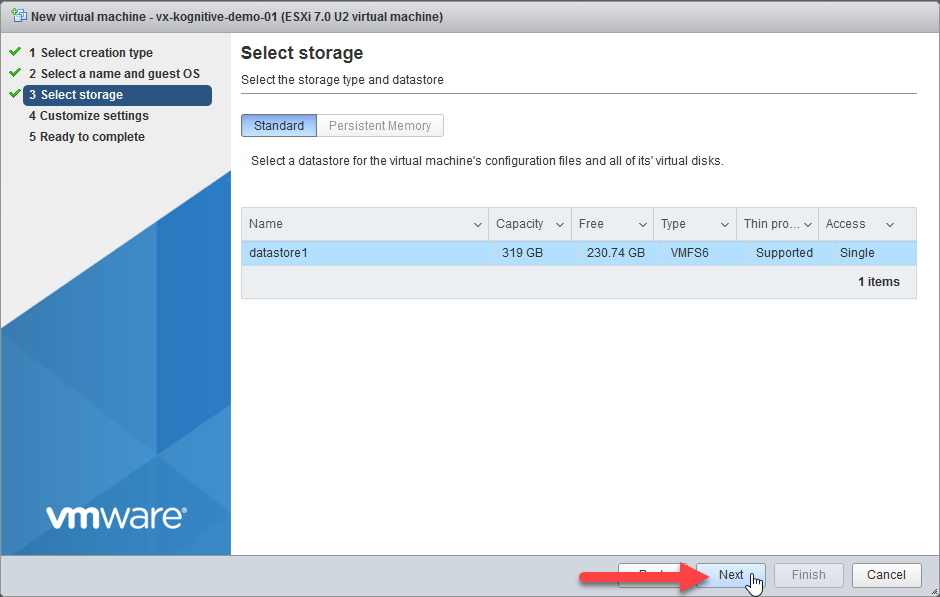
Select the storage location for your VM. Typically, this will be a Datastore.
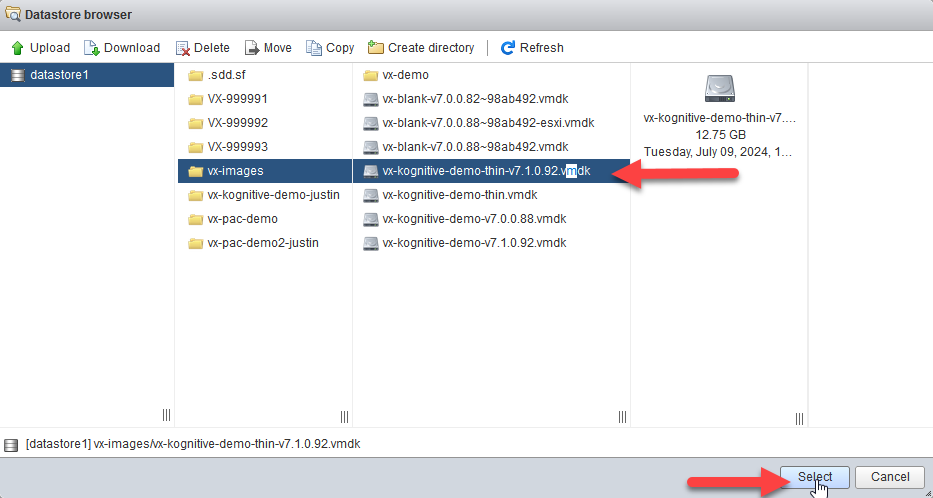
Click Add hard disk to add the existing VMDK file

Find the vmdk file you converted earlier and click Select to continue.
Set the custom VM settings based on the table below. Make sure to remove the default hard disk that is attached to the VM. Click Next to continue.
Table 1: VM Requirements | |
CPU: | 4 |
Memory: | 16GB |
Hard Disk: | Existing VMDK |
Network Adapter 1: | WAN 1 |
Network Adapter 2: | WAN 1 |
Network Adapter 3: | WAN 1 |
Network Adapter 4: | WAN 1 |
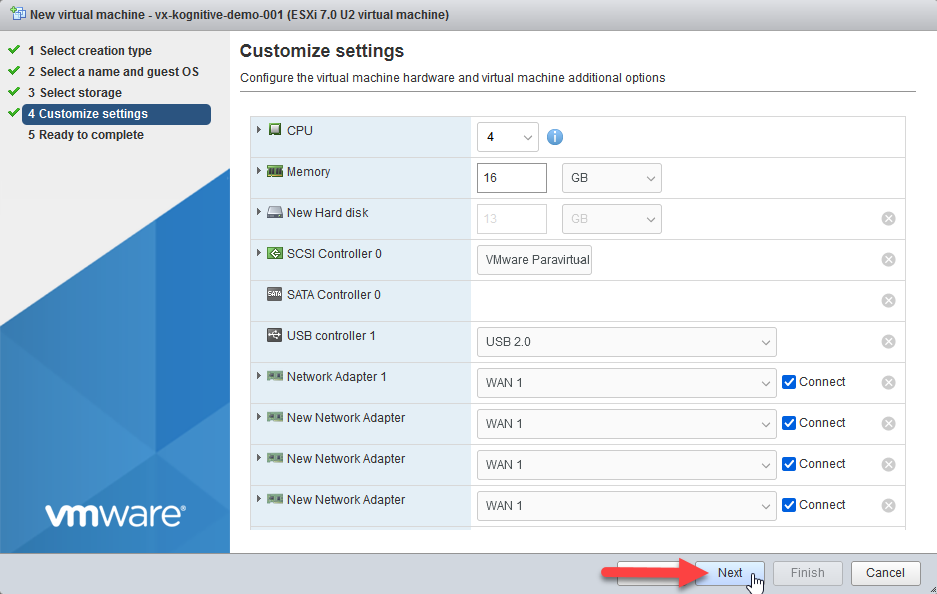
Each Network Adapter should be set to the WAN port group. This step ensures the VM can obtain an IP address and reach the Internet for license registration. You will need to update the Network Adapter settings after the VM is registered.
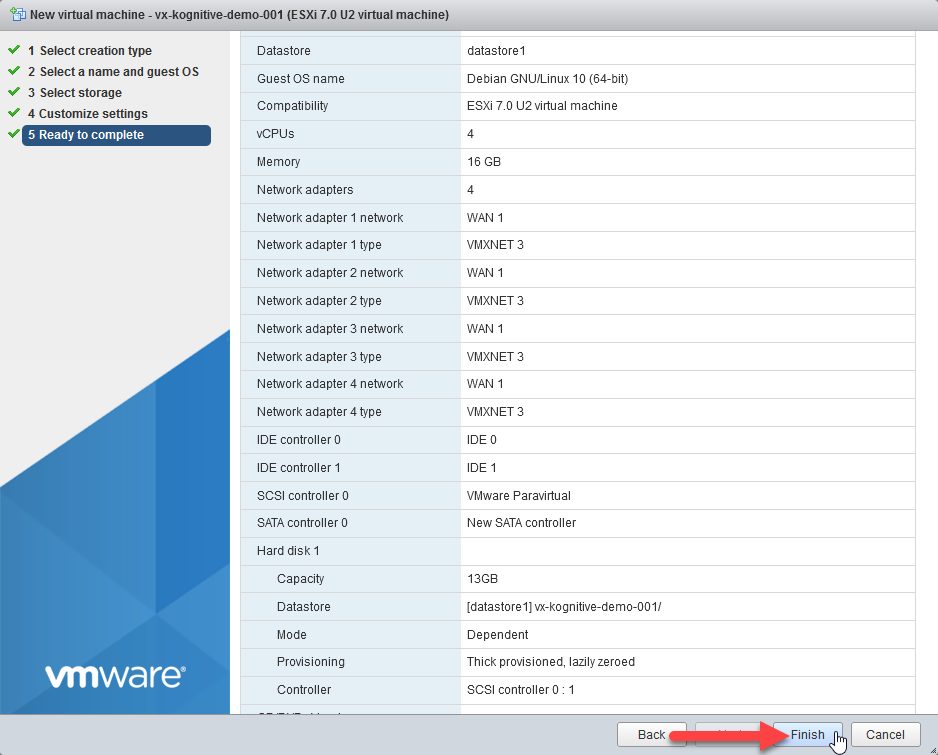
Confirm your settings are correct for you environment, then click Finish to complete the VM Creation process.
Use the EdgeVX Quick Start Guide to complete the configuration.