
Firewall
To configure the firewall, perform the following steps.
Steps
Click Next on the Traffic Profiles page or click Firewall. The Firewall page appears.
Firewall
Click + Add New Rule icon. The Add New Firewall Rule section appears.
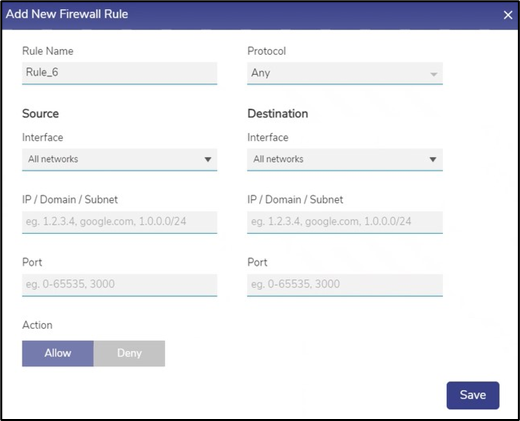
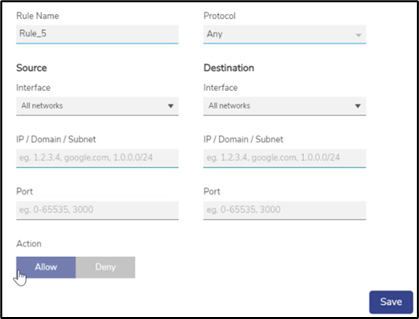
Add New Firewall Rule
To enter data in the respective fields, see table below.
Fields | Configuration |
Rule Name | Enter the unique name of the rule. The name can include alphanumeric and special characters. |
Protocol | In the Protocol list, click one of the following protocols that apply to the rule.
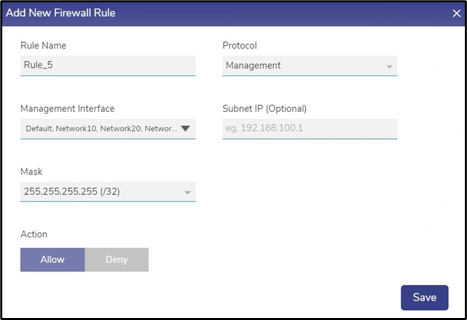 Management Protocol
|
Source | In the Interface field, click the source device to which the rule is applicable. To apply the rule to entire WANs and networks, click All Networks. |
IP / Domain /Subnet | Enter the IP Address of the device for which the rule is applied or Domain Name of the device for which the rule is applied or Subnet. |
Port | Enter the From Port number. The Ports can be given as a range. For example: 0-65535. |
Destination | In the Interface field, click the destination device to which the rule is applicable. To apply the rule to entire WANs and networks, click All Networks. |
IP / Domain /Subnet | Enter the IP Address of the destination device for which the rule is applied or Domain Name of the destination device for which the rule is applied or Subnet. |
Port | Enter the To Port number. The Ports can be given as a range. For example: 0-65535. |
Action | Click one of the following action:
|
Click Save.
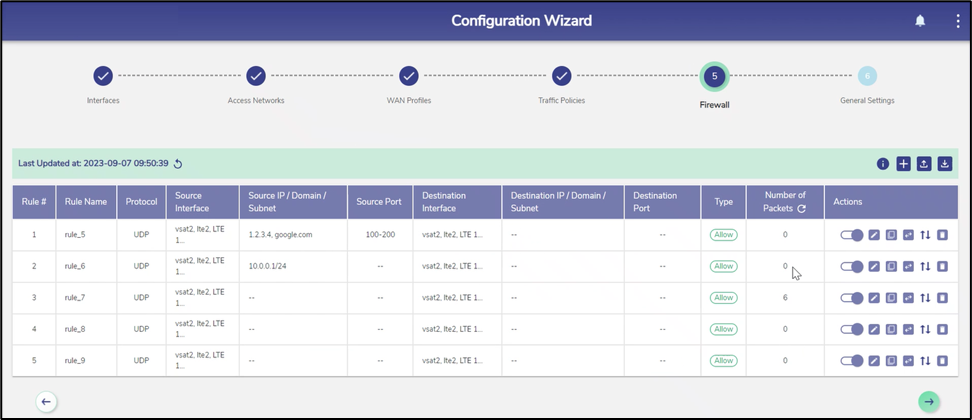
The rules are displayed under the Firewall Rules section, see figure below.

Firewall Rules Table
If multiple rules are added, then the drag icon is displayed. By default, highest priority is assigned to the top rule and the priority decreases down the rule list. However, user can prioritize the rule by using the drag icon.
If the user allows the firewall rule, then Allow is displayed under the Type section.
If user deny the firewall rule, then Deny is displayed under the Type section.
For details about the firewall rules, point the mouse to i next to the Firewall Rules. The Firewall Rules pop-up window appears, see Figure Firewall Rules Info.

Firewall Rules Info
To refresh the firewall rules, click on the Refresh icon, see Figure Firewall Rules Info.
Adding Firewall Rule through CSV Template
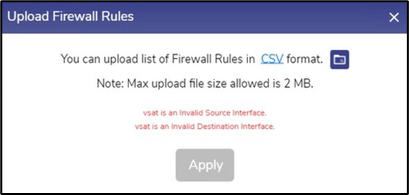
The user can upload the Firewall Rules in CSV format also. Click the Upload icon to open the Upload Firewall Rules pop-up.
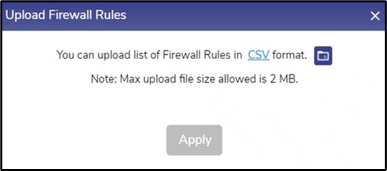
Upload Firewall Rules
Click the CSV button to download the new CSV template.
Open the template and enter the required details in the table.
Click Upload Configuration folder icon to select and upload the CSV file. The system validates the uploaded file and shows the following success message.

Upload Firewall Rules
If the validation is not successful, the system shows errors in the pop-up.
Firewall Rules Info
User can check the validation errors, rectify them in the CSV file and upload the file again to upload the Firewall Rules.
Click Apply to apply the new Firewall Rules. This action will replace the existing rules with the new set of Firewall Rules.
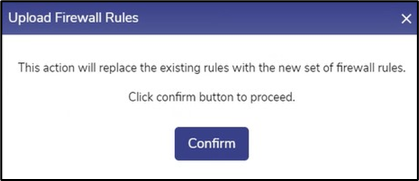
Upload Firewall Rules
Click Confirm to confirm applying the Firewall Rules.
The system again validates the uploaded file. Once the validation is successful, the Firewall Configuration will automatically reflect in the Firewall Rules table.
If the validation is not successful, the system shows the errors in the following pop-up.
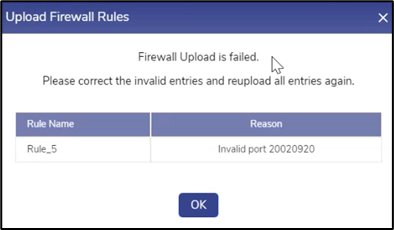
Firewall Upload Failed
User can check the validation errors, rectify them in the CSV file and upload the file again to upload the Firewall Rules.
Modifying Firewall Rule
To modify the firewall rule, perform the following steps.
Steps
Click Pencil icon corresponding to the firewall rule is to be modified, see figure below.

Firewall Rules List
The Edit Rule section appears, see figure below.
Edit Firewall Rules
To enter data in the respective fields, see Table Add New Rule.
Click Save.
The rules are displayed under the Firewall Rules section, see Figure Firewall Rules List.
Disabling Firewall Rule
By default, the firewall rule is enabled.
To disable the firewall rule, perform the following steps.
Steps
Click Enabled toggle button corresponding to the firewall rule is to be modified, see figure below.

Enable/Disable Toggle Firewall Rules
The Disable Firewall Rule pop-up window appears, see figure below.
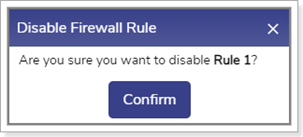
Disable Firewall Rule Pop-up
Click Confirm.
The firewall rule is disabled.
Enabling Firewall Rule
The user can enable the disabled firewall rule.
To enable the firewall rule, perform the following steps.
Steps
Click Disabled toggle button corresponding to the disabled firewall rule. The Enable Firewall Rule pop-up window appears, see figure below.
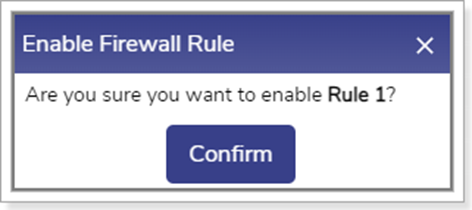
Enable Firewall Pop-up
Click Confirm.
The firewall rule is enabled and implemented.
Deleting Firewall Rule
To delete the firewall rule, perform the following steps.
Steps
· Click Delete icon corresponding to the firewall rule is to be deleted, see figure below.

Delete Firewall Rule Icon
· The Delete Firewall Rule pop-up window appears, see figure below.

Delete Firewall Rule Pop-up
· Click Confirm.
The firewall rule is deleted.
Defining New Priority of the Firewall Rules
To define the new priority of the firewall rule, perform the following steps.
Steps
· Click Drag icon corresponding to the firewall rule whose priority is to be re- configured, see figure below.

Defining New Priority of the Firewall Rules Icon
· Hold the Drag icon and drag the firewall rule based on the priority is to be assigned.
The new priority of the firewall rule is configured.
Creating Bi-Directional Rule
To create a Bi-Directional Rule, perform the following steps.
Steps
· Click Arrow icon in the Actions column to create a Bi-Directional rule.
· This creates a new rule in which the Source and Destinations are reversed.
· The system swaps the Source and destination and creates a new rule with the name “Bi”.
Note: The Bi-Directional Rule option is not applicable for Firewalls rules created with Management Protocol. These rules only have the source details associated with them and no destination details.

Bi-Directional Rule
Resetting the Number of Packets
To reset the number of packets, perform the following steps.
Steps
· Click Reset in the Number of Packets section, see figure below.
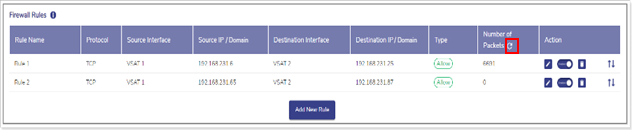
Resetting the Number of Packets Icon
The Reset Counters pop-up window appears, see figure below.
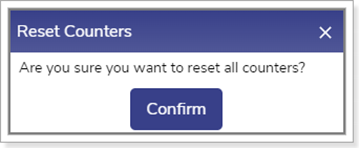
Reset Counter Pop-up
· Click Confirm. The entire counter is reset.
Firewall Reports
The Firewall activity can be viewed in real time using the Firewall Reports screen in Kognitive Cloud.
Login to Kognitive Cloud with valid credentials.
Select Reports from the left menu bar.
-20240815-143018.png?inst-v=f7c198dc-21df-487c-8ac0-bf85ed638519)
Reports - Kognitive Cloud
Click Firewall tab in the Reports screen.
The Firewall tab enables the user to view reports about the Firewall rules set for the selected organization.
Users can view information such as:
The Top Denied rule
The Top Allowed rule
Percentage of allowed and denied rules
The most utilized rules
List of all rules set for the organization
In the Organization field, select the Organization or sub-organization from the dropdown menu. The logged in admin Organization is populated by default here. This is the organization corresponding to the email ID used to login.
The dropdown list consists of all the sub-organizations under logged in admin organization.
Select the Sites from the dropdown menu.
Select the Period from the dropdown menu.
By default, the time interval selected is last one hr. The user can also select a custom time interval using the From and To fields.
The Firewall tab shows the data as shown in the below figure.
-20240524-153152.png?inst-v=f7c198dc-21df-487c-8ac0-bf85ed638519)
Firewall
Click the Generate Report button to download the Firewall reports in PDF format.
Headers
The headers show the following information:
Top Denied - The Firewall rule that was used to deny the maximum number of packets. The Site name and number of packets is also shown.
Top Allowed - The Firewall rule that was used to allow the maximum number of packets. The Site name and number of packets is also shown.

Headers
Firewall Actions
The Firewall Actions pie chart groups the firewall rules set by the users into Allowed and Denied categories and shows the percentage of each category. Hovering on any item on the pie chart highlights the category and shows number of rules in that category.
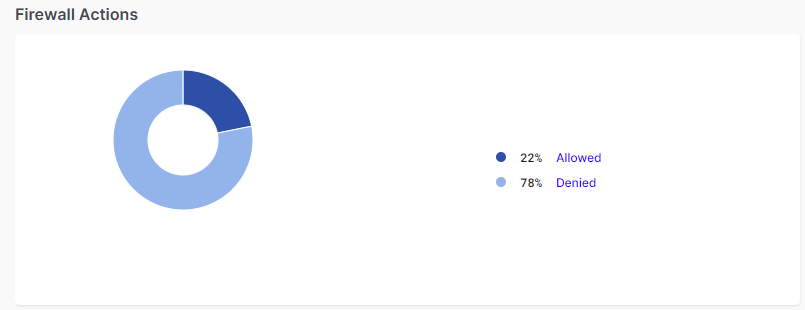
Firewall Actions
Top Rules
The Top Rules pie chart shows the most used Firewall Rules and shows their percentage. Hovering on any item on the pie chart highlights the category and shows number of packets in that category.
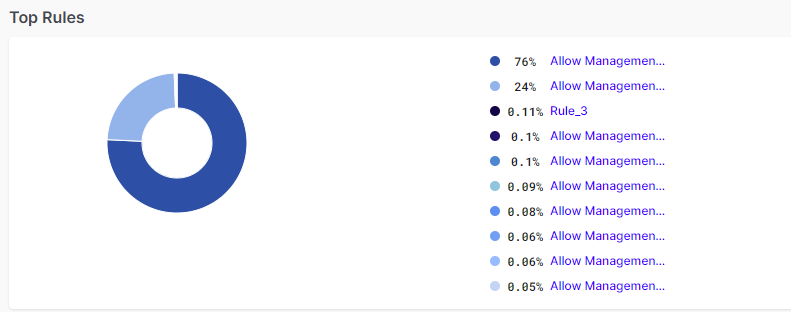
Top Rules
The line chart shows the amount of allowed and denied packets at different time instances. The horizontal axis contains the time instances, and the vertical axis contains the amount of packets. The graph between these two axes gives the user a clear understanding of how the firewall rules have been utilized over the selected time period.
Select the dropdown menu at the top right corner of the chart to change the time interval on the chart.

Line Chart
All the blue highlighted text in the Firewall screen is clickable. It can be the name of a site, name of a rule, or rule category. Clicking it filters the entire screen and displays the firewall rules information corresponding only to that site, rule, or rule category.
Firewall Table
The Firewall section shows a table that lists all the rules set under the selected organization. The Table shows the following information:
Rule Name - Name of the rule.
Site Name – Name of the Site.
Protocol
Source Interface
Source IP Domain
Source Port
Destination Interface
Destination IP Domain
Destination Port
No of Packets– Total number of packets used for the rule.
Action – Type of rule (Allowed/Denied)
Click the Download button to download the Firewall rules data locally in CSV format.
-20240524-162042.png?inst-v=f7c198dc-21df-487c-8ac0-bf85ed638519)
Firewall Table