Subscriber Self Top Up Configuration
Plan Top-Up
Captive subscribers/users can now top up their account on their own, to increase the data limit over and above their current plan, by using the Subscriber Self Top-Up feature. To use this feature, the Admin must enable Subscriber Self Top-Up in the user’s plan.
In the Plans screen, select the Add New Plan button or click the Edit
 icon of an already existing plan from the Plans table.
Select the Top-Up tab.

Plan Top-Up
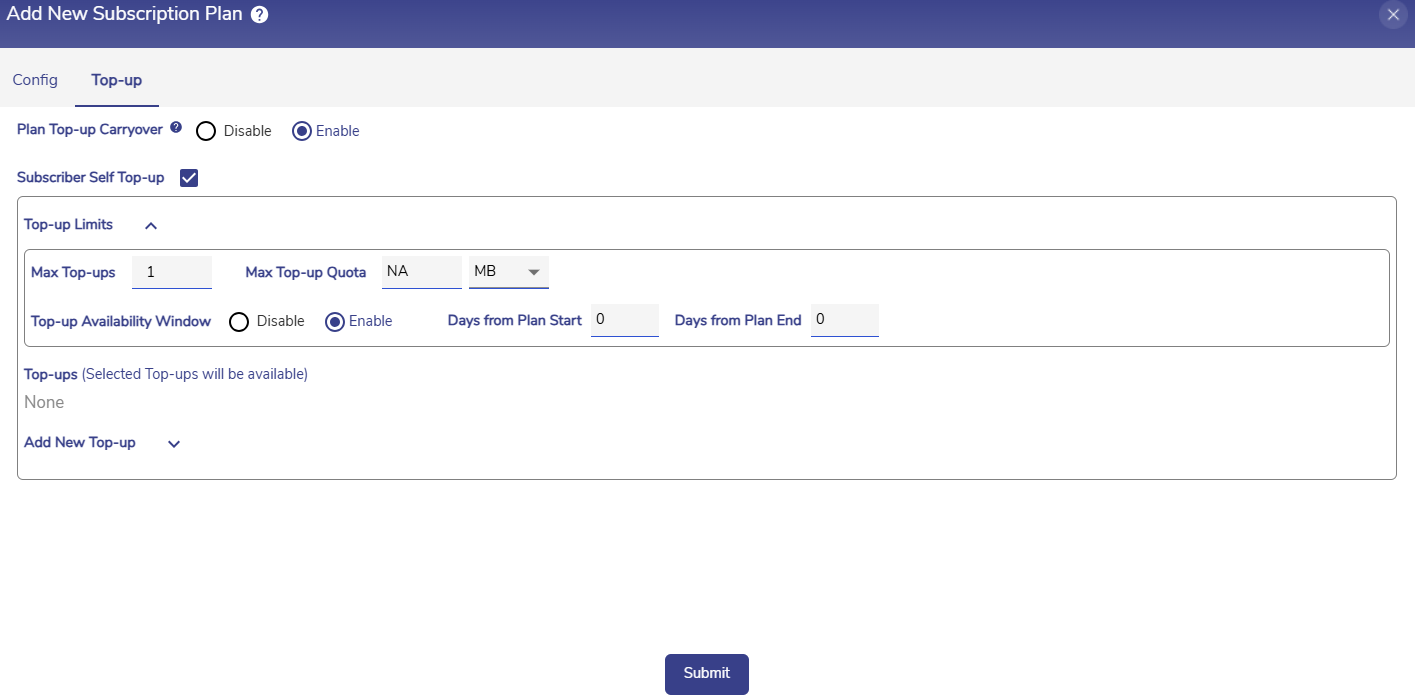
In the Plan Top-Up Carryover field, select the Enable radio button to to carry over the top up data to next plan. Select the Disable radio button to expire the top up data when the validity of the current plan ends.
Click the checkbox next to Subscriber Self Top-up field to enable the top up feature.
Top-up Limits
The Top-up Limits section allows the configuration of top-up limits such as Maximum number of top-ups and top-up availability window.
In the Max Top-ups field, enter the maximum number of times the user can top-up their account .
In the Max Top-up Quota field, enter maximum quota of data that for a top-up plan. Select the unit of data as either MB or GB using the dropdown menu.
The Top-up Availability Window defines the time period during which top-ups can be applied.
Select the Enable radio button to set a Top-up Availability window.
In the Days from Plan Start field, enter the number of days after the plan start date when top-ups should become available.
In the Days from Plan End field, enter the number of days before the plan end date till which top-ups should be available.
Top-ups will now be available only within the configured time window.
Select the Disable radio button to indicate that no top-up availability window should be applied.
Top-ups
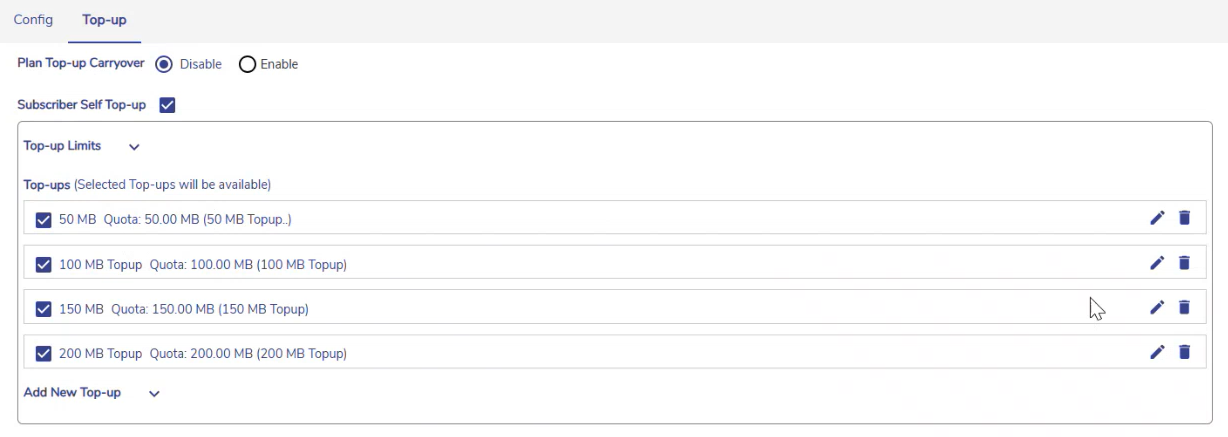
The Top-ups section shows the list of created Top-up plans.
Select the checkboxes of the top-up plans that should be shown for the user when they try to top-up their account in the User Portal.
Select the
 Edit icon to edit the top-up plans.
Select the
 Delete icon to delete the top-up plans.

Top-ups
Add New Top-up
The Add New Top-up section enables the creation of top-up plans.
The Top-Up plans are created similar to regular plans. Under the Add New Top-Up section, enter the Name of the Top-Up plan.

Add New Top-up
Enter the required Quota.
Enter the Quota. Select the unit of data as either MB or GB using the dropdown menu.
Enter any additional information required in the Description field.
Click Add to save the top-up plan.
The created plan top-ups will be listed below the plan creation section under the Top-ups section. Please select the checkboxes of the top-up plans that should be shown for the user when they try to top-up their account.
Click the Submit button to save the configuration.
