
To configure an Access Network as Captive, the admin must first create the traffic policies and then configure the Access Network as a Captive Access Network in the KonnectOS Portal.
Create Network Traffic Policy
-
Log in to the KonnectOS Portal.
-
Select SD-WAN from the side menu bar and click the Traffic Policies tab. The network traffic policies and the device traffic policies are listed in the left panel.
-
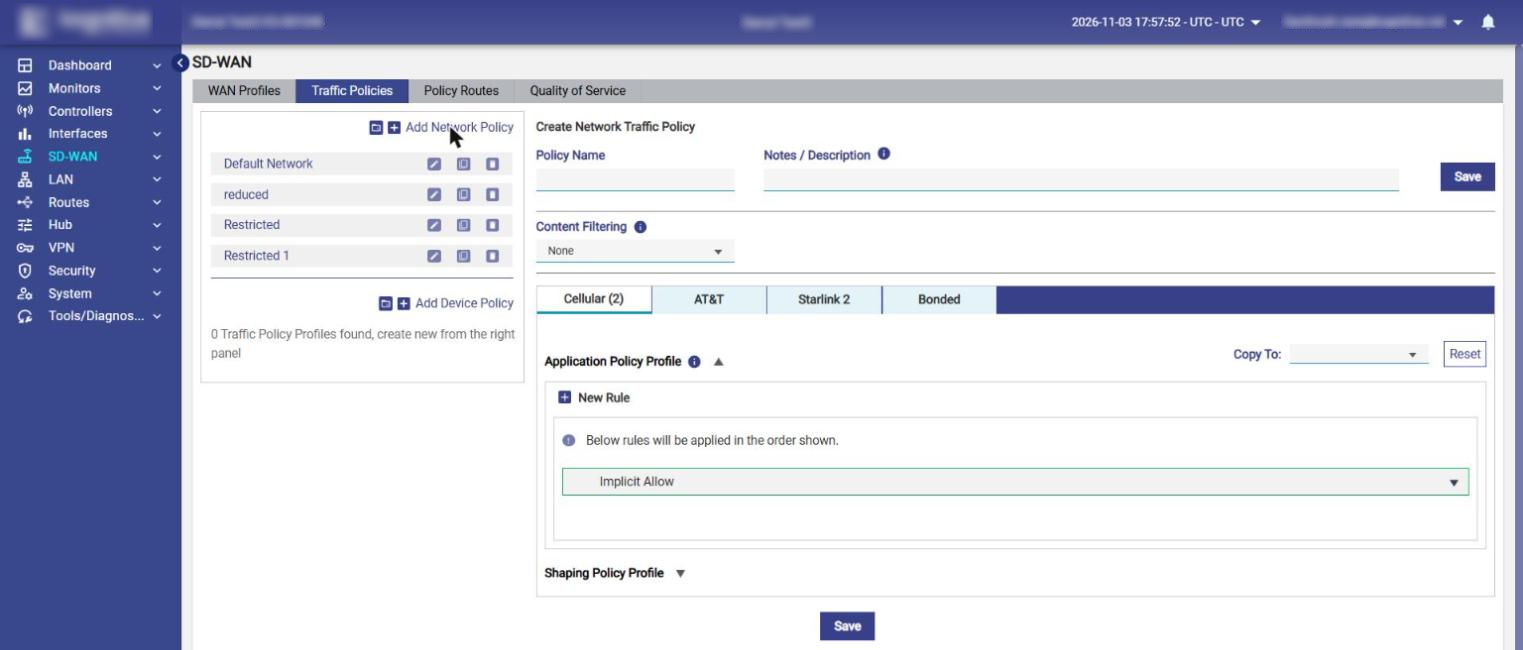
Click Add Network Policy. The Create Network Traffic Policy form appears on the right, see figure below.
-
Enter the Policy Name (for example, "CaptiveNetworkBlock" or "Restricted"; any name can be used). Optionally, enter Notes / Description.
-
Leave the policy without rules: the Application Policy Profile of each WAN tab contains only the default Implicit Allow rule. Before login, all traffic of the captive devices is redirected to the Captive Portal login page.
-
Click Save.
Note: If auto-redirection is enabled for an Access Network, the traffic policy created is not applicable; the auto-redirection functionality overrides the traffic policy. Also, auto-redirection does not work if the admin has set an implicit deny rule, despite captive redirection being enabled.
Create Device Traffic Policies
Create one or more Device Traffic Policies for the devices connecting via the Captive Access Network. These policies are associated with the plans assigned to the users of these devices in the CAN Administration Portal. The admin can add rules depending on what the captive devices must and must not access.
-
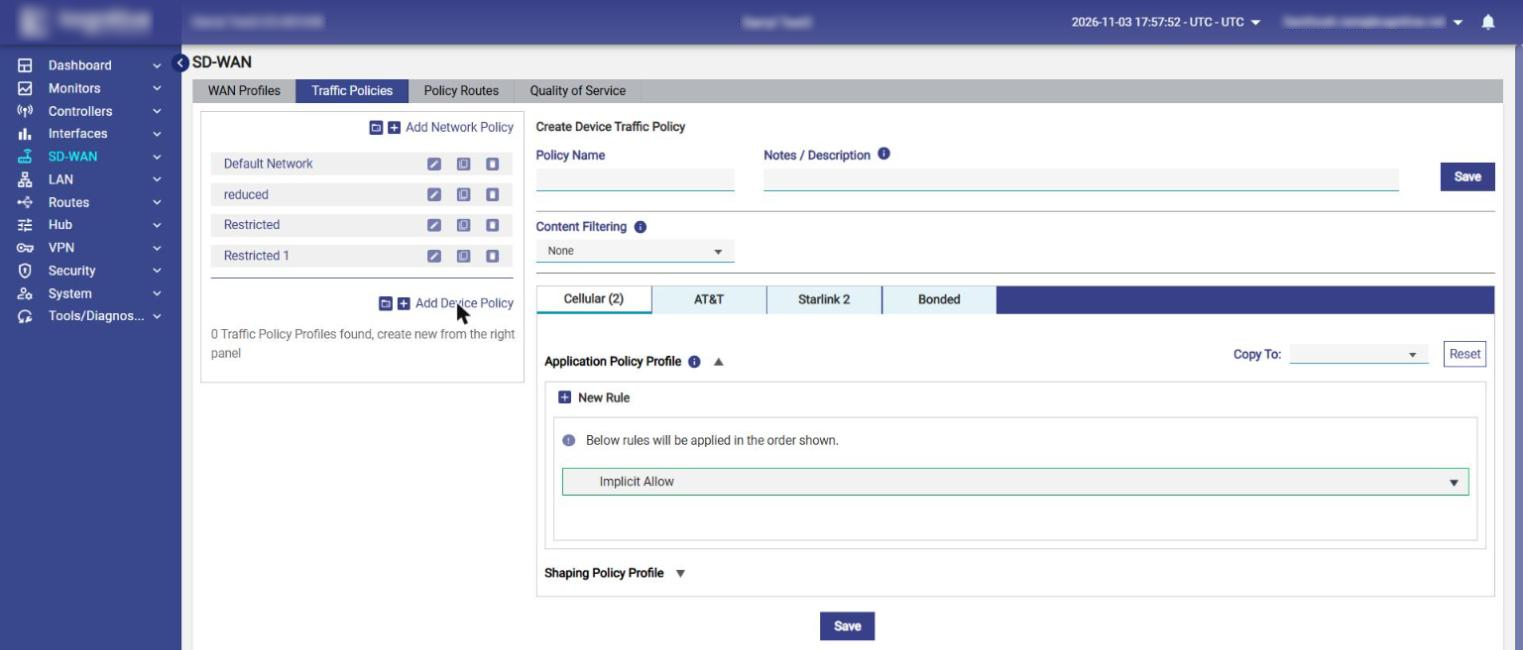
On the SD-WAN > Traffic Policies tab, click Add Device Policy. The Create Device Traffic Policy form appears, see figure below.
-
Enter the Policy Name and, optionally, Notes / Description.
-
Optionally, select a Content Filtering profile.
-
For each WAN tab (for example, Cellular, AT&T, Starlink, Bonded), add rules to the Application Policy Profile with New Rule, and optionally configure the Shaping Policy Profile. Use Copy To to copy the rules to another WAN tab, or Reset to clear them.
-
Click Save.
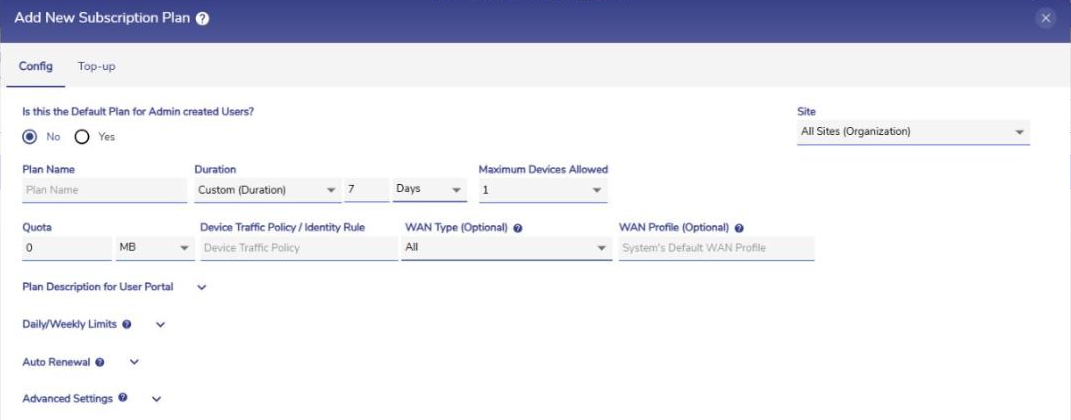
The Device Traffic Policy / Identity Rule of a plan in the CAN Administration Portal must match the KonnectOS Device Traffic Policy name exactly, including case, see figure below.
For details about traffic policies, see Traffic Policies.
Enable Captive Access Network
-
Select LAN from the side menu bar. The Access Networks tab is selected by default.
-
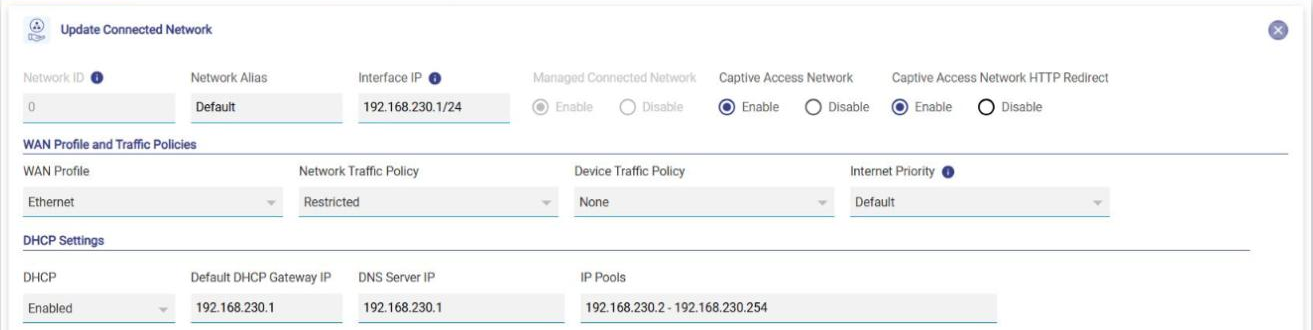
Click Add Connected Network to add a new network and configure it as Captive. Or, click the Edit Network (Pencil) icon of the Access Network that the admin wants to make Captive. The Add/Update Connected Network form appears, see figure below.
-
Select Enable under the Captive Access Network field.
-
The Captive Access Network HTTP Redirect field is automatically set to Enable. This automatically redirects all HTTP requests from the user to the CAN User Portal, where the user enters valid credentials to log in and access the internet.
Note: If auto-redirection is enabled, HTTPS traffic is blocked and HTTP traffic is redirected to the CAN User Portal.
-
In the Network Traffic Policy field, select the network traffic policy created above (for example, CaptiveNetworkBlock).
-
In the Device Traffic Policy field, select None, or select a Device Traffic Policy to apply to devices that are connected but have not yet logged in through the Captive Portal (for example, to set a usage quota or speed limit before login). This is supported from KonnectOS 8.1.2 Build 142. After login, the Device Traffic Policy of the user's plan applies.
-
Click Save. The Captive Access Network is created. A Captive Access Network icon is displayed next to the Network Alias in the Access Networks table (tooltip "Captive Access Network"), see figure below.

For details about Access Networks, see Access Networks.