
Users
Click Users tab from the Captive Access Network Homepage to open the Users screen.
-20250109-140740.png?inst-v=e0cf5ebf-01b8-481c-aa14-2a58f83bb340)
Users Tab
The different sections of the Users tab are explained below:
Selecting the Organization

Select Organization
Select the dropdown menu at the top right corner of the screen to select the required Organization or sub-organization. The logged in admin organization is populated by default here. This is the organization corresponding to the email ID used to login.
The dropdown list consists of all the sub-organizations under logged in admin organization. The admin can perform actions on users and plans of sub-organizations.
Users Screen Buttons
The functions of the buttons available above the Users table are explained below:

Buttons and their Functions
Search User
The Search field can be used to search for the user based on the User Name/Email Address.
Filter
The Filter button can be used to filter the Users table based on the following categories.
Disabled Users - Click the Disabled checkbox and click the Apply Filter button to view only the disabled user accounts.
Enabled Users - Click the Enabled checkbox and click the Apply Filter button to view only the enabled user accounts.
Expired Accounts - Click the Expired Accounts checkbox and click the Apply Filter button to view only the expired user accounts.
Select All - Click the Select All checkbox and click the Apply Filter button to view all the user accounts.
Add User Account
Click Add User Account button to add a new user.
The Add New User dialog box opens.
-20241115-075107.png?inst-v=e0cf5ebf-01b8-481c-aa14-2a58f83bb340)
Add New User - Credentials
Enter the Username. This field is mandatory and should be unique.
Enter the Email ID. This is an optional field.
The Admin can create a new user account with or without providing a password.
If the Admin wants to create an user account with password, enter it in the Password field. The Admin must then share this password with the user. Refer section Admin Created Users (With Password) in the User Portal Configuration for more details.
If the Admin wants to create an user account without password, skip the Password field and move to the next step. These user accounts can create their own password when logging into the User Portal for the first time. Refer section Admin Created Users (Without Password) in the User Portal Configuration for more details.
In the Select Site Access field, select the sites that the user needs access for. Select All Sites to give the user access for all sites under the selected Organization.
In the Select Plan field, select a plan from the dropdown menu.
The admin can directly select the required plan from the dropdown menu.
To use the Paywall feature and enable the user to buy the plan according to their wish when they login, select the name of the Planset from the dropdown menu.
To use this feature, the Planset has to be created in advance in the Portal tab of the Admin portal.
The Quota, Policy and Validity of the selected plan will be shown below the Select Plan field.
Click Submit button to create the user.
Global Settings
The Global Settings option ![]() can be used to set the Account Expiry duration and the Admin Email.
can be used to set the Account Expiry duration and the Admin Email.
Account Expires
The Account Expires tab is selected by default. This tab can be used to set the period of inactivity after which user accounts should be deleted automatically.
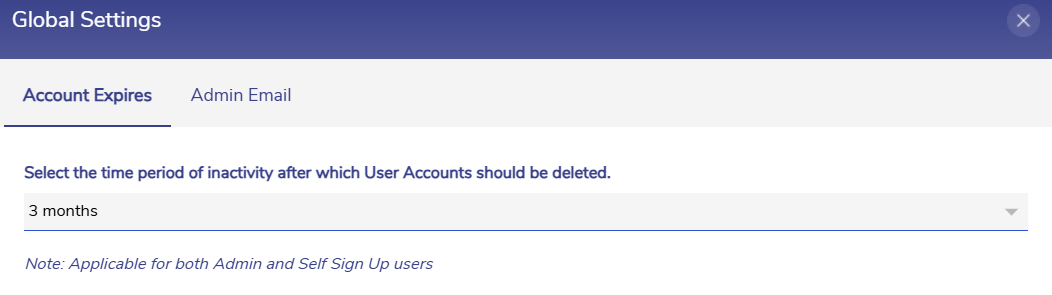
Account Expires
Select a duration from the dropdown menu.
Click the Save button to save the changes.
Admin Email
Click the Admin Email tab to set the email addresses that will be used for communication of all important actions required by the administrator(s).
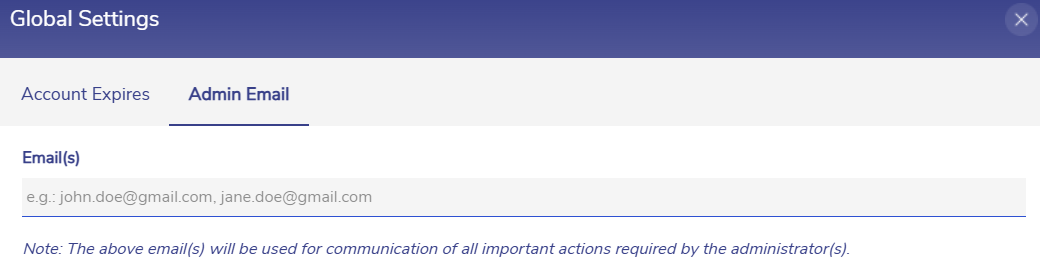
Admin Email
Enter the Admin Email(s).
Click the Save button to save the changes.
Bulk Upload User Accounts
Click the Bulk Upload User Accounts icon to add or modify multiple users at a time.
The Bulk Upload User Accounts dialog box opens.
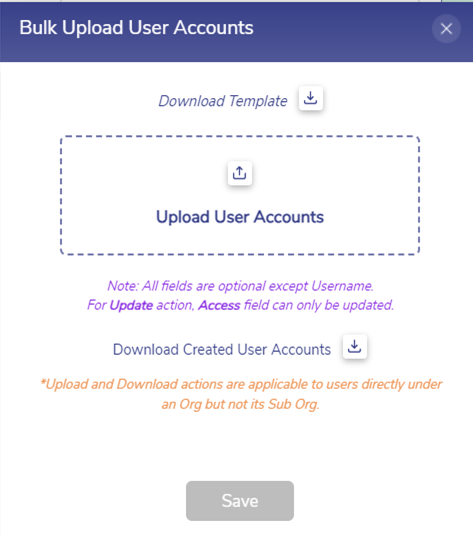
Bulk Upload User Accounts
Click Download icon to download the template. The User Account Details template downloads as a CSV file.
Refer the below screenshot of the downloaded CSV template with example user details.

Template
The template has 8 columns, each with different functions.
Column Name | Values | Remarks |
Action | Add, Update, Delete, No Change | No other action is supported. |
Access | Enable, Disable, Expire Plan | No other access value is supported. |
User Type | Self-Sign Up, Admin Created | No other user type is supported. |
Username | <username> | Username is a mandatory field and will be used for identification. |
Email Address | <email address> | Email address must be unique and can only be changed for admin created users. |
Password | <password> | Password can only be changed for admin created users. |
Plan Name | <Plan> | Plan with this name should be present for the organization. |
Remarks | <remark> | Remarks will be stored and can be viewed while downloading the already existing user details. |
Username is a mandatory field. All other fields are optional.
Plan Name must match the name of an existing plan. If a Plan Name is not provided, the user account will be created without any plan. If a Password is not provided, the user will be prompted to set up their own password on first use.
The function of the Action column are explained below:
Add:
New users can be added by using the Add action.
The Username and email address should not match with any existing user.
Update:
The admin can change access, email, password, plan and update remarks for a user.
To update the field, set action as “Update” and change the field values. Other fields can be left unchanged or empty.
Password is hidden by default. To change the password field, set action as “update” and enter new password.
Admin can also change the access value, plan name and update remarks for a self signed up user.
Delete:
Admin can delete the admin created users and self signed up users.
To delete the user, provide Delete as action and Username of the user.
No Change:
Users with “No Change” as action will remain unchanged even if the values of the other fields are changed.
Important Notes
User type cannot be changed by admin.
Password and Email cannot be changed for “Self Sign Up” users.
If the Access is set as “Expire Plan”, the plan assigned to user will be removed and user will be disabled. On enabling the user access, a new plan mentioned in “Plan Name” will be assigned to user.
If the action is set as Update and the Username does not match an existing user, a new user will be created.
To Delete the user, only the Username is required.
Enter the user details in the given format and save the CSV template.
Click Upload to upload the user accounts. Select the updated CSV file from the system and upload it.
Click Save button to update the uploaded details in Portal.
If the uploaded CSV file consists of any errors, for example, duplicate entries of username, the errors are listed in the popup and file cannot be saved. Therefore, make sure to fill the details in the correct format without any errors.
Generate Usage Report
Click the Generate Usage Report icon to download the Session Report in CSV format.
Select the Start Date and Time.
Select the End Date and Time.
Click Generate CSV button.
The usage report will be generated in CSV format. The generated reports will be available in the Reports tab.
Clicking the three dots icon opens a Logout button. Click Logout button to logout from the Administration Portal.
Pagination
The pagination helps the admin navigate to the next page by using the < > buttons.
Click the dropdown given next to the Pagination to change the number of users displayed in one page. The admin can choose between 10/25/50/100/150/200 from the dropdown menu.
Users Table
The Users table displays detailed information of all users for the selected organization.
-20250109-144804.png?inst-v=e0cf5ebf-01b8-481c-aa14-2a58f83bb340)
Users Table
It displays the below information:
User Credentials – Name of the user followed by the user Email.
Organization – Name of the organization.
Site Name - Name of the Site.
Creation Date - Date on which the current plan was created.
Current Plan - Name of the current plan. Hover the cursor on any entry in the Current Plan column to view the WAN types associated with that plan.
Plan Start Date – Start date of the plan.
Plan End Date – End date of the plan, calculated as the Plan Start Date + plan validity or set by the admin.
Remaining Quota – Value of the quota remaining out of assigned quota.
Remaining Daily Limit – Value of the remaining daily usage limit and remaining time limit.
Currently Logged In – Indicates whether the user is currently logged in or not.
‘Y’ – If user is logged in.
‘N’ – If user is logged out.
Users Table - Actions Column
The Actions buttons in the User table are explained below:

Actions - Users Table
View Session Details
Click the View Session Details icon under the Actions column to expand the device table that displays details of the devices used by the user for login. The device table displays the following information:
IP Address – IP address of the device.
MAC Address - MAC address of the device.
Host Name – Host name of the device.
Site Name – Site name associated with the device.
Quota Used – Consumption of data by the device.
Last Activity – Duration between the time of last activity on device and the current time.
Click View Session Report icon under the Actions column to expand the session table for the device. The session table displays the following information:
Session ID – Unique ID of the session.
Start time – Time at which the session begins.
End Time – Time at which the session ends.
Total Duration – Duration of the session. For an ongoing session duration is displayed as “Ongoing”.
Quota Used - Consumption of data for each session.
View Plans
Click View Plans icon to open the Plan details section.
The Plan Details sections displays information about the Current plans, Upcoming plans and the Expired plans.
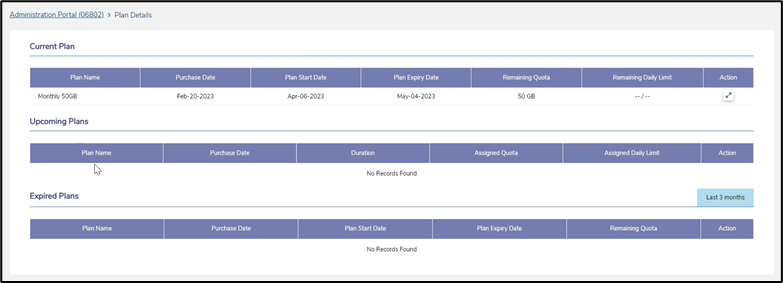
Plan Details
It displays the below information:
Plan Name – Name of the plan.
Purchase Date – Date at which the plan was purchased.
Plan Start Date – Start date of plan.
Plan Expiry Date – Date at which the plan will expire.
Remaining Quota – Remaining value of plan quota.
Click View Session Details icon under the Action column to expand the Device table that contains the device details such as IP Address, MAC Address, Host Name, Site Name, Quota Used.
Duration – Validity of plan after the plan starts.
Assigned Quota – Maximum amount of data user can consume using the plan.
Actions
Click the Actions icon
 to open the Actions dialog box.
The Actions dialog box contains the following sections:
Account
Plan
Report
Account
Edit
Under the Account section, click the Edit option from the left menu bar to edit the corresponding user details.
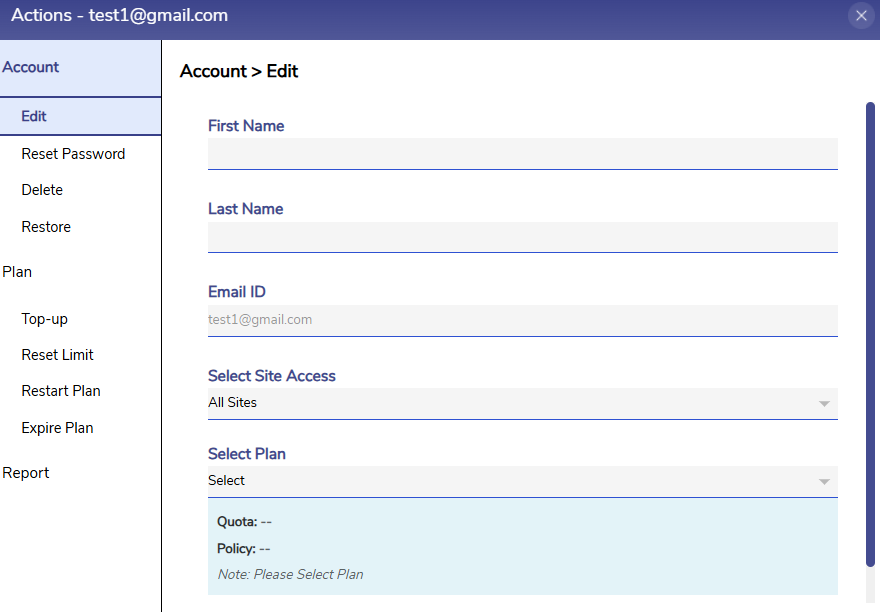
Account - Edit
The admin can edit the First Name and Last Name of the user.
In the Select Site Access field, select the sites that the user needs access for. Select All Sites to give the user access for all sites under the selected Organization.
To update the user’s current plan, select Update Current Plan.
In the Select Plan field, select a plan from the dropdown menu. Description of the selected plan contains the Quota, Policy and Validity of the plan.
Click Submit button to save the changes. On expiry of the current plan, the new plan will become applicable.
Reset Password
Click Reset Password option to reset the password of the user.
In few scenarios, the users might forget their password and also forget the answers for the their security questions.
In those scenarios, the user can request the admin to reset their account passwords. Refer section Request Reset Password in the CAN User Portal Configuration page for more information on requesting password reset.
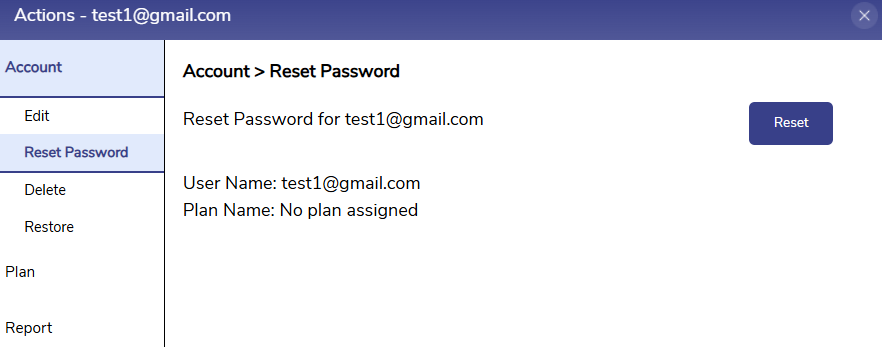
Reset Password
The user will receive the below email once admin resets the password.
-20240508-083741.png?inst-v=e0cf5ebf-01b8-481c-aa14-2a58f83bb340)
Password Reset Successful
After receiving the email, the user must open their Captive portal, enter their email address and click Reset Password button again.
The user can now set a new password.
Delete User
Click Delete option from the left menu bar.
Click the Delete button next to the username to delete the user.
Restore
Click the Restore option from the left menu bar.
Click the Restore button next to the username to restore the expired user account.
Plan
Top-Up
Under the Plan section, click the Top Up option from the left menu bar to add a Top-up to the user’s plan.
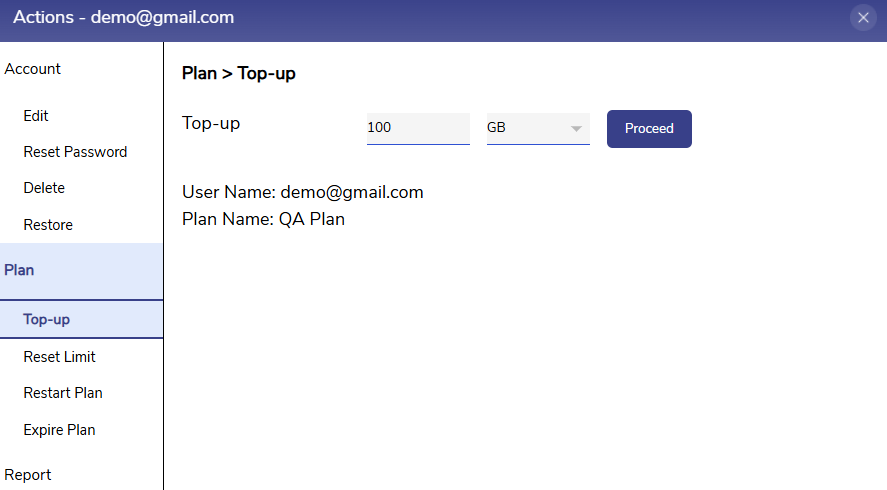
Top-Up
Enter the Top-up quota and select the unit from the dropdown menu (MB/GB).
Click Proceed button to save the changes.
Top-up on a plan cannot be more than the quota of the plan.
Reset Daily Limit
Click Reset Limit option from the left menu bar to reset the daily limit. Once the daily limits are exhausted, admin can reset the daily limits. This option is disabled for users with no plan or users with plan which does not have daily limits.
Click the Reset button next to the username to reset the daily limit.
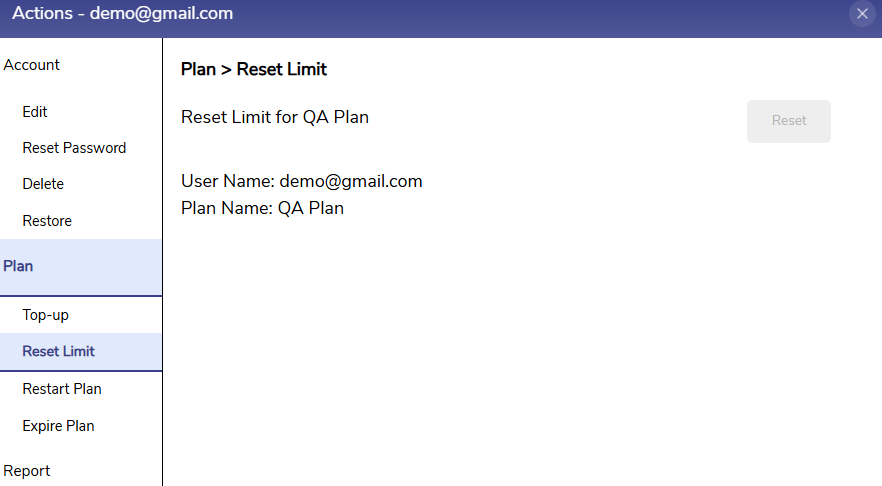
Reset Limit
Restart Plan
Click the Restart Limit option from the left menu bar to restart the plan of the selected user. When this option is selected, the data usage, remaining quota and remaining daily limits of the user will be reset and the plan will start from the beginning. If user is logged in, then the user will be logged out and will have to login again.
Click the Restart button next to the username to restart the plan.
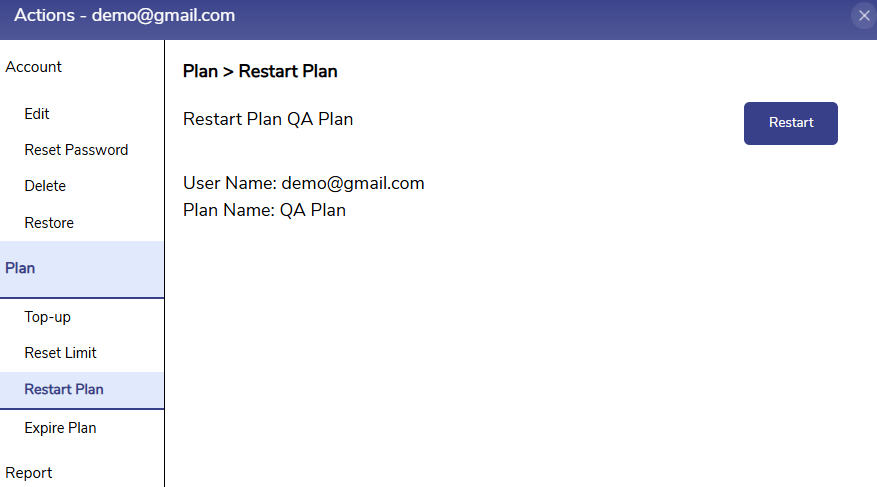
Restart Plan
Expire Plan
Click the Expire Plan option from the left menu bar to expire the user’s plan immediately.
Click the Expire button next to the username.

Expire
Report
Click the Report option from the left menu bar to generate the session report of all the devices of the user.
Enter the Start Date and End Date.
Click Generate CSV button. Two types of reports will be generated.
High Level Usage Report - Provides summary of sessions, usage and duration.
Detailed Usage Report - Provides detailed report of users plan and topup details.
Enable/Disable Account
Click Toggle button to enable or disable the user account. If disabled, user will not be able to login to the User Portal and if already logged in, user will be logged out of the Portal immediately.
Select Multiple Users
Select the checkbox on the left of the User credentials to select multiple user accounts.
-20250218-095353.png?inst-v=e0cf5ebf-01b8-481c-aa14-2a58f83bb340)
Select Multiple Users
Select the checkbox on the left of the User credentials heading to select all the user accounts.
Once the admin selects a user account, the below 6 icons become available.

Operations On Multiple Users
Using this feature, admin can do operations such as Reset Password, Restart Plan, Reset Daily Quota, Restore Users, Add Top-up and Bulk Delete on all the selected user accounts at the same time.
Click the Reset Password icon to reset the password of the selected users. Next time the user tries to login into the User Portal with their credentials, a pop-up to reset the password will appear.
Click the Restart Plan icon to restart the plans of the selected users. When this is selected, the data usage, remaining quota and remaining daily limits of the user will be reset and the plan will start from the beginning. If user is logged in, then the user will be logged out and will have to login again.
Click the Reset Daily Quota icon to reset the daily quota of the selected users.
Click the Restore Users icon to restore the expired user accounts.
Click the Add Top-up icon to add a Top-up for the selected users. The Top-up plan dialog box opens.
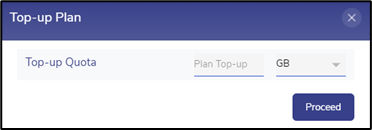
Top-up Plan
Enter the Top-up Quota and select the unit from the dropdown menu (MB/GB).
Click Proceed button to save the changes.
Click the Bulk Delete icon to delete all the selected user accounts.