
Tickets
Overview
The Tickets screen provides a summary of all the tickets raised organization-wide. Tickets screen can be accessed by selecting the Tickets option from the left menu bar of Kognitive Cloud.
In the Organization field, select the Organization or sub-organization from the dropdown menu. The logged in admin Organization is populated by default here. This is the organization corresponding to the email ID used to login.
The dropdown list consists of all the sub-organizations under logged in admin organization.
In the Sites field, select the required sites from the dropdown menu. The dropdown menu consists of all the sites associated with the selected Organization and sub-organizations.
Select the Period if necessary.
-20231229-154629.png?inst-v=6e7d9137-a13b-498e-965b-9bf2c24b8222)
Tickets
The Tickets table shows the list of all the tickets of the selected Organization. It also shows the following information:
Ticket ID - Unique ID of the ticket
Site - Name of the Site
Subject - Subject given for the ticket
Created On - Date and time of creation
Creator - Name of the person that created the ticket
Assignee - Name of the Assignee
Priority - Priority level of the ticket
Updated On - Date and time of updating the ticket
Status - Status of the ticket
Click Download to download the table data in CSV format.
Click the Filters button to view the filtering options.
The user can select options such as:
Unassigned
Hot Sites
Raised less than 24h ago
Critical
Standup
My Tickets
RMA
User can filter the tickets based on their Status:
Open
Closed
Reopened
On Hold
Escalated
Resolved
User can select the name of the Assignee from the dropdown menu and filter the tickets assigned to them.
User can also select the name of the Creator from the dropdown menu and filter the tickets created by them.
Click Apply Filter to filter and view the required tickets.
Create a New Ticket
Click Create a New Ticket button to create a new ticket.
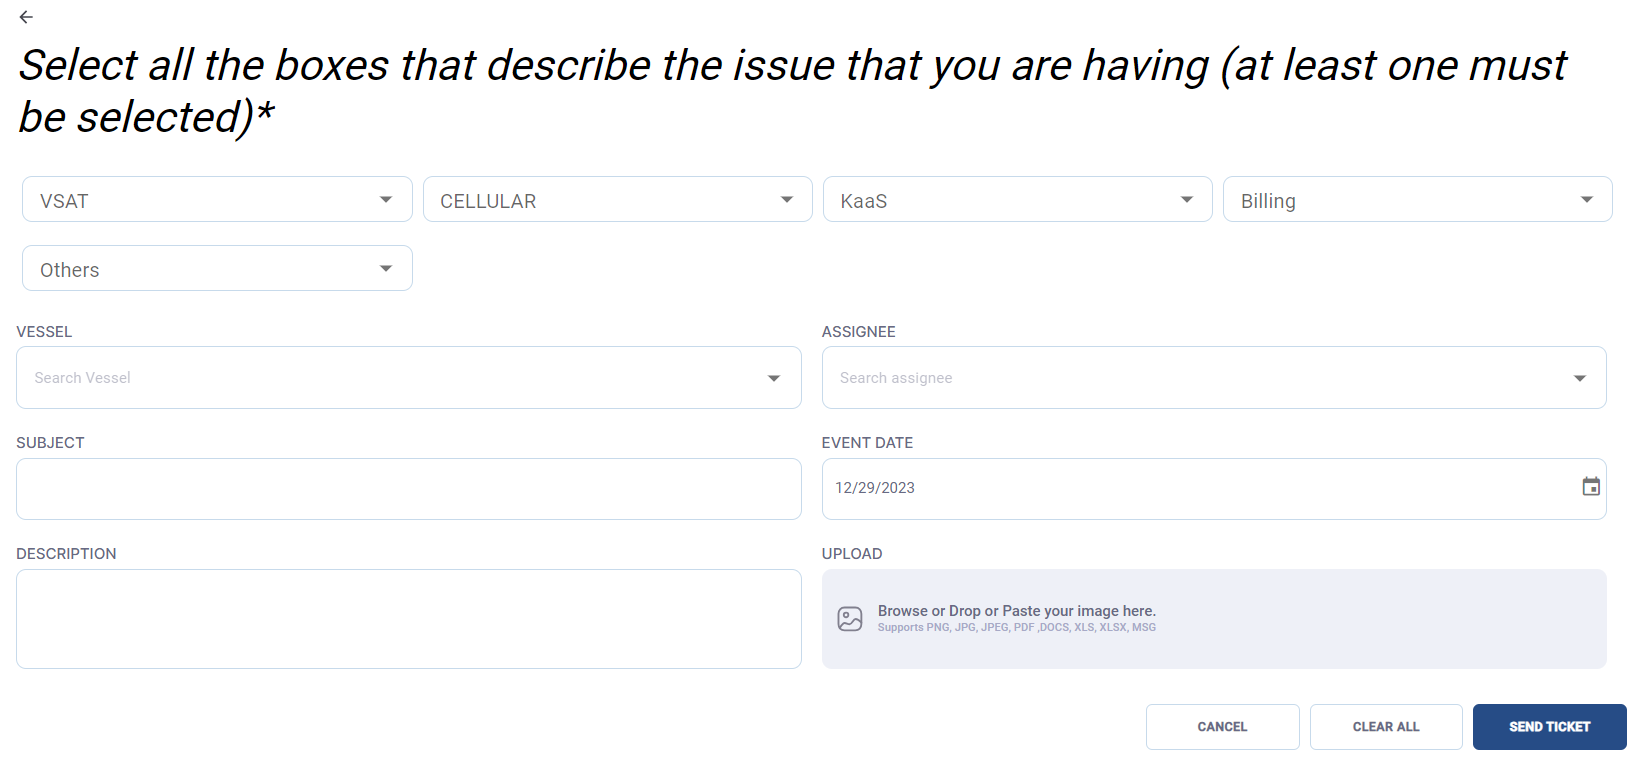
Create a New Ticket
Click the VSAT field and select one of the following options:
Upgrade / Downgrade
Slow / No Service
Modem
Antenna
Others
Click the Cellular field and select one of the following options:
Upgrade / Downgrade
Slow / No Service
Modem
Antenna
Others
Click the KaaS field and select one of the following options:
Server SW
Mobile APP
Outbound Calls
Inbound Calls
Others
Click the Billing field and select one of the following options:
Invoicing
Payment
Others
Click the Others field and select one of the following options:
Network Issues
LAN
WI-FI
AV
Others
Select the name of the required Site from the Vessel field.
Select the name of the Assignee from the dropdown menu.
Enter the Subject.
Select the Event Date.
Enter the Description.
Select and upload any required images or screenshots.
Click Send Ticket to create the ticket.
Click Cancel button to cancel the operation.
Click Clear All button to clear all the entered fields.