
Remote Connections
This manual guides the user through the steps required to set up and use the Remote Connections screen. This screen enables the user to create remote connections for the WAN/LAN addresses connected to the network. This feature enables them to work more flexibly and efficiently while effortlessly expanding their boundaries. This manual provides step-by-step instructions on how to set up and use the remote connections feature.
These remote connections can be accessed by creating a unique URL called Konnect URL. Remote Connections feature lets the user create multiple URLs for the addresses and prepopulates Konnect URLs (default links) for existing WAN interfaces and devices monitored on LAN. These URLs can be used to access these WAN/LAN addresses through any browser from their laptop/computer (Currently only HTTP/HTTPS are supported).
Click the Remote Connections tab to open the remote connections screen.

Remote Connections Screen
On the Remote Connections screen, the user can see the name of the site they selected and its corresponding ID. On the left-hand side below the Site name, the user can see the Address tab. It displays the addresses of the remote devices that are connected to the network. This tab lists all the scan device addresses available for the corresponding network.
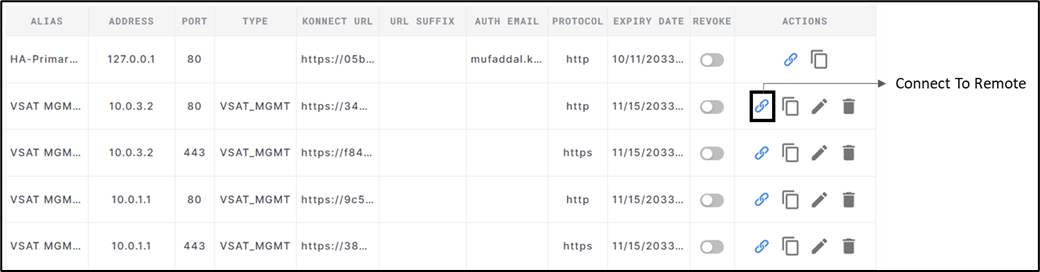
The URL table on the right side of the Address tab displays the current list of remote connections that are available to the user. It displays the details about the WAN/LAN/VSAT_MGMT interfaces connected to the corresponding device. It shows information such as Alias, Address, Port, Type, Konnect URL, URL Suffix, Auth Email, Protocol, Expiry Date, Revoke button and Action buttons.
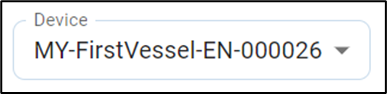
Select the dropdown menu in the Device field at the top right corner of the screen to switch between the devices.
Device Selection Field
Each device listed on the Topology screen will have an Alias name or Device ID uniquely associated with it. This name will be displayed in the Device field. If the Alias name is not pre-set for the device, the device ID will be displayed in its place.
Once the device is selected, the URL table displays the list of remote connections available for that device. These URLs were created by default and prepopulated here.
The addresses we see are prepopulated by using the data available in the interface tables and taken from the systems where LAN Device Monitoring is enabled.
The URL table lists the Edge Portal link for the device as the first row. Click the Connect to remote icon in the first row to open the Edge portal directly. The URL can also be copied and used in a new tab to access Edge portal outside.
URL Table
Default Links: The Konnect URL column lists all the System & User generated remote connection Links. These system generated links are used as default links to connect to the remote addresses.
Click the Connect to remote icon in the Actions column to use this link and connect to remote.
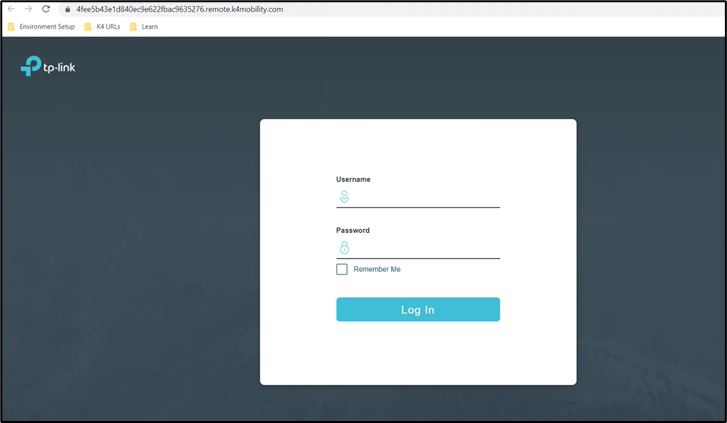
After clicking the Connect to remote icon, the user is redirected to the following screen:
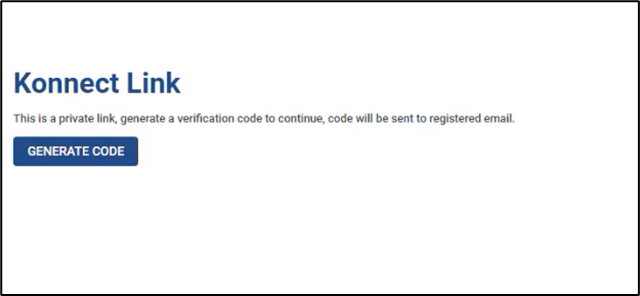
Generate Verification Code
Click Generate Code button to generate a one-time verification code. This code will be active for one hour since generation or until it is used.
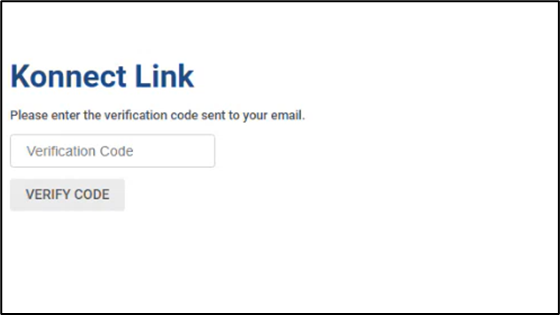
The verification code will be sent to the user’s Authorization Email address. The Authorization Email address can be added when creating the remote link or it can be edited and added after creating the remote link.
Enter the Verification code and click the Verify Code button.
Enter Verification Code
If the authentication is successful, the user will be allowed to access the device that is connected to that corresponding address. This authentication makes sure that only the users with the registered email address can access the devices using the remote links.
The Konnect URL helps the user to remotely access whatever that is hosted in that particular address and port combination of that device.
For example, if the user selects the remote link of any TP Link device running in that address and port combination, the user will be taken to the admin panel of that device as shown below:
Example of Remote Connection
The user can login with valid credentials and access that device remotely.
Click the Copy icon to copy the Konnect URL.
Click Edit icon to edit the Alias, URL Suffix, Auth Email and Expiry date of the Remote link.
Click the Delete icon to delete the remote link.
Click the Revoke button to revoke any remote link. All the System and User generated URLs can be revoked. Once revoked, the URL will stay in the system but cannot be used to connect to remote address. The revoked URLs can be restored and again be used as usual to connect to remote address.
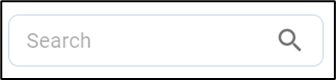
The Search field enables the user to search for the addresses based on their Alias names.
Search Field
Enter the Alias name or part of the Alias name in the Search field and press enter on the keyboard. The table gets filtered and displays only the required addresses.
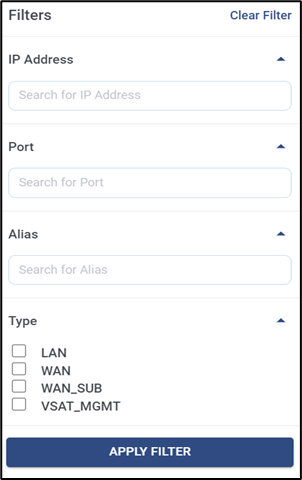
The FILTER button helps the user to filter the table based on IP Address, Port, Alias and Type.
Filters
Select the IP address or Port or Alias from the dropdown menu and click APPLY FILTER to filter the address table accordingly.
Select the Type from the available options and click APPLY FILTER to filter the table based on the Type.
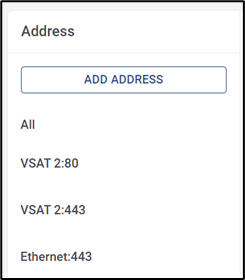
Address
The Address tab on the left side of the screen lists all the scan device addresses available for the corresponding device.
Address
Any address is uniquely identified by its Address and Port combination. Each address can be given a unique Alias name. This Alias name will be displayed in the Address section. If the Alias name is not pre-set for the address, the Address and Port combination will be displayed in its place.
Clicking any address from this section will filter the table on the right and display only the remote connection links of that address. Users can also multi select the addresses using Ctrl + Click on address.

Address Filtering
Click the Connect using default link icon in the Address tab to use the default link of that address and connect to remote.
Click Edit icon next to the Address to edit the Alias name.
Click the Delete icon next to the Address to delete the address.
Add Address
If any device of the user is not listed in the table, the user can add it if they know the corresponding address and which Port of it is open for communication. The user can add the address manually and create a remote connection link for it.
Click ADD ADDRESS on top of the list of existing addresses on the left. It opens the Create a new address dialog screen.
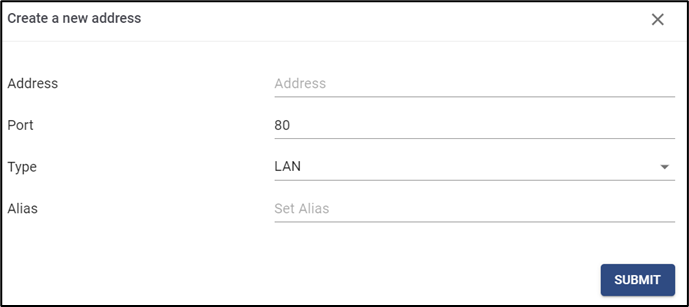
Create Address
Enter the Address (valid IPv4).
Enter the Port (1-65535).
Select address Type (LAN/WAN) using the dropdown menu. This is an optional field.
Enter the Alias name for the address and click SUBMIT.
This creates a new address and adds it to the Address tab on the left.
Once the address is created, a default remote connection link is also created for it automatically. This default link will have an expiry date of just one day.
The user can manually create multiple remote connection links for an address and customize its Alias name, Protocol and Expiry date.
Generate Konnect URL
Click on the Generate remote connection link icon on the Address tab for the corresponding address. It opens the Generate Remote Connection Link dialog screen.
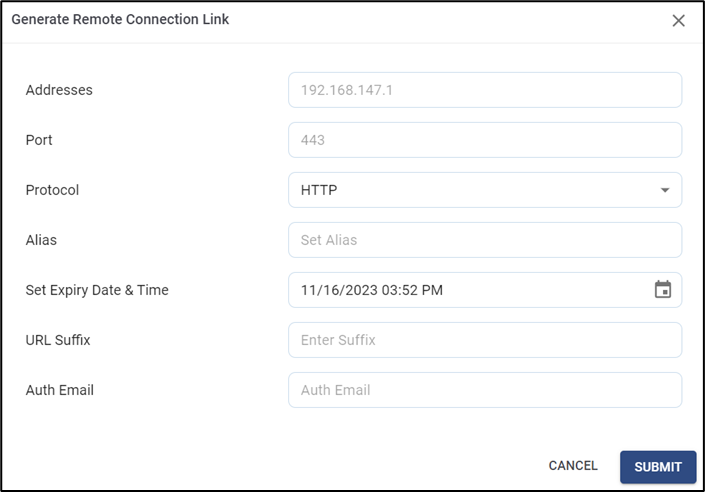
Generate Remote Connection Link
Select Protocol (HTTP/HTTPS) using the dropdown menu.
Enter the Alias name of Konnect URL.
Set the Expiry Date & Time of URL using date-time picker.
Enter the URL Suffix.
Enter the Auth Email. This is the authorization email to which the verification codes will be sent.
The remote links with no Auth Email set for it are considered as open and will be accessible by anyone having the link.
Click on Submit.
This creates a new Konnect URL for the selected address and adds it to the table of URLs on the right.
Click the Connect to remote icon in the Actions column to use this link and connect to remote.

Konnect URL Table
Troubleshooting
The user might encounter few errors occasionally when trying to access the remote connections. The below shown images are example of some of the common errors that the users might encounter.
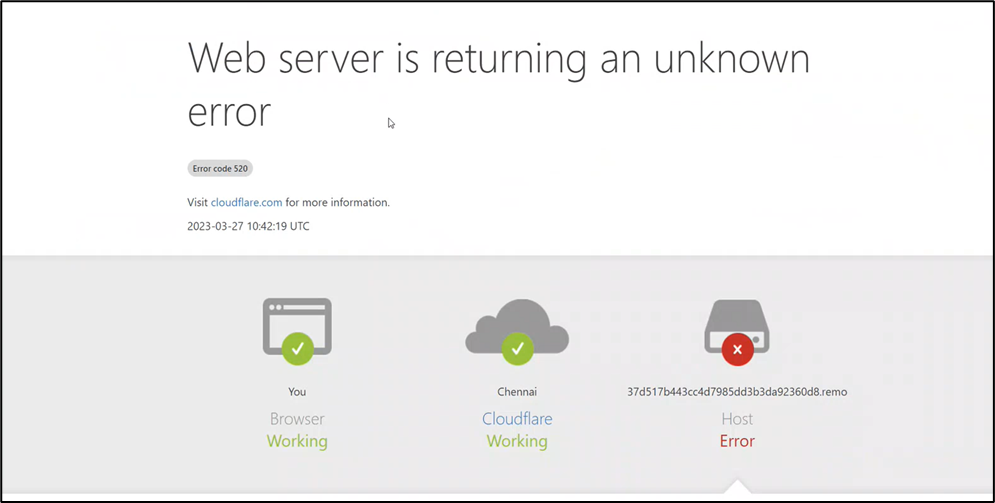
Troubleshooting
Try the below steps to rectify the error:
Check the Internet connectivity.
Check if the Konnect URL is valid.
Restart the system or try accessing again after some time.
The device might be disconnected from the system. Check the device, reconnect it and try again to access the remote URL.
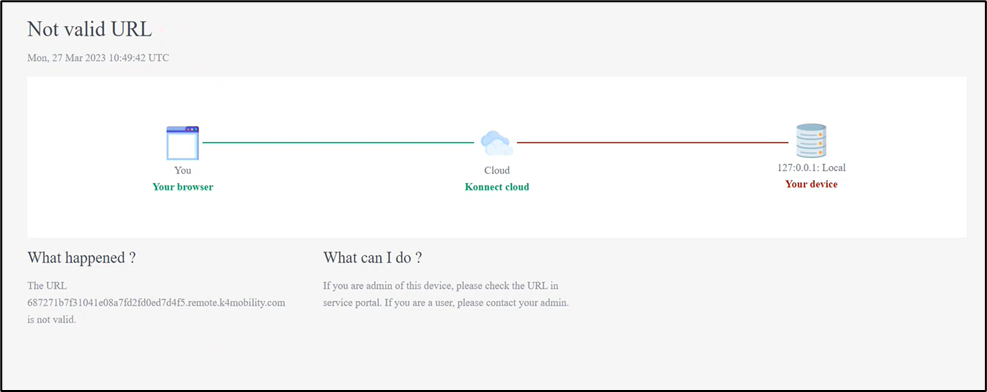
The user might get the below error if they try to access an URL that was revoked.
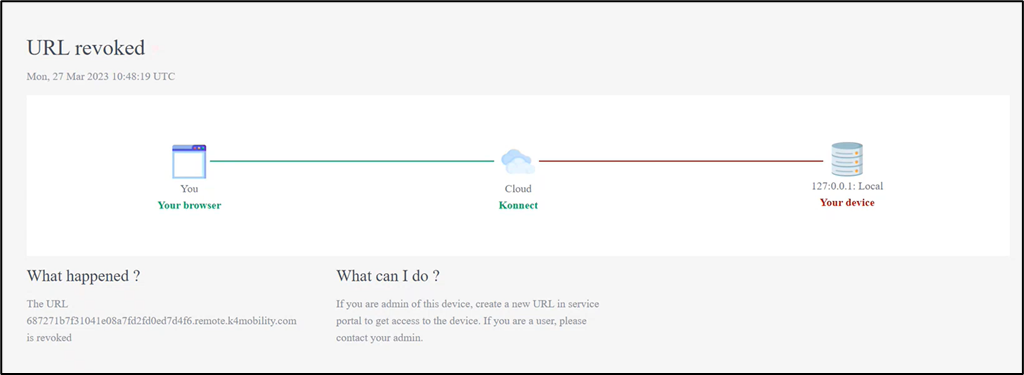
Revoked URL Error
Once revoked, the URL will stay in the system but cannot be used to connect to remote address.
Restore the revoked URL or contact your site administrator to allow access and try again to connect to the remote address.