
Konnect Hub
The following sections describe the steps used to configure a Konnect Hub server:
Configuration
Login to the Edge Portal with valid credentials.
Click the
 icon from the Edge Portal homepage.
Select Configuration Wizard from the options shown.
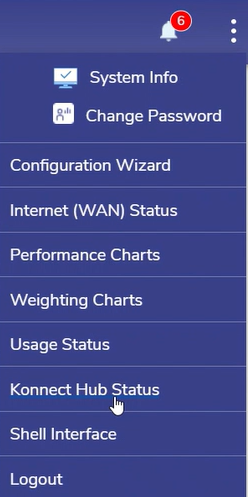
Menu
The Konnect Hub section is visible only to the users with Hub Enterprise or Hub Standard license types.
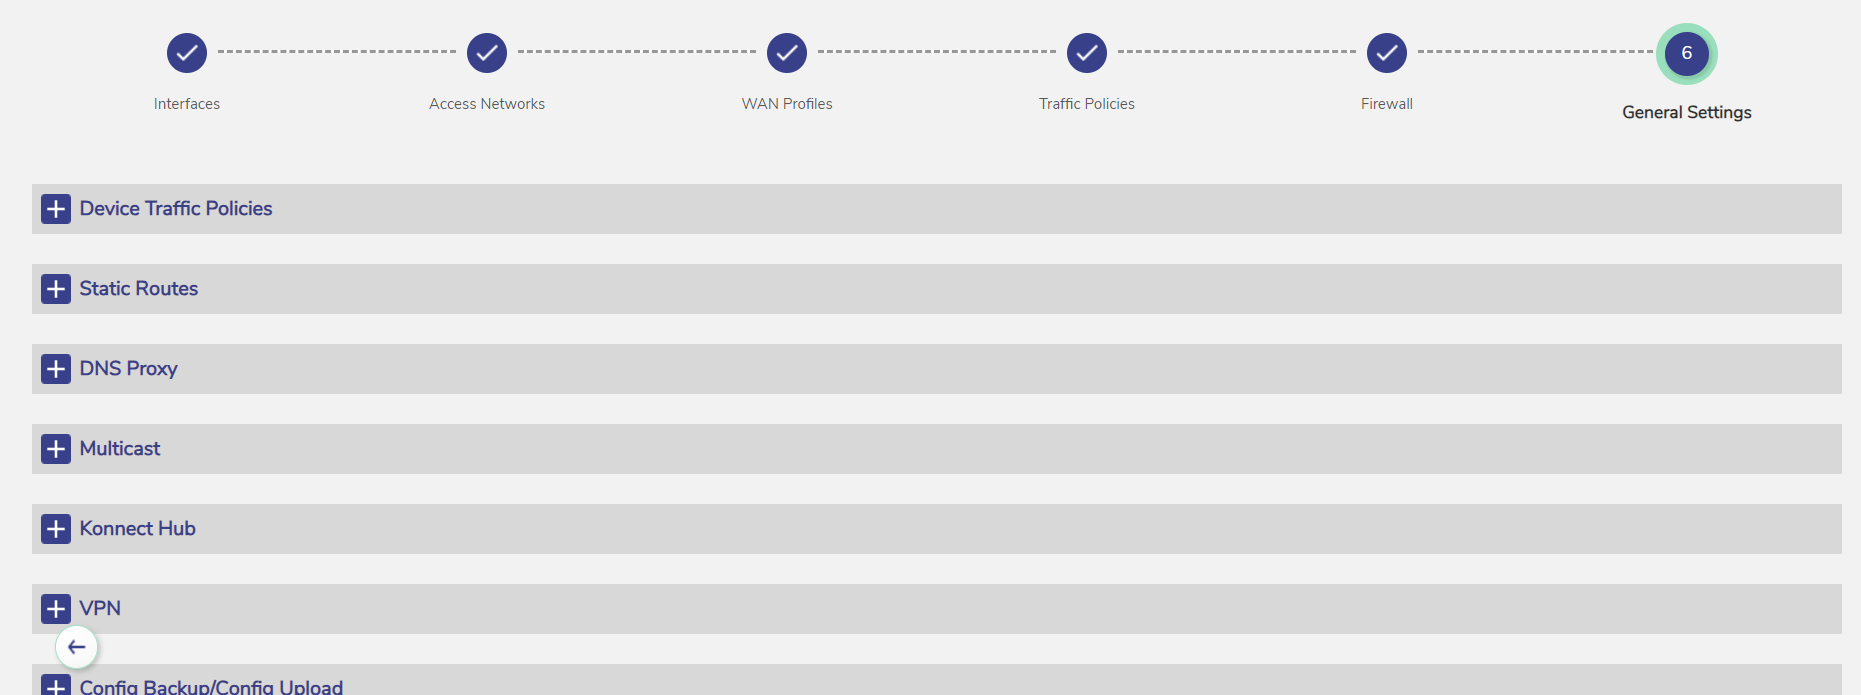
Select the
 section to expand it.
General Settings
By default the Konnect Hub feature is disabled on Edge. The user must enable it manually.
In the Select Konnect Hub Settings field, select Enable from the dropdown menu. This enables the Konnect Hub feature.
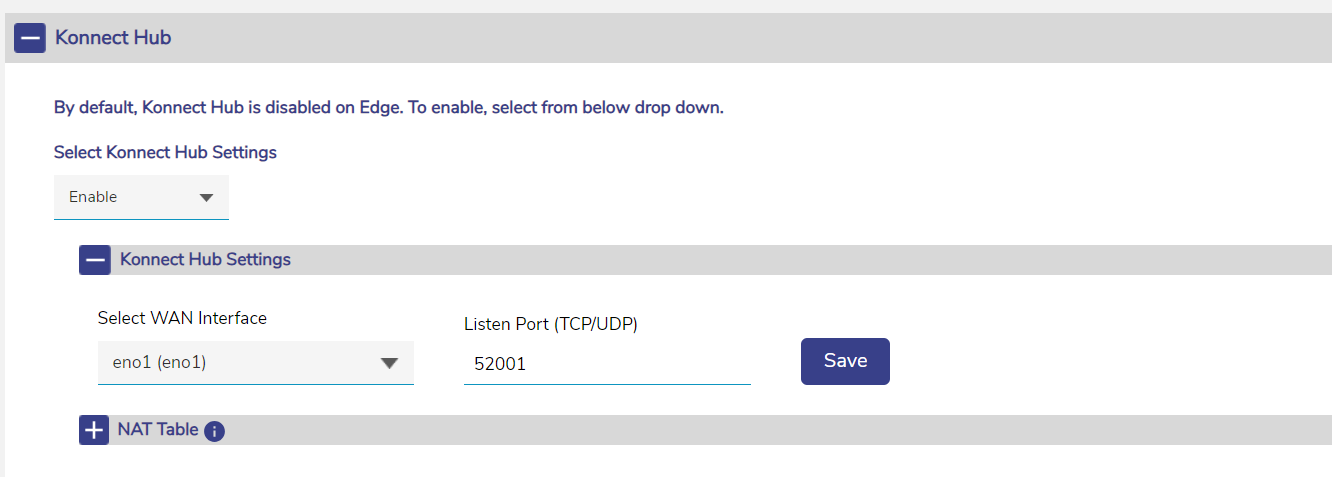
Konnect Hub Settings
Expand the Konnect Hub Settings section.
Select WAN Interface from the dropdown menu.
Enter the TCP/UDP Listen Port number.
Expand the NAT Table section to view a summary of the NONAT, SNAT & NETMAP specifications in use, constructed from data from the Hub Managed Network definitions. This information is taken from the Access Networks screen of the Configuration Wizard.
-20240411-114442.png?inst-v=113b1a36-52f9-4344-a825-138b5322243c)
NAT Table
The NAT Table shows the following information:
Edge Device Name
WAN Interface
Access Network
NAT Type
NAT To
Actions
Change Device Priority
This is a Read only table. The user can change the order of the entries by clicking and dragging the
 icon. The user cannot do any other operation in this table.
Expand the Inbound NAT/Route Table section to view the following information:
Edge Device Name
Destination IP Address (IP:Port)
DNAT Address and Port (IP:Port)
-20240423-091545.png?inst-v=113b1a36-52f9-4344-a825-138b5322243c)
Inbound NAT/Route Table
This is also a Read only table. The user can only view the information presented. They cannot modify any value.
Port Forwarding
When deploying the Hub behind a third-party firewall or router, port forwarding on the device must be enabled. This typically involves setting up both an Allow Rule and a NAT rule. However, the exact requirements can vary depending on the make and model of your device. Please refer to the appropriate documentation for your specific device to determine the precise steps needed to configure port forwarding and firewall rules.
Action | IP/Port |
|---|---|
Permit | TCP & UDP Port: 51820 |
Permit | WAN Interface IP |
The Hub listening port can be changed to any valid TCP/UDP Port number.
Configuration - Access Networks
For remote devices to make use of the Konnect Hub service, the user should define ‘Hub Managed Networks’ in the Konnect Hub Server. Each ‘Hub Managed Network’ maps a remote access network (on a client EdgeServer) to this Konnect Hub server.
This process is done in the Access Networks screen of the Configuration Wizard.
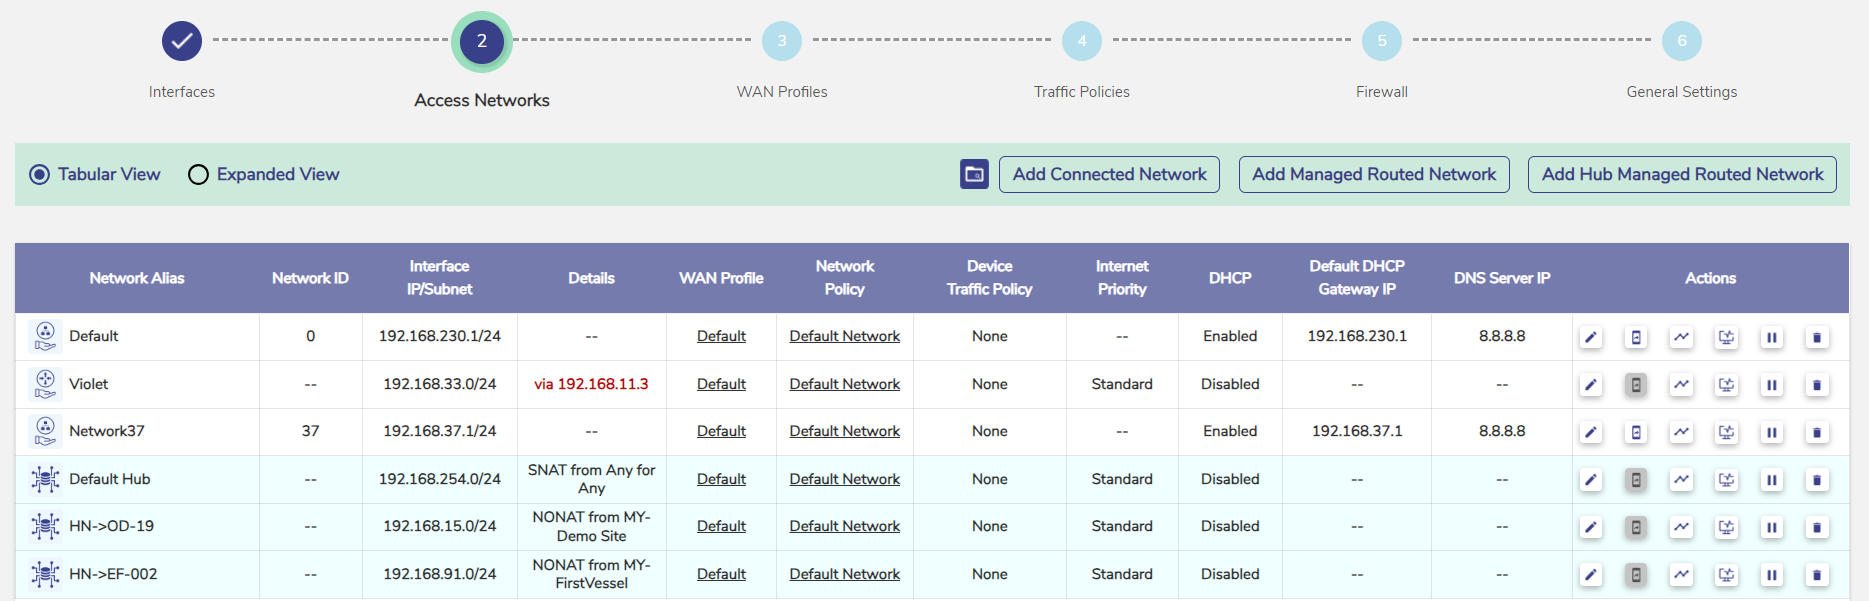
Access Networks
A ‘Hub Managed Network’ is indicated by the symbol
 .
.Click the Pencil icon to edit an existing Hub Managed Network.
Click the Delete icon to delete a Hub Managed Network.
Click Add Hub Managed Routed Network button to create a new Hub Managed Network.
Note: The users need Hub Enterprise License to create new Hub Managed Networks. The users with Hub Standard License cannot create new Hub Managed Networks and will have only the Default Hub Access Network available.
The Add Hub Managed Routed Network dialog box opens.
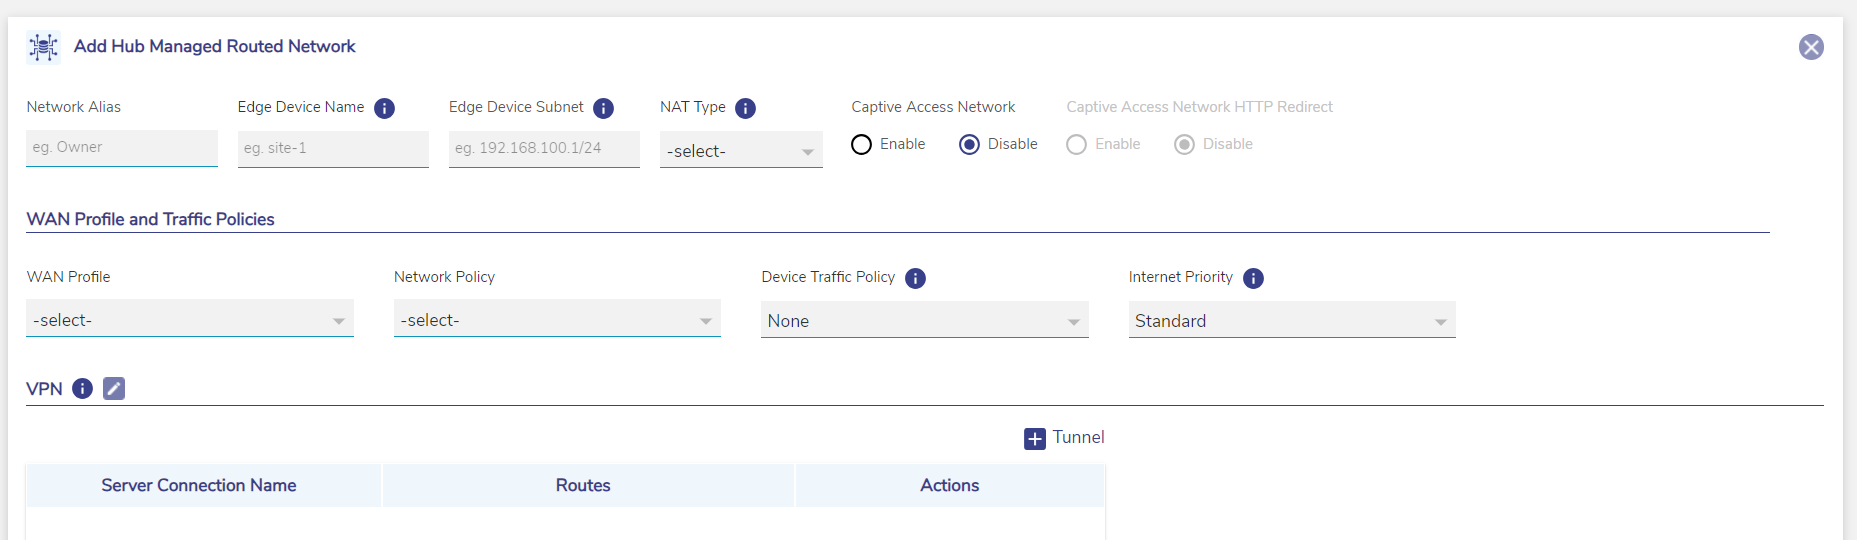
Add New Hub Managed Routed Network
Enter a name for the network in the Network Alias field.
Enter the name of the client EdgeServer for this network in the Edge Device Name field.
In the Edge Device Subnet field, enter the subnet of the access network on the client EdgeServer for this network that will be mapped to this Hub Managed Network.
The NAT Type field allows the user to choose between NONAT, SNAT & NETMAP.
If the NAT Type is SNAT or NETMAP, an additional field ‘Map To’ will be available. This is where the remote subnet will be mapped to in the Konnect Hub server.
For SNAT, the ‘Map To’ field can be a CIDR subnet, or just an IP
For NETMAP, the ‘Map To’ field must be a CIDR subnet, with the same prefix length as that of the ‘Edge Device Subnet’ field.
For ‘NAT Type’ of ‘SNAT’ and ‘NETMAP’, an additional ‘Inbound NAT/Route Table’ section will be available. This is where the user can define inbound rules.
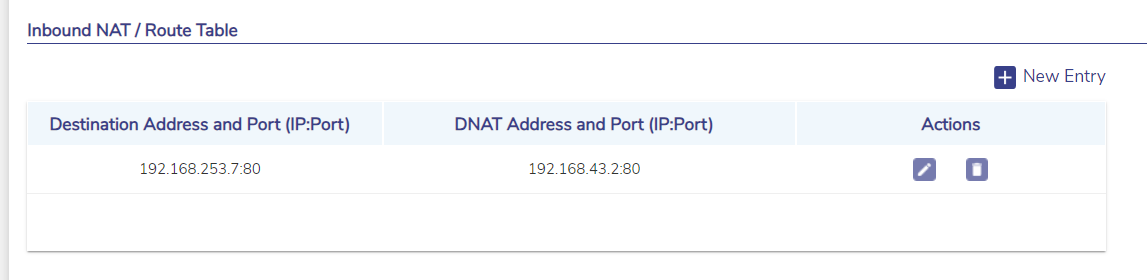
Inbound NAT / Route Table
Click + New Entry button to create a new entry.

Create New Inbound Rule
Enter the Destination Address & Port (which must be within the ‘Map To’ specified). This specifies the ‘IP:Port’ combination that will be mapped.
Enter the DNAT Address & Port (which must be within the ‘Edge Device Subnet’ specified). This specifies the target ‘IP:Port’ combination to which such connections will be DNAT-ed.
When the NAT Type is selected as SNAT, the user must enter both the Destination Address & Port and DNAT Address & Port.
When the NAT Type is selected as NETMAP, the user can only specify the Destination Address & Port. The system will automatically compute the ‘DNAT Address & Port’.
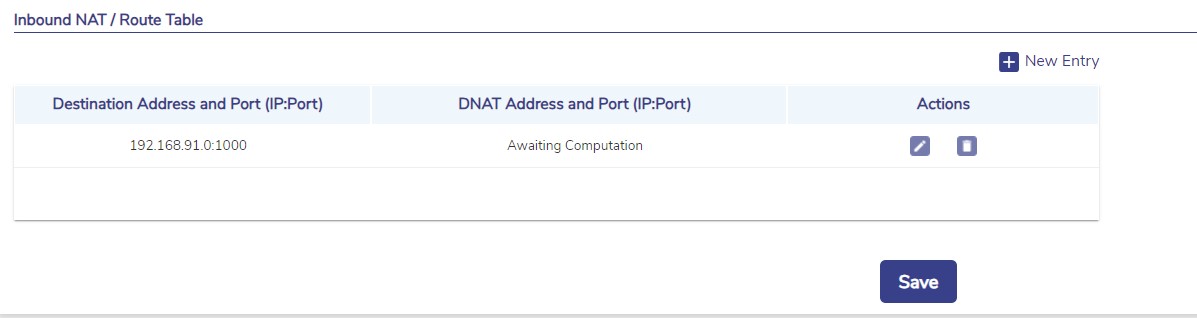
Create New Inbound Rule - NETMAP NAT Type
Click the Green tick icon to save the entry.
Actions:
Edit - Click the Pencil icon to edit the entries.
Delete - Click the Delete icon to delete any entry.
A similar screen is presented when the user edits any existing Hub Managed Network.
Select the required WAN Profile, Network Policy, Device Traffic Policy and Internet Priority under the WAN Profile and Traffic Policies section.
Konnect Hub Status
The user can view the Konnect Hub Status by following the below steps:
Click the
icon from the Edge Portal homepage.Select the Konnect Hub Status from the options shown.
Menu
The Konnect Hub Status screen opens as shown below.
-20240423-093927.png?inst-v=113b1a36-52f9-4344-a825-138b5322243c)
Konnect Hub Status
It shows the following information:
Edge - Name of the device
WAN Interface
Status
Speed
Flows
Last Observed
Actions
Click the KPI icon
 under the Action column to view the Performance Charts of the corresponding device.
The user can view the graphs of various performance measuring metrics such as Data Rate, Flows, Status and Latency plotted at various time instances.
-20240423-095911.png?inst-v=113b1a36-52f9-4344-a825-138b5322243c)
Performance Chart
Select the time period to analyze from the dropdown menu at the top right corner of the chart or use the Custom Search button to enter the time period manually.
Please refer the following page for Konnect Hub Use Cases: