How To Install EdgeVX on VirtualBox
Before you begin:
Currently, Kognitive Networks does not have an official installation file for VirtualBox. The EdgeVX can be installed within a VirtualBox environment, but there are a few steps the user will need to perform before you can start the installation process, such as obtaining the VM disk image and converting the image to the proper VDI format for VirtualBox.
Image Conversion Steps
Purchase the VX through your account manager. Once this process is completed, a license will be allocated to your organization within the Kognitive cloud platform.
Deploy the VX. Log into the cloud and locate the VX DID on the Inventory > Warehouse page.
Next, you will need to register the DID or Device Identifier. During this process, you may create a new site or deploy the VX to an existing site. This step is crucial for the licensing process.
Next, on the S/W Configuration page, click the CURRENT EOS tab and download the latest virtual image under the Virtual EOS tab.
Extract the Image. You will need to extract the disk image using your preferred tool. On Windows, you can use the built-in utilities or 7zip. Mac and Linux users can use the gzip utility.
Next, you will need to convert the disk image from the source type to VDI. On Windows, Linux, and MAC you can use the qemu-img package to convert the disk image. Windows users can obtain the installation package at https://cloudbase.it/qemu-img-windows/
After downloading the qemu-img package, open a command prompt and change to the installation directory.
cd c:\path\to\qemu-img\directory Next, you will need to run the conversion command, but you will also need to know the path of the source image. Once you have the path to the source format image, run the following command:
qemu-img convert -f qcow2 -O vdi source.qcow2 dest.vdiSave the location of the vdi image. You will need this later when building the VM using VirtualBox.
Now you can build the virtual machine using standard steps to build a VM.
VM Creation
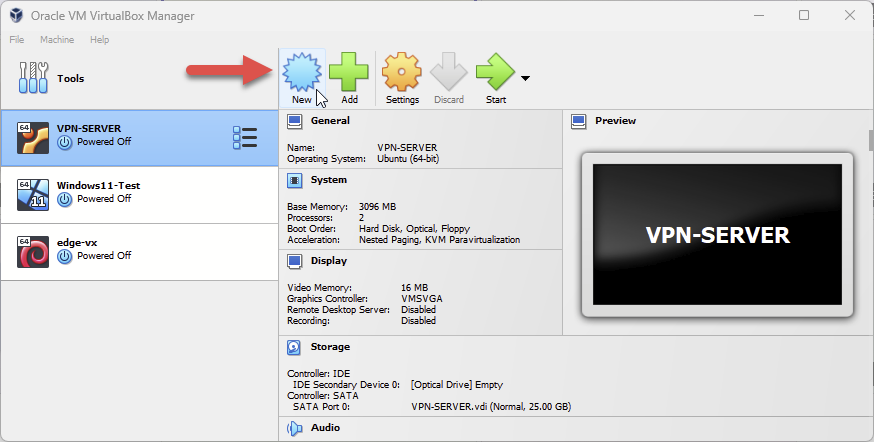
Start VirtualBox and click the blue button labeled New to create a new virtual machine.
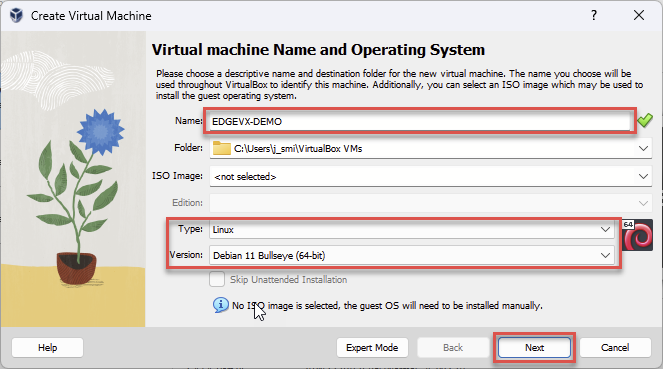
Give the VM a name and select the Type and Version for the operating system. Click Next to continue.
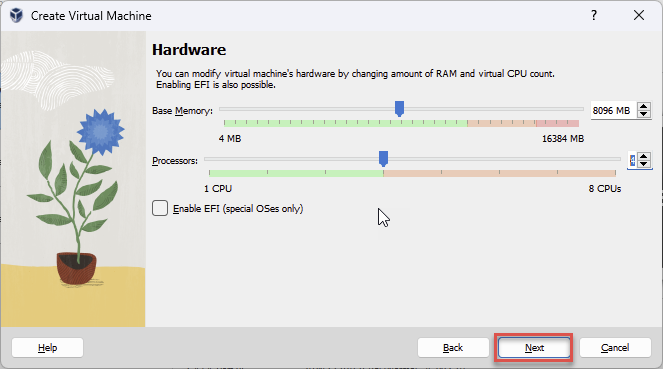
On the Hardware screen, set the Base Memory to 8192MB and Processors to 4. The EdgeVX requires a minimum of 4096MB and 2 vCPUs. Click Next to continue.
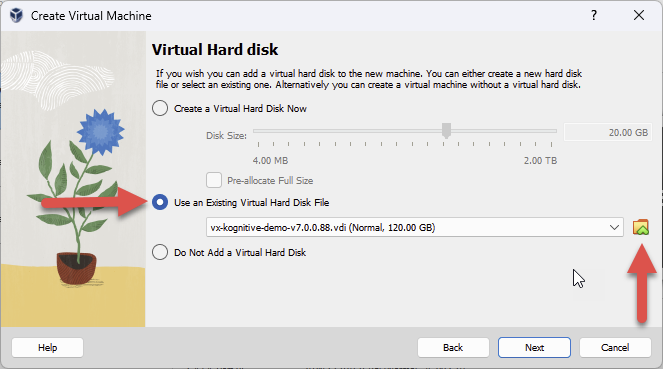
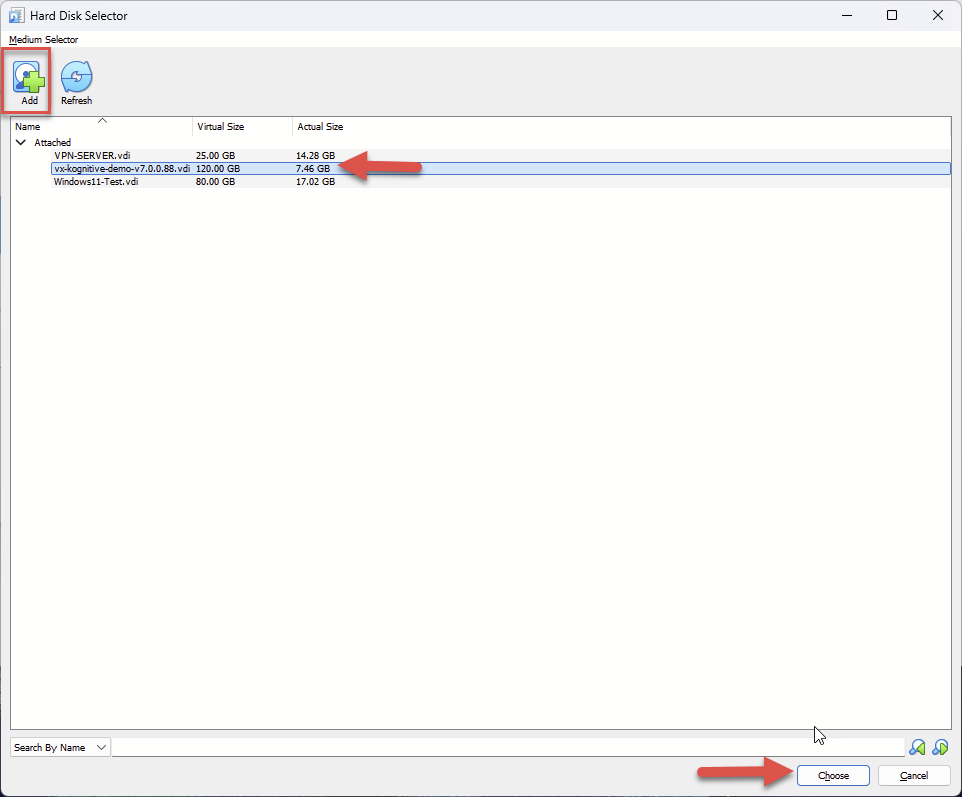
On the Virtual Hard disk screen, click Use an Existing Virtual Hard Disk File. Click the folder icon to open the Hard Disk Selector screen.
This would be a good time move the vdi image to the VM folder created for this VM. Generally this would be C:\Users\USER_NAME\Virtual Box VMs\Name of VM\ once you move the VDI image to this location. you can select it on the screen below. Click Choose to continue.
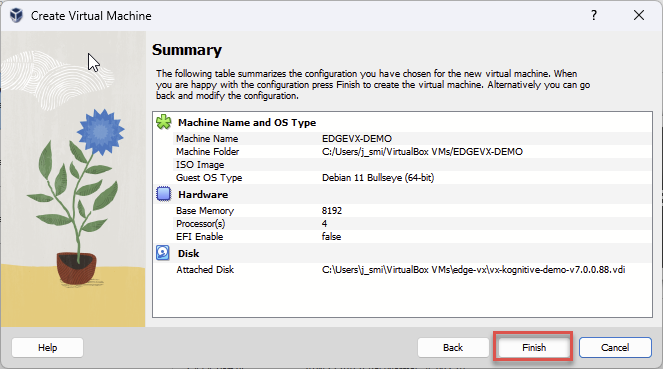
Click next on the Hard Drive selection screen to continue. On the Summary screen, review the settings to ensure everything is correct, and then click Finish. The VM will be built.
Click the orange Settings button to open the settings for newly created virtual machine. Navigate to the Network tab on the side panel.
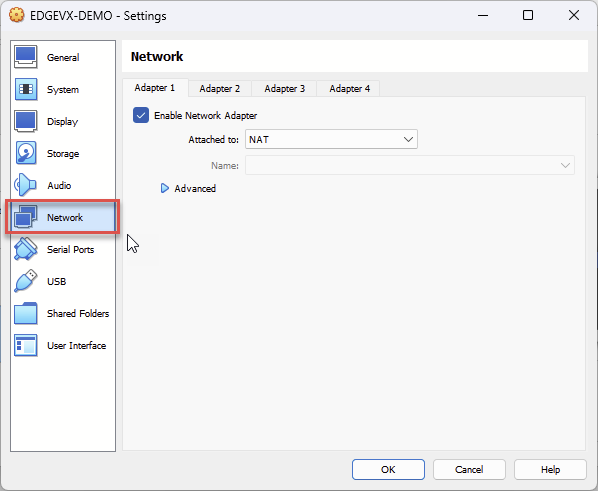
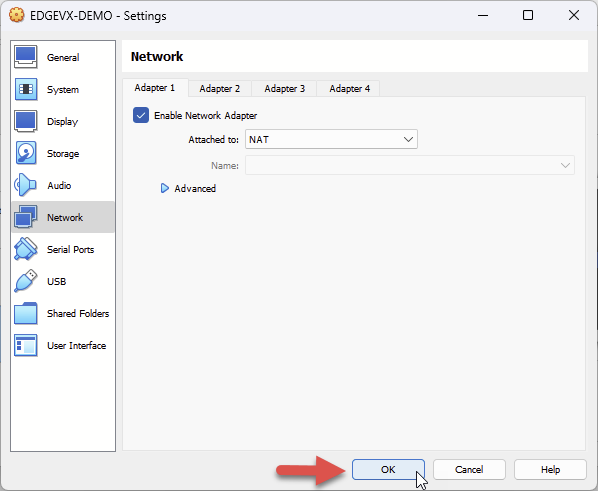
The EdgeVX requires at least three network interfaces. There should be at least one WAN, LAN, and Admin/Management interface. Make sure you select “Enable Network Adapter” for the first three network adapters. You will also need to make sure the “Attached to:” drop has the follow settings.
Adapter | Enable Network Adapter | Attacheed To: |
|---|---|---|
Adapter 1 | Yes | NAT |
Adapter 2 | Yes | Host-Only |
Adapter 3 | Yes | Not Attached |
Adapter 4 | No | Not Attached |
This configuration will allow the EdgeVX to reach the Internet and licensing server. You will also be able to route traffic from your machine to the EdgeVX through the LAN. If you need a different configuration, change the Network Adapter settings appropriately.
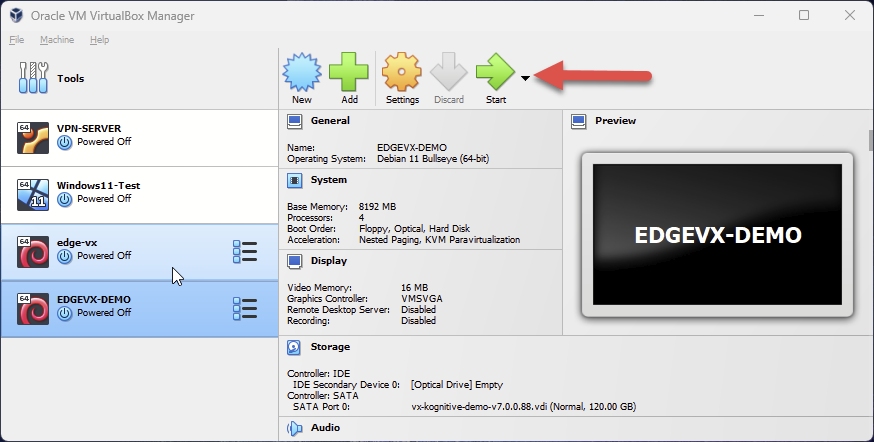
Start the Virtual Machine by clicking the green Start button.
Follow the EdgeVX Quick Start Guide to continue with the EdgeVX personalization and setup.
