
Guide: CAN Paywall Configuration
Paywall feature allows the MSP to sell Internet Plans to the captive web user. Please note that the Paywall feature is enabled at an organization level, thus when enabled the created Payment Captive Web Portal will be utilized for that organization and its users.
The Paywall feature allows Captive users (without any active plans) to buy the plan according to their need. To operate/setup a Paywall, the Plans and a Captive Portal Website are created within the Admin Portal (Plans and Portal Tab) by the Admin. When this is completed, the Organization’s Sites and Users will be associated with the Paywall.
The Paywall feature is available only for the Organizations that have enabled it. To enable the Paywall feature, please contact your respective System Administrator / Account Manager.
To setup CAN Paywall, the following steps defined here must be completed:
Setup Payment Gateway (Stripe):
The MSP works with Kognitive to setup banking, taxation, and revenue share
Define Subscriber Plans and Captive Web Portal for service:
Define Internet Plans for sale in the Admin Portal
Associate Plans with Subscriber Accounts and with Self Signup users
Subscriber Portal Configuration:
Setup Website Plans that are available for Subscribers
Setup Payment Gateway (Stripe)
The required Payment Gateway setup will be done by the Kognitive Operations Team. Users can start from the Admin Portal configurations.
Refer the following page for more information about this step:
Define Subscriber Plans and Captive Web Portal for Service - Admin Portal Configuration
The following configurations are done by the Administrator in the CAN Administration Portal.
1. Create the Required Plans in Plans Tab
Select the Add New Plan button from the Plans tab.
-20250115-085010.png?inst-v=360eba69-b4e7-4616-8c2d-65aa1289b23b)
Add New Plan
Enter the required plan details such as Plan Name, Quota and Duration.
In the Payable Plan field, select the Yes radio button. Only the plans configured as Payable plans can be used for the Paywall feature.
The Payable Plan and Price fields are only available for the Organizations that have enabled the Paywall feature. To enable the Paywall feature, please contact your respective Account Manager.
In the Price field, enter the required price of the plan.
If the plan should be free of cost, enter 0 in the Price field.
Paywall can offer both Free and Paid plans. Payable Plans that are created as free, can also be assigned to the users via the paywall feature.
But an user can have only one active plan at a time.
Click Submit button to save the plan.
Create all the required plans that should be displayed to the user as their options.
2. Creating the Plans in Portal Tab
Select the Portal tab from the Captive Access Network Homepage.
Select the Plans Page option from the side bar to create the Plans for the Paywall feature.
Set the Welcome Message. The welcome message will be displayed in the Available Plans tab for the Paywall enabled organizations.
Set the Post Login Page Message. This message will be displayed when the user successfully logs in into his account. The Admin can view the preview of the setup in real-time in the right panel.
%20(1)-20241211-115413-20241211-172126.png?inst-v=360eba69-b4e7-4616-8c2d-65aa1289b23b)
Plans Page
The Plan(s) - for Admin created Users section is used to add a set of Plans that can be associated with the Admin Created Users. This feature can only be used by Paywall enabled organizations. The Paywall feature enables the end user to buy the plans from this set according to their need. Once the plans are added, this can be associated with the user account when creating the user in the Users tab.
Enter a Name for the Paywall Plans.
In the Plan(s) field, select the plans that should be displayed to the end user as their options. Only the plans configured as Payable plans will be allowed to be added in this set of Plans.
When multiple plans are selected, all the selected plans will be shown to the user while logging in their User Portal. The user can then buy the plan of their choice.
The Plan(s) - for Self Sign Up Users section is used to add a set of Plans that can be associated with the Self Sign Up Users. This feature can only be used by Paywall enabled organizations. The Paywall feature enables the end user to buy the plans from this set according to their need. Once the plans are added, these plans will be associated with all the self sign up users automatically when they sign up.
In the Plan(s) field, select the plans that should be displayed to the self signed up user as their options to buy. Only the plans configured as Payable plans will be available in the dropdown menu.
When multiple plans are selected, all the selected plans will be shown to the end user while logging in and the user can buy the plan of their choice.
Click the Save button to save the configurations.
Please note that the Payable Plans created and Web Portal are associated with the Organization. Thus Sites and Users of the organization will be able to use the Paywall once this is configured.
3. Associating Plans with the User - Admin Created User
When creating a user account from the Users tab, select the name of the set of plans in the Select Plan field. This set of plans was created in the Plan(s) - for Admin created Users section of the Portal tab.
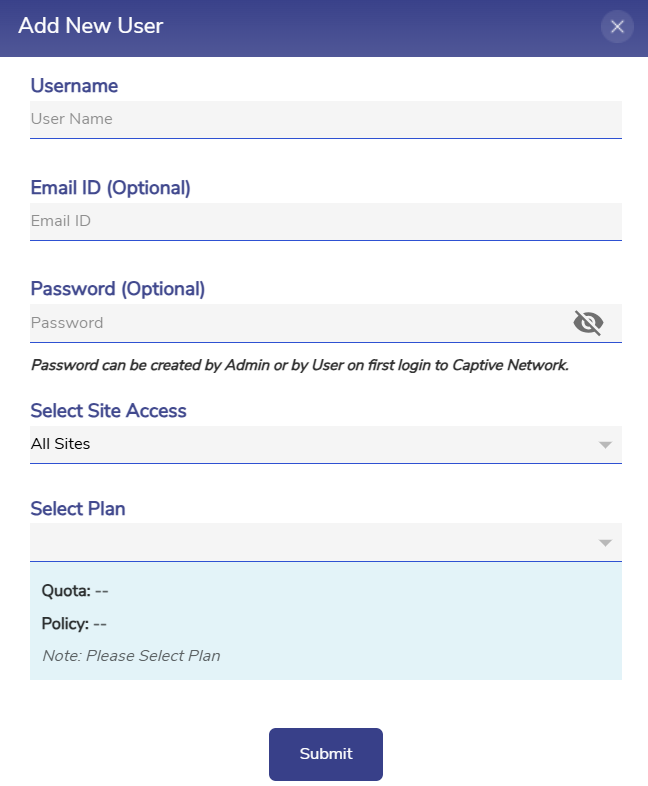
Add User
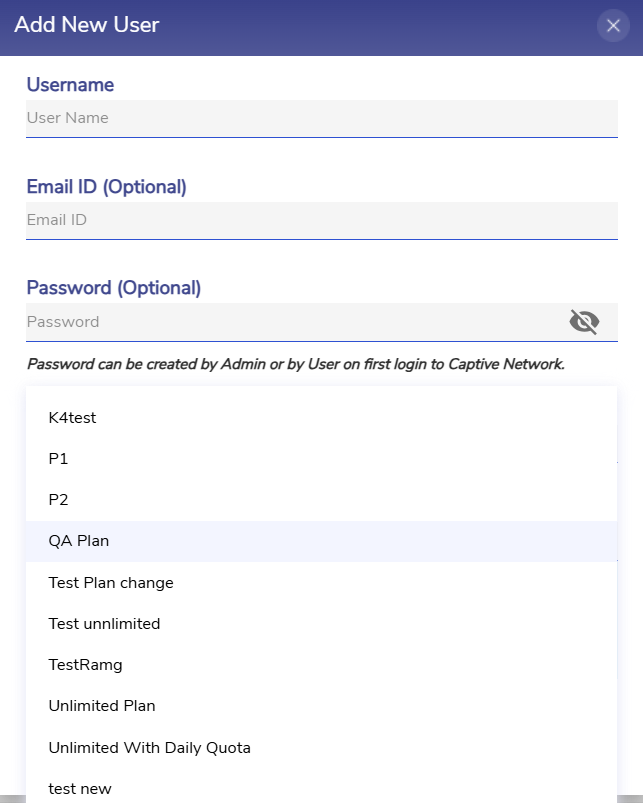
Select Plans
Click Submit to save the changes.
Now when the user logs into their account, they will have the option to buy any one of the plan from the selected set of Plans.
4. Associating Plans with the User - Self Sign Up User
When a self sign up user logs into their account, they will have the option to buy any one of the plans that the admin has already configured for Self sign up users.
Subscriber Portal Configuration
The end users that are associated with the Paywall Plans can log in to the User Portal and buy their plan as per their requirement.
Login to the User Portal with valid credentials. The user is welcomed with the following screen.
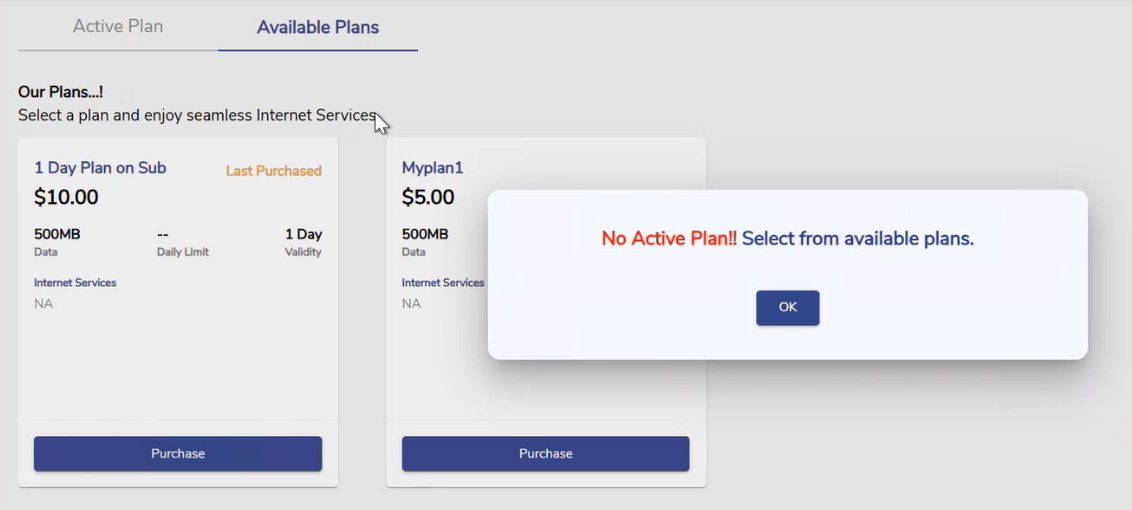
Available Plans
Select Ok button.
Select the Available Plans tab. Proceed to select the required plan by comparing the plan details.
Select the Purchase button of the required plan.
The user is redirected to the checkout screen.
Follow the on screen instructions to and complete the payment.
-20241119-144755.png?inst-v=360eba69-b4e7-4616-8c2d-65aa1289b23b)
Checkout
When the payment is successfully completed, the following success message is shown to the user.

Payment Success
The selected plan can be seen under the Active Plans tab.
The user will not be allowed to purchase another plan when the current plan is active.
The admin can view the log of all purchase events done by the users.
Select the Events tab from the Homepage of the Admin Portal.
Select the Purchase tab.
Select the Custom Search radio button and select the required time period.
The table shows all the Purchase Events occurred during the selected time period.
-20241213-102856.png?inst-v=360eba69-b4e7-4616-8c2d-65aa1289b23b)
Purchase Tab
Refunds
The admin can raise refund requests for the user transactions if needed. The user must provide the details of the their transaction to the admin to raise the refund request.
The admin must follow the below steps to request a refund:
Collect the payment details from the end user.
Open the Admin Portal and select the Users tab.
Find the required user using the username.
-20241219-100256.png?inst-v=360eba69-b4e7-4616-8c2d-65aa1289b23b)
User Tab - Admin Portal
Select the Actions
 icon under the Actions column. The Actions dialog box opens.
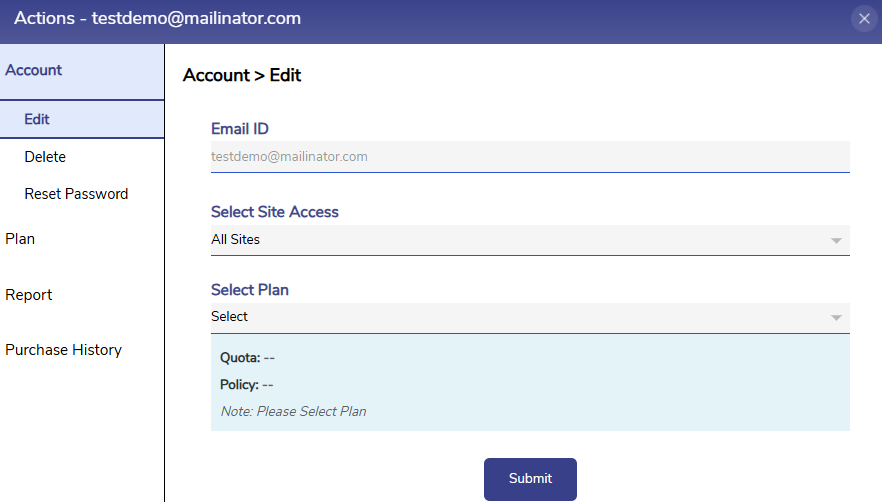
Actions Dialog Box
Select the Purchase History option from the side bar.
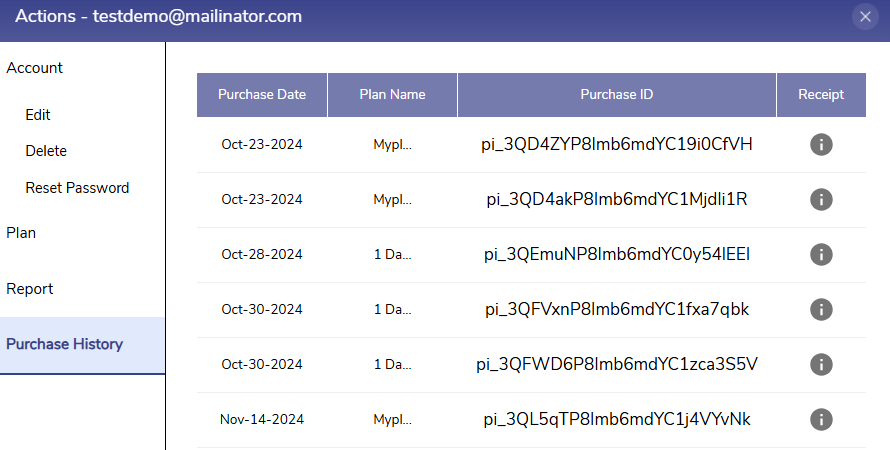
Purchase History
Find the Purchase ID of the payment transaction that needs to be refunded from the Purchase ID column.
The admin can initiate the refund from the corresponding Stripe account using the Purchase ID and the refund will be credited to the payment source account of the end user.