Guide: Paywall - Payment Gateway (Stripe) Configurations
The first step in configuring the Paywall is to create an onboarding link for enrolling MSPs. This link is generated by the Kognitive Operations Team using an admin account in Stripe. The onboarding link can either be shared with MSPs for self-enrollment or used by Kognitive to onboard them manually by entering their details.
These details include business information and bank account details required for payouts. Once the client accounts are created, the associated Stripe account ID must be stored in the database, which can be achieved via an API.
In this document, the personnel from the Operations Team responsible for this configuration will be referred to as the “Admin”.
Let us take a look at the steps in detail:
Open the Stripe login page and login using the admin account credentials.
Currently, we support this exclusively through Kognitive Stripe accounts and do not support integration with MSP Stripe accounts.
-20241212-112907.png?inst-v=360eba69-b4e7-4616-8c2d-65aa1289b23b)
Stripe Login Page
The admin is directed to the Stripe Dashboard screen. Click the Connect button from the side bar.
-20241212-112806.png?inst-v=360eba69-b4e7-4616-8c2d-65aa1289b23b)
Connect Screen
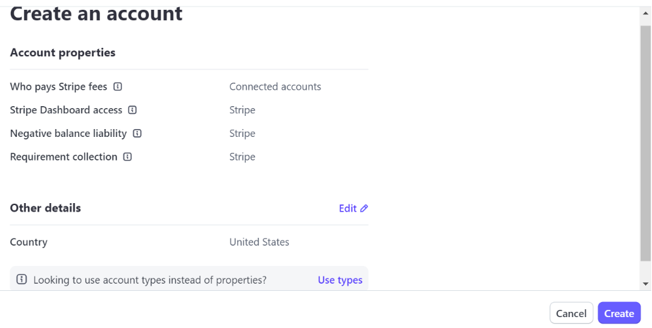
Click the Create button at the top right corner of the table. The Create an account dialog box opens and shows the Account Properties.

Create an account
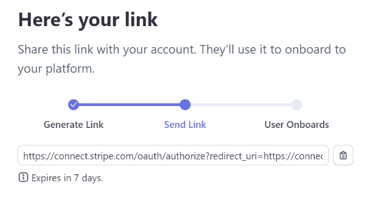
Click the Create button. An one time onboarding link will be generated. This link should be used to fill the details of the MSPs.

Onboarding Link Generation
Copy the link and share it with the respective MSPs or the admin can use the link to onboard the MSPs manually.
After the MSPs complete their enrollment using the link, the admin can view the newly created account on the Stripe Connect page.
Login to the Stripe admin account and click the Connected accounts option from the side bar to view the newly created accounts.
Click the account to view more details.
-20241212-131926.png?inst-v=360eba69-b4e7-4616-8c2d-65aa1289b23b)
Connected accounts
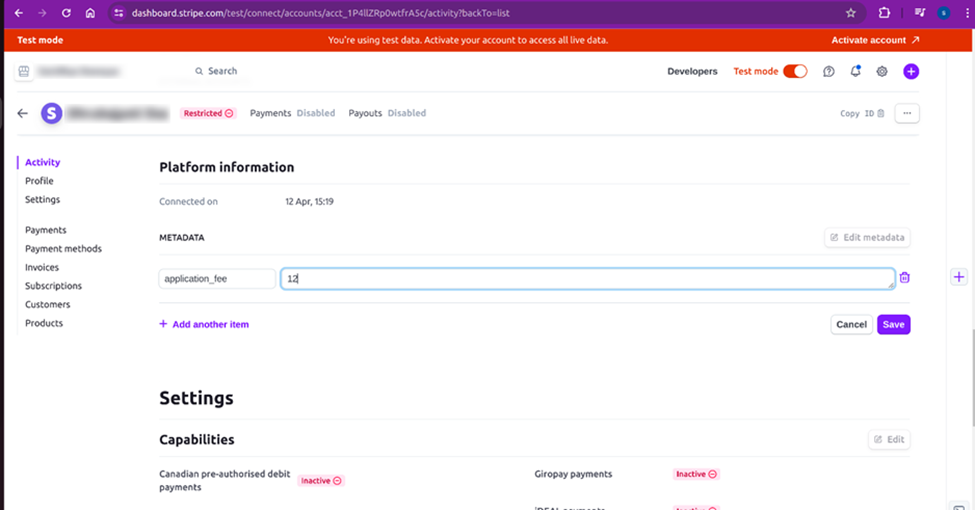
Click on the Copy ID button in the top right corner and store it in the CAN Portal database corresponding to its MSP. Also click on Edit Metadata button and store the application_fee for that MSP.
Click the Save button to save the changes.

Platform Information
Branding and Member with View Only Access
Stripe gives admin the ability to add members to a particular account and also provides few branding customization options which are visible on payment checkout page as well as in receipts.
Admin switches to newly created connected account using the dropdown menu at the top left corner.
-20241212-132356.png?inst-v=360eba69-b4e7-4616-8c2d-65aa1289b23b)
Connected accounts
Click the Settings icon at the top right corner and select the Team and security option.
-20241212-132508.png?inst-v=360eba69-b4e7-4616-8c2d-65aa1289b23b)
Settings
Stripe Team and security settings page opens. Clicks on + New member button.
-20241212-132720.png?inst-v=360eba69-b4e7-4616-8c2d-65aa1289b23b)
Team and security
The Invite team members tab opens. Enter the email addresses of the MSP Owner to onboard, select the role "View Only" and click on Send invite button.

Invite team members
Admin can select External payout accounts and scheduling options from account setting dropdown on this page and can configure payout schedule as per admin’s needs.
-20241212-135256.png?inst-v=360eba69-b4e7-4616-8c2d-65aa1289b23b)
Settings - Bank accounts
Admin can select branding option from account setting dropdown on this page and can configure branding as per MSP. Admin can add logo, change accent and brand colors and can also add custom domain for their branding URL instead of Stripe URL at checkout page.
-20241212-135546.png?inst-v=360eba69-b4e7-4616-8c2d-65aa1289b23b)
Settings - Branding
