
Config Backup / Config Upload
The EdgeOS system configuration includes all essential settings, such as interface definitions, access networks, policies, rules, and device configurations. A saved configuration can serve multiple purposes:
Backup – Restore a system to a previously known, stable state.
Clone – Transfer an existing configuration to new hardware, useful in cases of RMA (Return Merchandise Authorization) or hardware failure.
Template – Deploy a standardized configuration across multiple EdgeOS installations, ensuring consistency within a fleet of devices.
Configuration Compatibility and Use
To ensure a configuration loads correctly, the receiving device must meet strict compatibility conditions in terms of software version, product type, and license tier.
Key Compatibility Rules
Software Version Compatibility - Configuration files are forward-compatible only. This means they can only be loaded onto devices running the same or a newer version of EdgeOS than the one they were created on. Downgrading is not supported.
Product-Specific Configuration - Configuration files are product-type-specific and can only be applied to the same product model. They are not cross-compatible with different product or device types. The device type can be identified by the first two letters of the Device ID (DID).
License Tier Matching - The receiving device must have the same license tier as the device from which the configuration was saved.
If the above compatibility conditions are not met, the configuration upload will fail.
Configuration Backup and Upload
The device Configuration, or 'Config', can be saved or applied/restored from the EdgeOS /Web portal from this section of the Configuration Wizard:
Config Backup/ Config Upload
Creating new Configuration Backup
To initiate a new Configuration backup, perform the following steps.
Steps
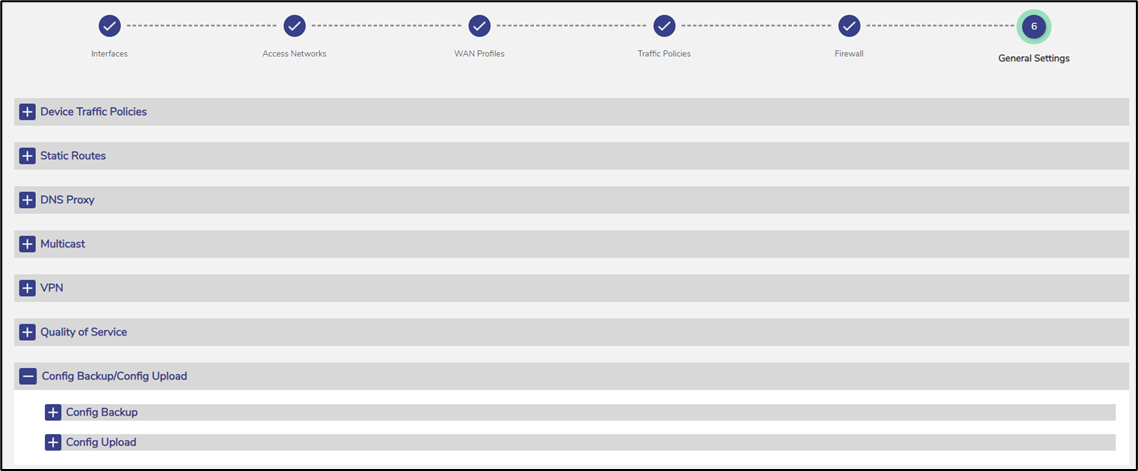
Click Next icon on the Firewall page or click General Settings. The General Settings page appears.
Click Config Backup/Config Upload. The Config Backup/Config Upload section becomes available, see Figure Config Backup/Config Upload.
Click Config Backup. The Available Configuration Backups table becomes available. This table has listing of the prior backups that are available in the system. If there are no backups yet, this table will be empty. Below the table there is a subsection, Initiate New Configuration Backup, see Figure Initiate New Configuration Backup.
Select Configuration Backup Type. Configurations are grouped as below. see Figure Select Configuration Backup Type.
All Configuration
Interfaces - All the LAN/WAN interface configuration and WAN profiles
Traffic Policies - All traffic policies, include Device policies.
Networks - All Access Network configuration, including DHCP reservation.
Firewall Rules
After selecting the Configuration which needs to be backed up, user can add comments to identify the backup. This is an optional step.
Click on Start Backup button.
Once the backup is ready, it will show in the available Configuration backups along with the backup type, user login through which the backup has been created and the time of backup creation, see Figure Available Config Backups. By clicking the download icon next to the Configuration back, the saved configuration can be transferred/saved to the local device.

Initiate New Configuration Backup

Select Configuration Backup Type
-20250220-121757.png?inst-v=cd2204a7-e381-44f1-b4d0-400520472550)
Available Config Backups
Uploading Configuration from Backup
To initiate a Configuration upload, perform the following steps.
Steps
Click Next on the Firewall page or click General Settings. The General Settings page appears.
Click Config Backup/Config Upload. The Config Backup/Config Upload section becomes available, see Figure Config Backup/Config Upload.
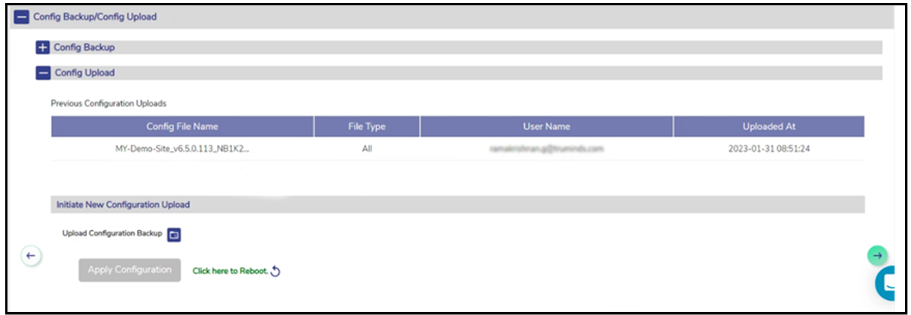
Click Config Upload. The Previous Configuration Uploads table becomes available. This table has listing of the prior uploads that have been done on the system. If there are no uploads, this table will be empty. Below the table there is a subsection, Initiate New Configuration Upload, see Figure Initiate New Configuration Upload.
To initiate an upload, click on the
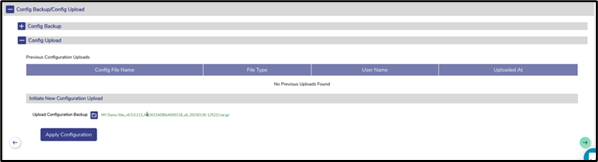
 icon under the Initiate New Configuration Upload heading. Select a configuration from the list of backed up configurations. The selected configuration will appear next to the upload icon, see Figure Upload Configuration.
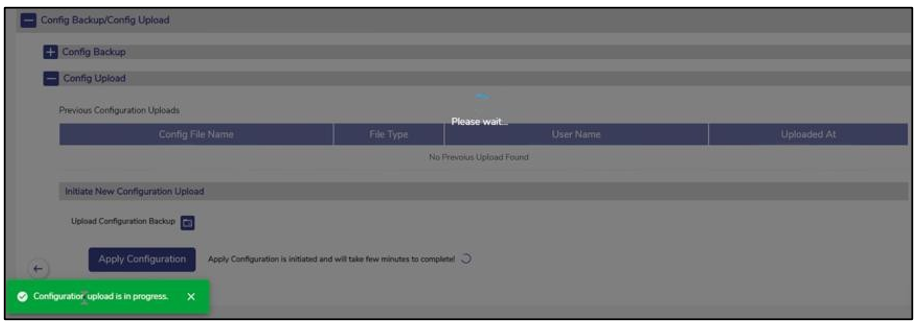
Click Apply Configuration button. The configuration upload will be initiated and will take a few minutes, see Figure Apply Configuration Once configuration is applied, the services will be restarted and corresponding message will be visible, see Figure Apply Configuration Intermediate Step. The uploaded configuration will also be visible in the Uploads table. The last step will be to reboot the server to apply the configuration, see Figure Apply Configuration Reboot Server.
Click the Reboot icon. A confirmation Pop-up will be available, see Figure Reboot Confirmation. Click Confirm to reboot the server. Once the server comes up, the configuration will be uploaded on the system.
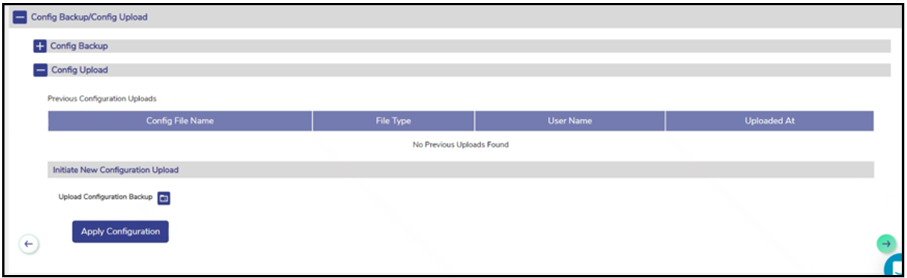
Initiate New Configuration Upload
Upload Configuration
Apply Configuration

Apply Configuration Intermediate Step
Apply Configuration Reboot Server
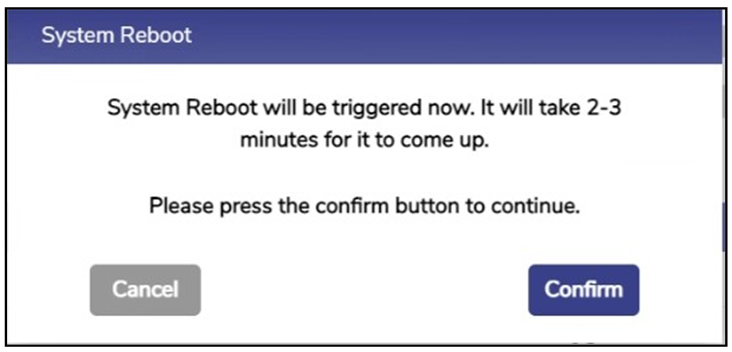
Reboot Confirmation
Please note that the Source and Target devices have the same License Type for a successful configuration restore. If the license types do not match, the Configuration Upload will fail, displaying the following error message on the screen.
%20(1)-20250220-121337.png?inst-v=cd2204a7-e381-44f1-b4d0-400520472550)
License Type Mismatch
The failed Configuration upload will be listed under the Previous Configuration Uploads table with the Failure Reason.
%20(1)-20250220-122248.png?inst-v=cd2204a7-e381-44f1-b4d0-400520472550)
Previous Configuration Uploads