
Agent Config
Click the Agent Config tab. This tab can be used to configure the agent and associate them with the required hub.
The Agent Config tab opens as shown below.
-20250228-172406.png?inst-v=f7973c5e-4720-4374-88d5-68e50f2b6491)
Agent Config
Service / Hub Config
Click the Service / Hub Config button to configure the WAN Profile and set the WAN balancer for the Service or the Hub.
-20250228-172822.png?inst-v=f7973c5e-4720-4374-88d5-68e50f2b6491)
Service / Hub Config
Agent WAN
The Agent WAN tab from the side menu bar will be selected by default. This is a global configuration. The created WAN Profiles can be used across the selected organization.
Select the required Organization.
-20250228-173230.png?inst-v=f7973c5e-4720-4374-88d5-68e50f2b6491)
Agent WAN Profile
Select any existing WAN Profile from the dropdown menu or create a new WAN Profile using the below options.
Enter a name for the WAN Profile in the Agent WAN Profile field.
Enter the WAN Name.
Select the WAN Type from the dropdown menu.
Select the Interface.
Enter the IP.
Enter the Gateway.
Enter the required VID.
Agent WAN Balancer
Select the Agent WAN Balancer option from the side menu bar.
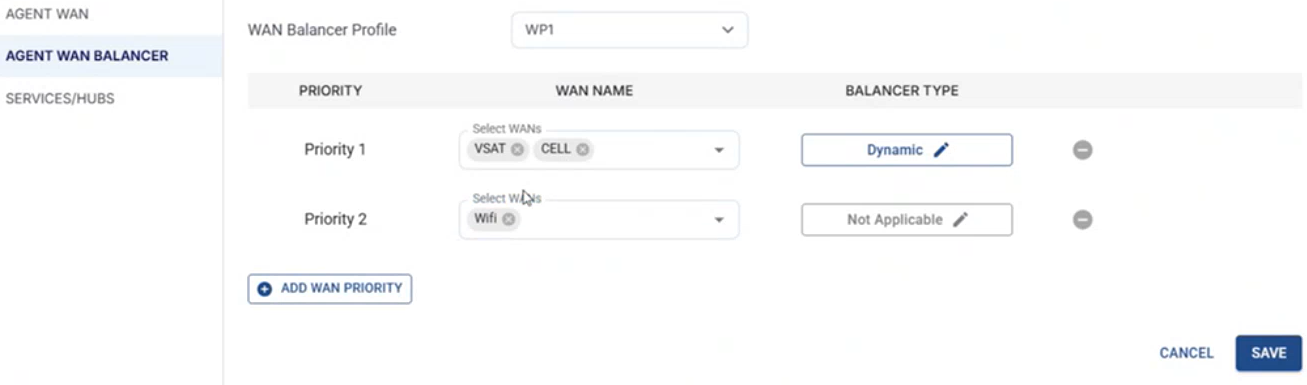
Agent WAN Balancer
Select the required WAN Profile in the WAN Balancer Profile field.
Select the Priority order of the WANs.
Click the Save button to save the changes.
Services/Hubs
Select the Service/Hubs option from the side menu bar to view all the services and hubs associated with the selected organization.
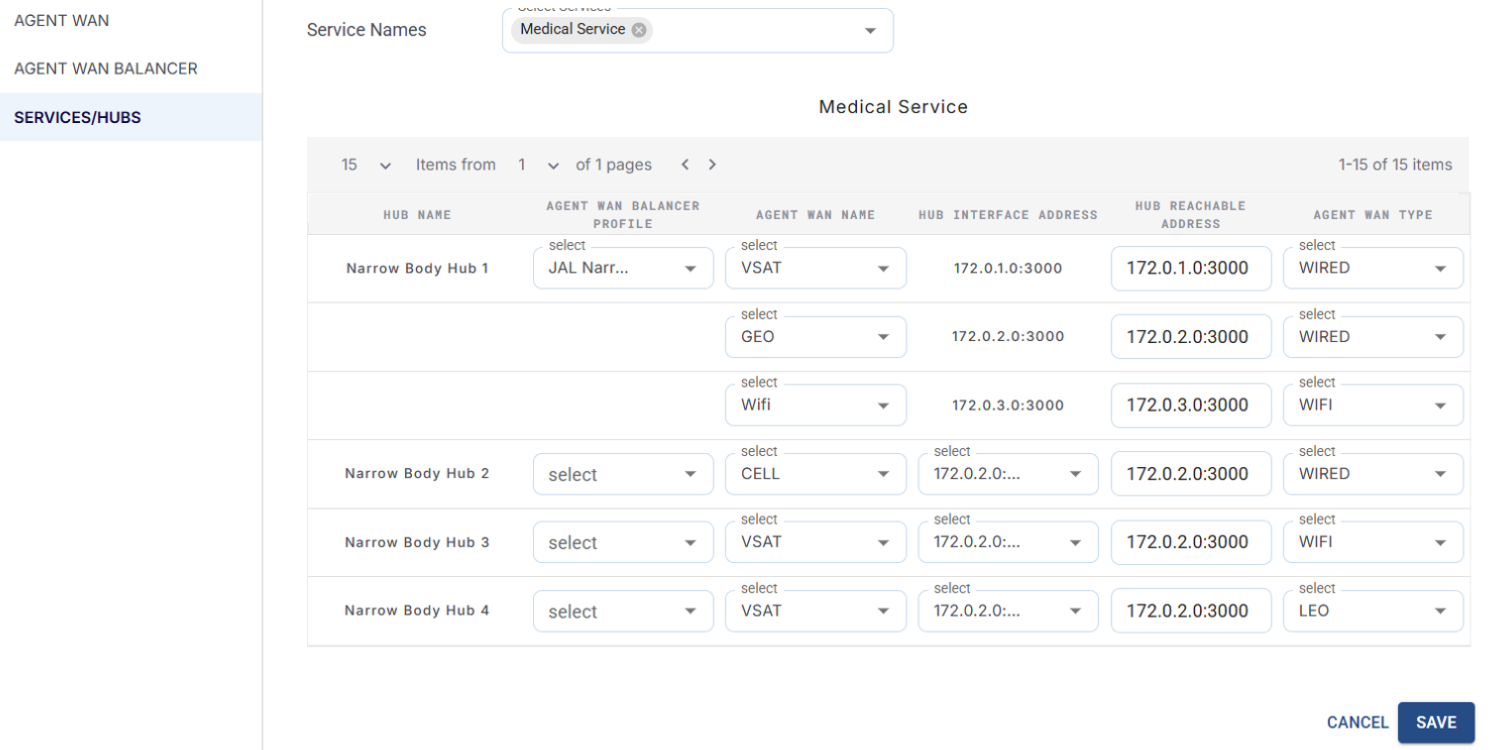
Service / Hubs
The data in this screen will be updated every five minutes by the system.
Enter the required Hub Reachable Address and Port combination for the Agent Wan Balancer Profiles.
Create Agent
Select the Create Agent button to create the agent.
Access Network
The Access Network option will be selected by default.
-20250228-180431.png?inst-v=f7973c5e-4720-4374-88d5-68e50f2b6491)
Select the required Organization.
Enter the Agent ID.
Enter the Agent Name.
Enter the VLAN Name.
Select the Interface.
Enter the VID.
Enter the IP.
Select the Add VLAN button to add a new VLAN.
Select the Save button to save the changes.
Agent Config Summary
Select the Agent Config Summary option from the side menu bar to view the list of Hubs and VLANS associated with the selected Organization.
-20250228-181158.png?inst-v=f7973c5e-4720-4374-88d5-68e50f2b6491)
Agent Config Summary