
Account Management Tab
Accounts Table
By default, the Account Management tab will be selected.
After selecting the Organization, the Accounts table displays the current list of user accounts that are associated with the selected organization or sub-organization.
The table shows the below information:
First Name – First name of the user.
Last Name – Last name of the user.
Email Address – Email Address of the user.
Phone – Phone number of the user.
Access Privileges – Types of access privileges given to the user.
Last Login – Date and time of last login.
Status – Status of the user account.
Confirmed – If the user account is properly registered and functioning, the status will show as Confirmed.
Disabled – If the user account is disabled, the status will show as Disabled.
Resend Invite – If user the has not yet registered using the already sent invite, the status will show as Resend Invite. Click the Resend Invite button to send the invite to the user again.
Locked – If the user has exceeded the maximum attempts for failed login, their account will be locked for 10 minutes, and the status will show as Locked. The user can have a maximum of 5 failed login attempts before their account is locked.
Organization – Primary Organization that the user account belongs to.
-20240621-084854.png?inst-v=a339970e-7834-48cf-82e2-68ab689b0480)
Accounts Table
The SEARCH field can be used to search for the user account based on the First Name/Last Name/Email Address /Phone/Organization. The accounts table gets filtered according to the search and displays the search results.
Click the Download button to download the user account details in CSV format.
Action buttons
Set New Password
Click the Lock
 icon from the Actions column to set a new password for the user.
Enter the New Password.
Re-enter the password to confirm it.
Click Save.

Set New Password
Edit Access Privileges
Click the Edit
 icon from the Actions column to edit the access privileges of the user.
The Update Access Privileges dialog box opens.
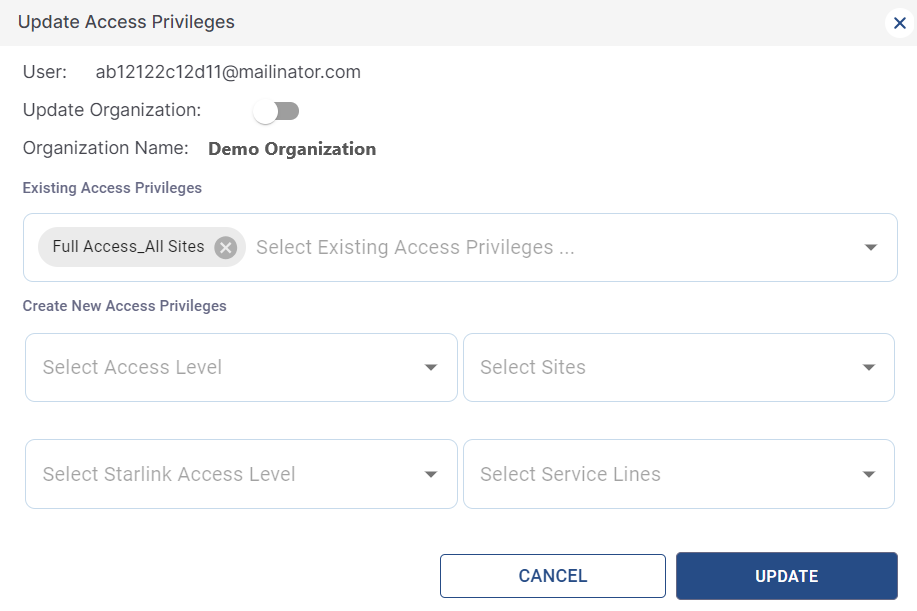
Update Access Privileges
It shows the Username and Primary Organization name of the user.
Click the toggle button in the Update Organization field to change the Primary organization of the user.
The Update Organization option will be available only for the admin account of the Primary organization. It will not be available for the admin of Secondary organization.
Updating the organization removes the existing user privileges. Click Yes in the pop-up to confirm changing the Primary organization.
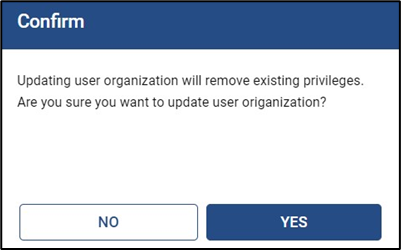
Confirm Updating Organization
Select the new Organization name from the dropdown menu.
Check the Existing Access Privileges.
Select the New Access Privileges from the dropdown menu.
In the Select Sites field, select the sites that the user account needs access to.
Select Starlink Access Level from the dropdown menu if needed.
Select Service Lines from the dropdown menu.
Click the UPDATE button to save the changes.
The Primary Organization of the user will be updated successfully. The user will receive the below email to their registered email address.
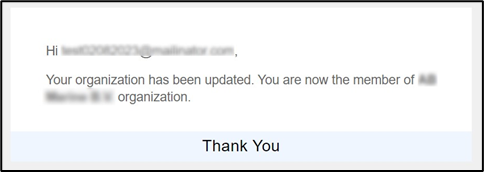
Organization Update Successful
Click CANCEL button to cancel the operation.
Delete User
Click Delete
 icon from the Actions column to delete the user.
Click Yes in the pop-up to confirm deleting the user.
Deleting a user from the Primary organization, deletes the user from their Secondary organization as well.
But deleting a user from the Secondary organization, deletes the user only from the Secondary organization. The account will still remain active on the Primary organization.
Enable / Disable User
Click
 toggle icon from the Actions column to disable the user.
Click Yes in the pop-up to confirm disabling the user.
Invite User
Click INVITE USER button to create a new user account and invite them.
The Invite User dialog box opens.
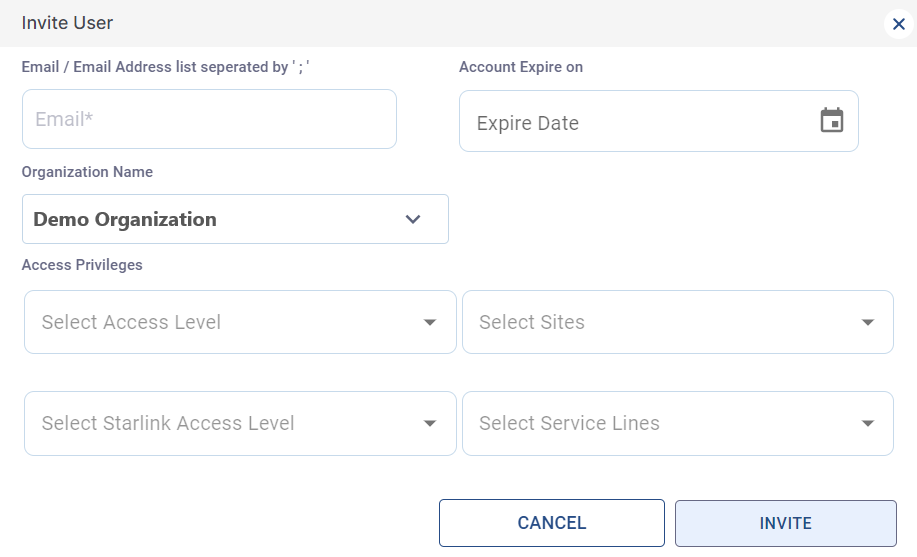
Invite User
Enter the Email Address. The admin can enter up to 30 Email IDs and create multiple accounts at once. The Email IDs should be separated by “;”.
Select the Account Expire On from the date picker. This is an optional field.
In the Organization Name field, select the required organization from the dropdown menu. This Organization becomes the Primary organization of the user account.
In the Select Access Level field under the Access Privileges section, select the type of Access Privilege that the user requires. Please refer the Access Privileges page to know more about the various types of Access Privileges available to the user.
In the Select Sites field, select the sites that the user needs access to from the drop down menu. Select All Sites to give the user access to all the sites under the selected organization.
Starlink Access Privileges
Select Starlink Access Level - This field is used to assign Starlink related access privileges to the user.
Select the required Starlink Access privilege type from the dropdown menu. The Access Privileges available to the user are:
Starlink Access
Starlink Full Access
Starlink Admin Access
Please refer the Starlink Access Privileges section in Access Privileges page to know more about the various types of Starlink Access Privileges available to the user.
In the Select Service Lines field, select the starlink service lines that the user needs access to from the drop down menu. Select All Service Lines to give the user access to all the service lines under the selected organization.
Register User Account
Click INVITE button to send the account registration invite to the user.
The user will receive the following registration invite email from Accounts.
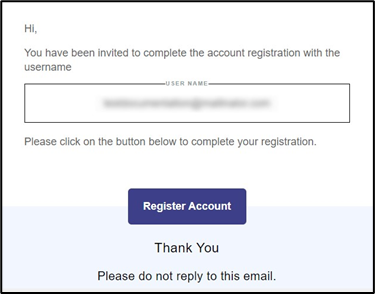
Register Account Email
Click on Register Account button at the bottom of the email body. The user is directed to the Account Registration Page.
Enter the required details in the form.
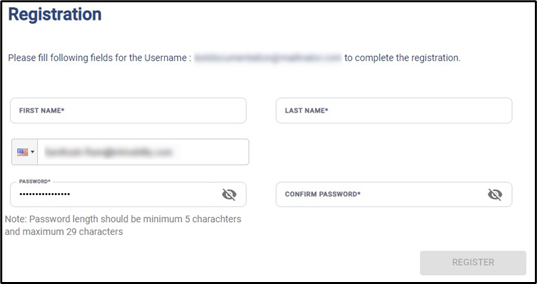
Registration Page
Click REGISTER button.
The account will be activated successfully. At this point the user can access the Edge OS Portal, Edge Mobile App, Konnect Application and Kognitive Cloud.
Once the account is successfully registered, the accounts table displays the user details as shown in the below figure.
Accounts Table
How To Add a Single User Account to Two Different Organizations
For any new account created in the Kognitive Cloud, the organization associated with it becomes its Primary Organization. If needed, this account can also be added to another organization and given access to the sites under the second organization. When an account is added to a second organization, this new organization becomes the Secondary Organization for the account. Similarly, one single account can be added to multiple organizations.
To add an account to a Secondary Organization, follow the below steps:
Follow the steps given in section Invite User to create an account and add it to a Primary Organization.
Click INVITE USER button from the Account Management page.
Enter the Email Address. The admin can enter up to 30 Email IDs and add multiple accounts at once. The Email IDs should be separated by “;”.
Select the Expire date from the date picker. This is an optional field.
In the Organization Name field, select the required organization from the dropdown menu. The selected organization becomes the Secondary organization for the user.
In the Select Template field, select the type of Access Privilege that the user requires. Please refer the Access Privileges page to know more about the various types of Access Privileges available to the user.
In the Select Resources field, select the sites that the user needs access to from the drop down menu. Select All Sites to give the user access to all the sites under the selected organization.
Click INVITE button.
The user will receive the following email from Accounts:
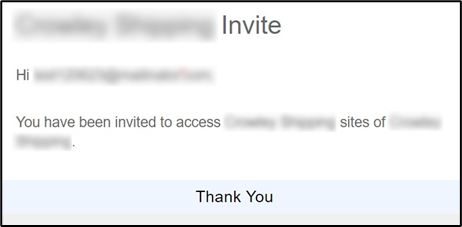
Secondary Organization Invite Email
The user will not receive any registration link like they did in the first time because the account already exists in the system. They will be added to the Secondary Organization directly.
Once the account is successfully added, the accounts table displays the user details as shown in the below figure:
Accounts Table
The User account will be shown in the accounts table when viewing from both the Primary & Secondary Organizations. But the Organization column will show the name of the Primary Organization only. This is done so as to distinguish between the Primary and Secondary organizations.
Click the Email address of the user from the accounts table to open the Profile screen.
It shows the below information:
First Name - First name of the user
Last Name – Last name of the user
User Name (Email) – Email Address of the user
Account Status – Status of the user account
Distribution Partner – Name of Primary Organization of the user
Permissions – Type of access privilege given for the Primary Organization
Group Details – Details of the Secondary Organization
Group – Name of Secondary Organization
Permissions - Type of access privilege given for the Secondary Organization
Click Edit to update the First Name, Last Name and Phone number of the user.
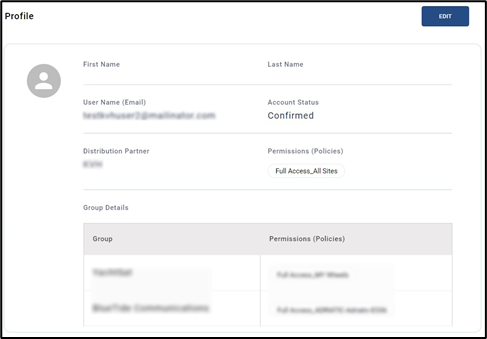
Profile
When an account is added to multiple organizations, the user can see the sites of Primary and Secondary Organizations in their Dashboard depending upon the access given to the account. They can view the Dashboards, Alerts, Map, Reports, Tickets, Software and Inventory screens of both Primary and Secondary Organizations in their account. But they cannot manage or access the Accounts and Warehouse operations (under Inventory screen) for the Secondary Organization.
Edit Organization (Create / Modify / Delete Organization)
Click the EDIT ORGANIZATION button. The following dialog box opens.
-20240621-091335.png?inst-v=a339970e-7834-48cf-82e2-68ab689b0480)
Edit Organization
The user can perform three operation using this dialog box. The operations are - Create, Modify and Delete Organization.
Create
The Create tab is selected by default.
Create Organization
Enter the Organization Name.
Select the Parent Organization from the dropdown menu.
Click Create button to create the organization.
Click the Clear button to clear both the above fields.
Modify
Select the Modify tab to edit the organizations.
-20240621-091633.png?inst-v=a339970e-7834-48cf-82e2-68ab689b0480)
Modify Organization
Select the Organization that the user needs to edit from the dropdown menu.
Enter the New Organization Name.
Click Modify button to save the changes.
Click Cancel button to cancel the operation.
Delete
Select the Delete tab to delete the organizations.
-20240621-091813.png?inst-v=a339970e-7834-48cf-82e2-68ab689b0480)
Delete Organization
Select the Organization that the user needs to delete from the dropdown menu.
Click Delete button to delete the organization.
Click Cancel button to cancel the operation.
Please refer the below page for more information about Access Privileges.