
Guide: Traffic Policy Use Cases
Keywords: EdgeOS, Traffic Policy
1 What are Traffic Policies
Traffic Policies allow the user to control the upload and download speed for networks and hosts connected to the Edge appliance. Users can also control how much data can be uploaded or downloaded (Quota) on different WAN technologies and how often the data cap or quota is refreshed (1hr - 24hr) by setting Traffic Policies.
Within a Traffic Policy, users can also define an Application Policy Profile. These policies control what applications are allowed and denied. There are over 500 different applications, covering Advertisements and Streaming Media to Software Updates and VPN Software. Each Application Rule can be configured to control the application’s upload and download speed. Traffic policies can be applied at a network or device level using the mac address or IP Address.
1.1 Best Practices for Traffic Policies
When deploying the Edge appliance, the user must consider several things while configuring Traffic Policies.
Are there any high-priority users such as the Owner or Guests?
Are there any high-cost links that should be controlled?
What user experience should the network deliver?
Traffic Policies and Application Policies can become overwhelming if the user attempts to cover every use case immediately. It is better to start small and gradually add on. One way to do this is to define a policy for high-priority users like the Owner or Guest networks. This will ensure that these users have the experience that they expect. Next, define a policy that prevents low-priority users from impeding network traffic for high-priority users. Finally, ensure that all policies control the cost of high-cost links like Fleet Broadband.
Within the Edge software, there are mechanisms to help the user configure different Traffic Policies. The Traffic Policy Template can be used as a starting point. There are four templates to choose from: App Block, VLAN Rate limit, VLAN Quota with Rate Limit, and Open. Start with the policy that closely matches the intended outcome. Once the user has tweaked the policy for one WAN technology, they can use the Copy To option to copy the settings over to the other WAN types like LTE, Wi-Fi, Ethernet, and Bonded. Finally, when defining an Application Rule by Domain or IP/Port, use the CSV upload feature if there is a need to add many different rules.
2 Configuring Traffic Policies
Login into the EdgeOS Portal by using the Konnect application.
Click the three dots icon at the top right corner.
Click Configuration Wizard.
Click Step 5 Traffic Policies to open the Traffic Policies page.
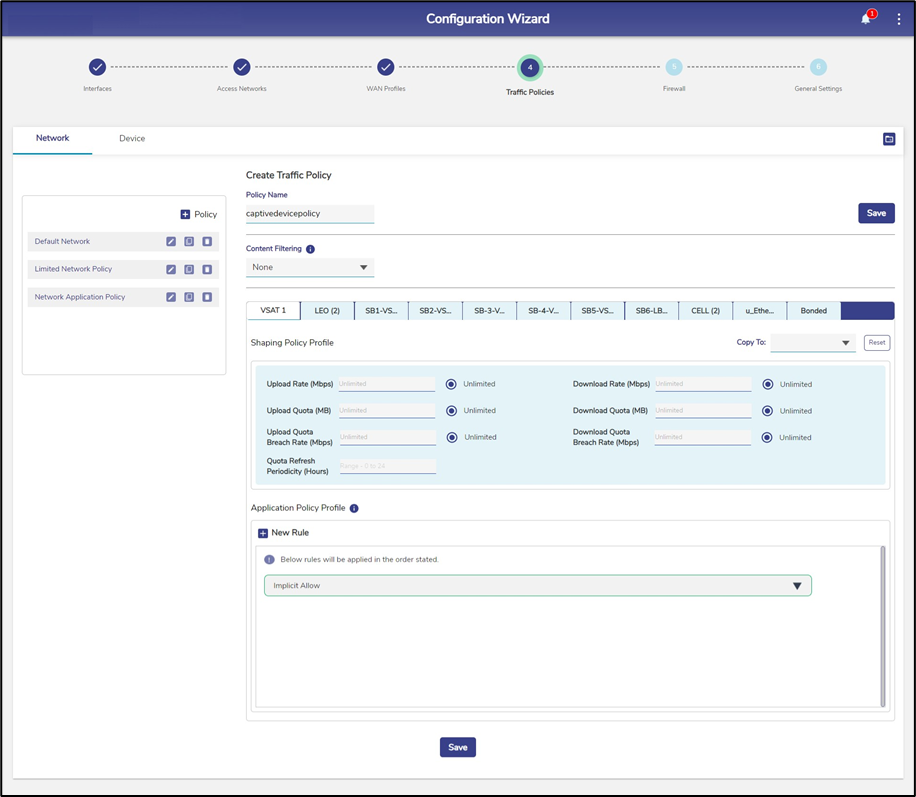
Figure 1 Traffic Policies Page
By default, the Network tab is selected.
Click + Policy button to create a new network traffic policy. The Policy Name field becomes available under the Create Traffic Policy section.
Enter the Policy Name.
In the Content filtering field, select any option from the dropdown menu according to the user’s need.
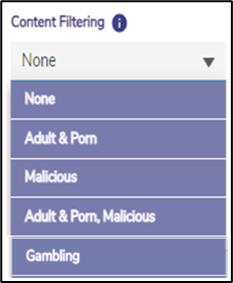
Figure 2 Content Filtering
The tabs available denote the different WAN interfaces available for the user.
2.1 Shaping Policy Profile
Under the Shaping Policy Profile section, enter the required Upload Rate in Mbps.
Enter the Upload Quota in MB.
Enter the required Download Rate in Mbps.
Enter the Download Quota in MB.
Enter the Upload Quota Breach Rate in Mbps. Once the Upload quota is used up by the user, the network starts working in the limited speed given here.
Enter the Download Quota Breach Rate in Mbps. Once the Download quota is used up by the user, the network starts working in the limited speed given here.
Enter the Quota Refresh Periodicity in hours. This specifies the time when quota gets refreshed for the user.
2.2 Application Policy Profile
Under the Application Policy Profile section, the user can set the rules by which the network will function.
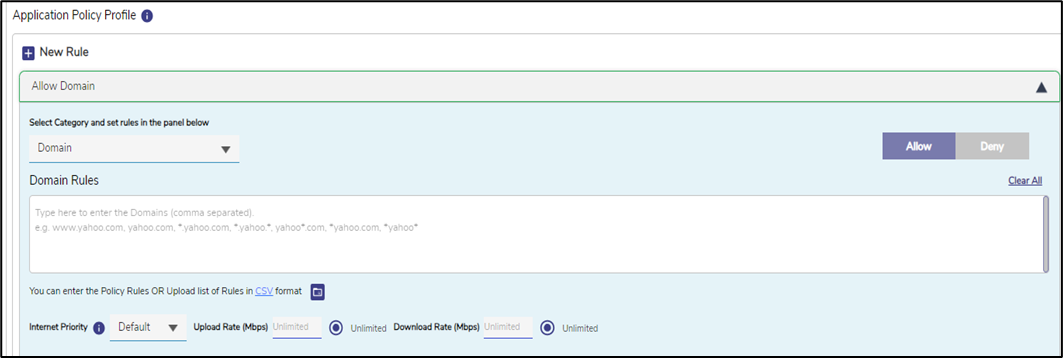
Figure 3 Application Policy Profile
Click + New Rule button to create a new rule.
2.2.1 Domain based Rules
In the Select Category field, select Domain option from the dropdown menu.
Click under the Domain Rules section.
Enter the domains for which the rule will apply, using the *.<domain name> format
If Captive Portal is enabled and HTTP Redirect is disabled, add *.k4mobility.com, *.cloudflareinsight.com in the textbox.
Domains must be separated by comma.
Click Allow button.
The user can also click the CSV button to download the upload template.
Enter the required domains in the template and upload it back by clicking the folder icon.
Apply Implicit Deny for every other domain to deny access to other domains.
2.2.2 Application based Rules
In the Select Category field, click Application option from the dropdown menu.
Click the Applications button to open the list of available applications.
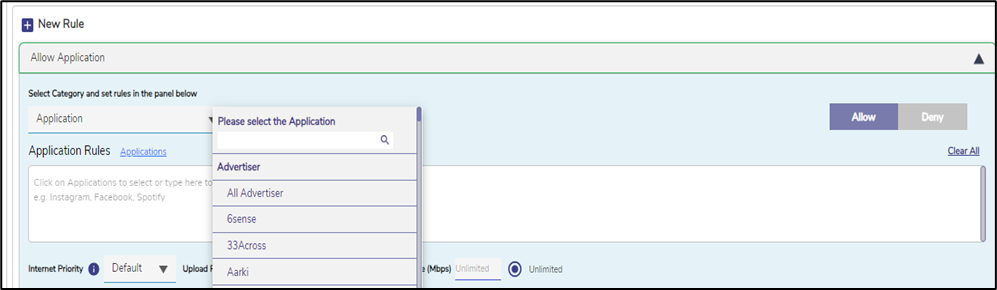
Figure 4 Application Based Rules
Select the required applications from the list for which the user might need access.
The user can also enter the names of the applications in the Application Rules textbox. The applications must be separated by comma.
Click Allow button.
Apply Implicit Deny for every other application to deny access to other applications.
2.2.3 IP & Port based Rules
In the Select Category field, click IP & Port option from the dropdown menu.
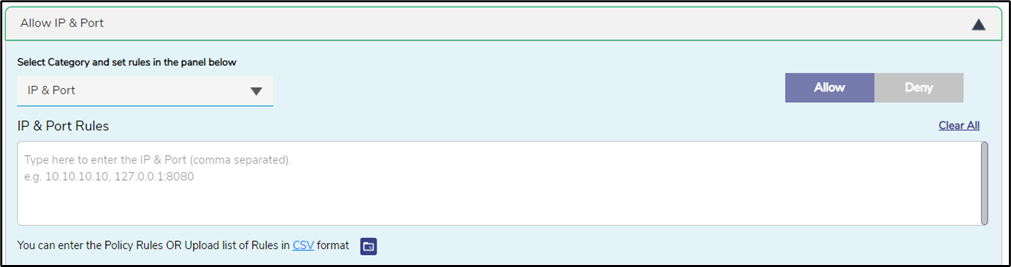
Figure 5 IP & Port Based Rules
Enter the required IP and Port combinations in the IP & Port Rules textbox for which the user might need access. The combinations must be separated by comma.
Click Allow button.
The user can also click the CSV button to download the upload template.
Enter the required IP and Port combinations in the template and upload it back by clicking the folder icon.
Apply Implicit Deny for every other IPs and Ports to deny access to other IPs and Ports.
Click anywhere on the page to automatically validate and save the rules.
3 Use Cases
Let us look at some of the most common use cases.
3.1 Deny Access to All Social Media and Streaming Applications
Enter the Policy Name.
To deny access to all Social media and Streaming applications, click + New Rule button under the Application Policy Profile section.
In the Select Category field, click Application option from the dropdown menu.
Click the Applications button to open the list of available applications.
Select All Social Media and All Streaming Media options from the applications list.
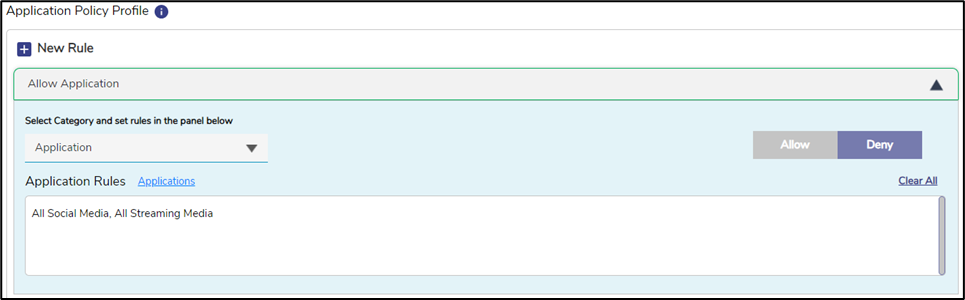
Figure 6 Use Case 1
Click Deny button.
Click anywhere on the page to automatically validate and save the rule.
Now users cannot access any social media or streaming application through this network.
3.2 Allow Access to Only a Known Set of IPs, Domains and Applications
Enter the Policy Name.
Click + New Rule button under the Application Policy Profile section.
In the Select Category field, click IP & Port option from the dropdown menu.
Enter the required IP and Port combinations in the IP & Port Rules textbox for which the user might need access. The combinations must be separated by comma. For example: 10.10.10.10
Click Allow button.
Click anywhere on the page to automatically validate and save the rule.
Click + New Rule button.
In the Select Category field, select Domain option from the dropdown menu.
Enter required domains in the Domain Rules textbox. The domains must be separated by comma. For example: *.abc.com
Click Allow button.
Click anywhere on the page to automatically validate and save the rule.
Click + New Rule button.
In the Select Category field, click Application option from the dropdown menu.
Click the Applications button to open the list of available applications.
Select the required applications from the list for which the user might need access.
The user can also enter the names of the applications in the Application Rules textbox. The applications must be separated by comma. For example: Instagram, Facebook.
Click Allow button.
Click anywhere on the page to automatically validate and save the rule.
Apply Implicit Deny to deny access to any other IP, Domain or Application other the ones specified in the previous rules.
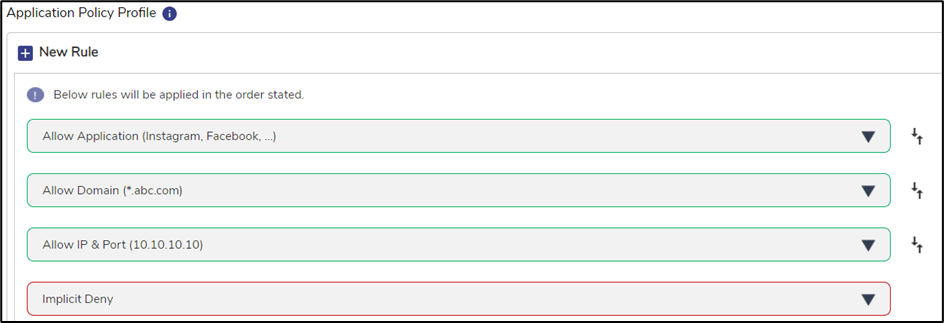
Figure 7 Use Case 2
3.3 Set a Maximum Quota For a Crew For a Day
Enter the Policy Name.
Enter the required Upload Quota in MB. For example: 1000 MB.
Enter the required Download Quota in MB. For example: 1000 MB.
Set the Upload Quota Breach Rate to 0 and the Download Quota Breach Rate to 0. This makes sure that the users cannot access the internet once they complete their quota.
Set the Quota Refresh Periodicity to 24 hours.
This policy ensures that the users cannot exceed their maximum quota for a day.
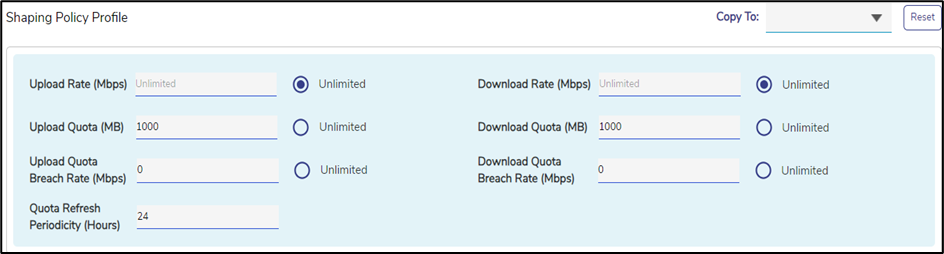
Figure 8 Use Case 3
3.4 Deny Access to Porn and Malicious Content
Enter the Policy Name.
In the Content filtering field, select Adult & Porn, Malicious option from the dropdown menu.
This filter blocks access to Adult, Pornographic content, and Malicious, blacklisted domains. This helps to prevent any attack against the user’s computer and network.
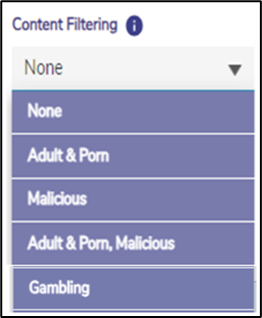
Figure 9 Use Case 4
3.5 Set Bandwidth For a Particular Application
Enter the Policy Name.
Click + New Rule button.
In the Select Category field, click Application option from the dropdown menu.
Click the Applications button to open the list of available applications.
Select the required application from the list for which the user might need access.
Enter the specific Upload Rate for that application.
Enter the specific Download Rate for that application.
Click Allow button.
Click anywhere on the page to automatically validate and save the rule.
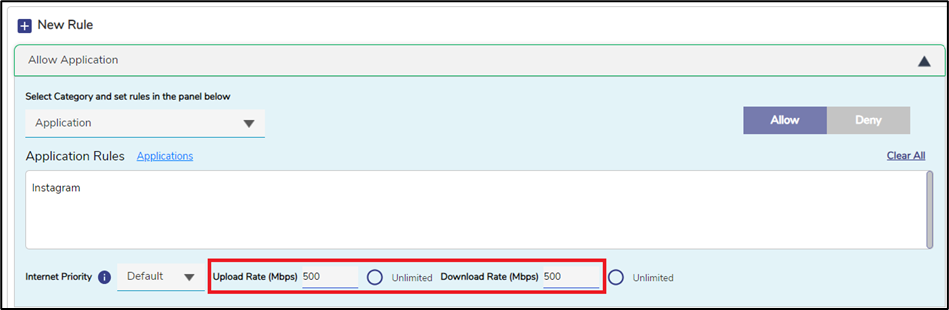
Figure 10 Use Case 5
3.6 For Effective VoIP and WhatsApp Calling
Enter the Policy Name.
Click + New Rule button.
In the Select Category field, click Application option from the dropdown menu.
Click the Applications button to open the list of available applications.
Select All VoIP/Conferencing and WhatsApp options from the applications list.
Click Allow button.
In the Internet Priority field, select Realtime option from the dropdown menu.
This policy enables the user to experience effective VoIP and WhatsApp calling.
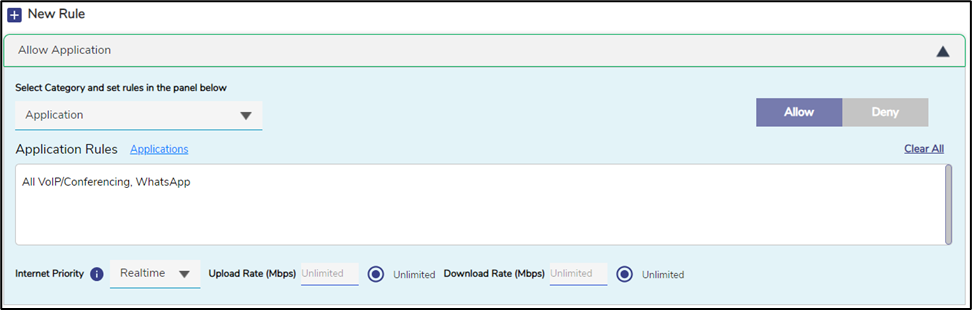
Figure 11 Use Case 6