
How To: Add Pools/Plans under a Main Pool and Assign Pools/Plans to Service Lines
Add Pools/Plans under a Main Pool
Click Plans tab under the Starlink screen.
The Plan Hierarchy section shows the details of the Standard Account and Pooled Accounts of the selected organization. The Plan Hierarchy table shows the following information:
Plan - Shows the name of the Standard plans and Pooled plans
Size - Size of data allocated to the pool
Service Lines - Number of Service lines associated with the pool
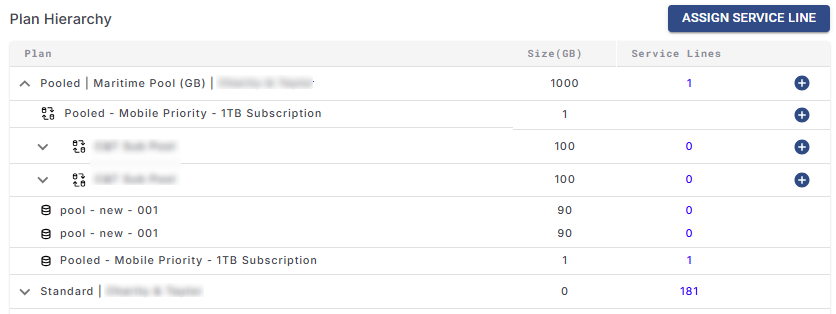
Plan Hierarchy
Click the
icon next to the name of the pooled account to expand and view the Sub pools and Plans details.
Click the
icon to add any sub pools and plans under a pooled plan.
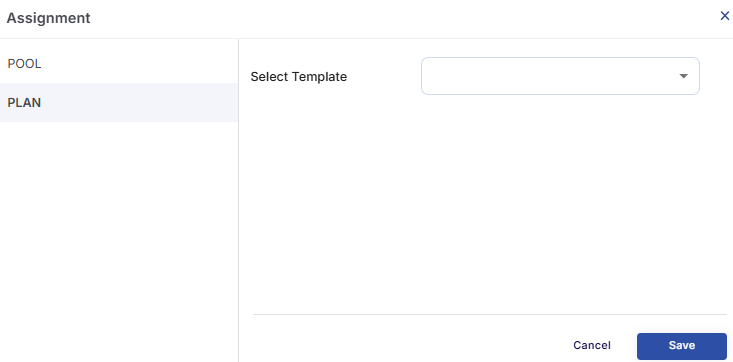
The Assignment dialog box opens.
Select the Pool option from the side menu bar.
In the Select Template field, select the required sub pool to add under the pooled account.
Select the Plan option from the side menu bar.
In the Select Template field, select the required plan to add under the pooled account.
Select the Save button to update the changes.

Add Pool
Add Plan
Assign Pool/Plan to Service Lines
Click the Assign Service Line button to assign the created Plans or Pools to the Service Lines.
This button can also be used to change the pool or plans linked with the service lines when needed.
The Assign Service Line dialog box opens.
-20250417-122814.png?inst-v=360eba69-b4e7-4616-8c2d-65aa1289b23b)
Assign Service Line
Selecting Plans
The Plan Hierarchy section shows all the Pooled plans and the Standard plans created under the selected organization and number of Service line associated with each plan.
Select the first Pool/Plan from the Plan Hierarchy section.
The selected entry is highlighted in green.
The plan name appears at the top of the green "Select Plan" section in the center pane.
All Service Lines associated with the selected plan are displayed within this section.
-20250417-123136.png?inst-v=360eba69-b4e7-4616-8c2d-65aa1289b23b)
Select Plan
Select another Pool/Plan from the Plan Hierarchy section.
This entry is highlighted in blue.
The plan name appears at the top of the blue "Select Plan" section on the right pane.
Service Lines linked to this plan are shown in the blue section.
Moving Service Lines Between Plans
Once both plans are selected and their service lines are populated:
Select one or more service lines from either the green or blue panel.
Selected Service Lines are highlighted in green or blue, depending on their origin.
The number of selected service lines will be shown at the top of the section in the Selected Service Lines field. Hover the cursor on the number shown to view the name of the selected service lines.
Use the arrow buttons (
>or<) between the panels to move the selected service lines from one plan to the other.Service Lines can be moved in either direction using the respective icon.
-20250417-123755.png?inst-v=360eba69-b4e7-4616-8c2d-65aa1289b23b)
Select Service Lines
Click the Verify button to review and confirm the changes.
Once verified, apply the new Pool/Plan to the selected Service Lines.
This process can be repeated by choosing different plans from the Plan Hierarchy. The new selection will populate the green section, and the user can then select another plan to populate the blue section.