
CAN EdgeOS Portal Configuration
To configure an Access network as Captive, the admin must first create the Network Traffic Policy and the network must be configured as Captive Access Network in the EdgeOS Portal.
Create Network Traffic Policy
Login into the EdgeOS Portal.
Click the
 icon at the top right corner of the homepage.
Click Configuration Wizard.
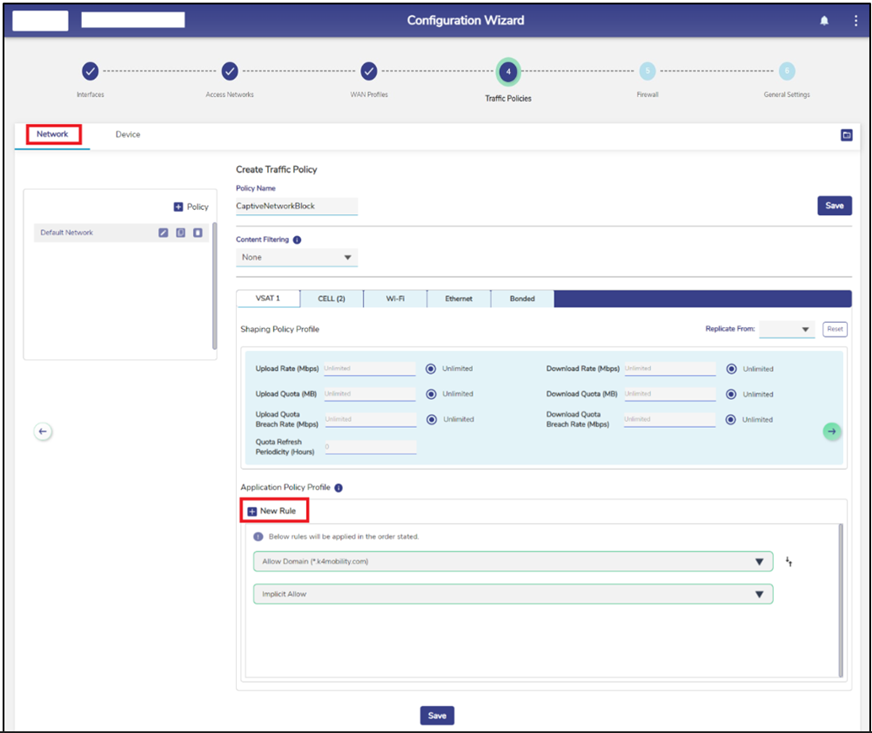
Click Step 4 Traffic Policies in the Configuration Wizard.
By default, the Network tab is selected.
Click + Policy button to create a new network traffic policy. The Policy Name field becomes available under the Create Traffic Policy section.
Enter the Policy Name. For example, “CaptiveNetworkBlock”.
Click Save button.
The above policy should be left empty. All traffic will be redirected to the Captive Portal login page.
Note: If auto-redirection is enabled for an Access Network, the Traffic policy created will not be applicable. Auto redirection functionality will override the traffic policy. Also, auto-redirection will not work in the device if the admin has set an implicit deny rule, despite captive redirection being enabled.
Network Traffic Policy
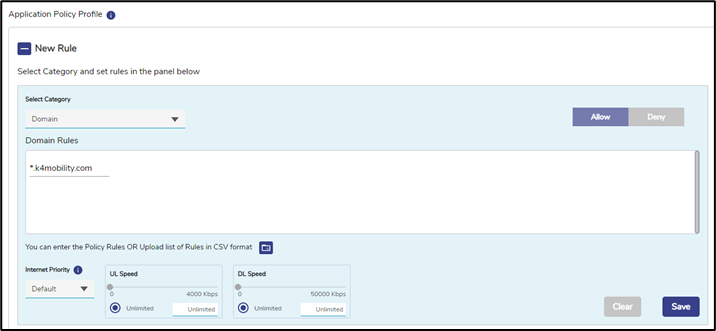
New Rule

Allow Domain
Click Save button to save the new Network Policy.
Click the Device Tab.
Create one or more Device Traffic Policies similarly in the Device Policy Section which will apply to the devices connecting via Captive Access Network. These policies will be associated with the plans assigned to users of these devices. The admin can add rules depending on what the captive devices must access and must not access. The Device Traffic Policy name must match the Traffic Policy configured in the Captive Portal Administrative portal.
The Device Traffic Policy name must match the Traffic Policy configured in the Captive Portal Administrative portal.
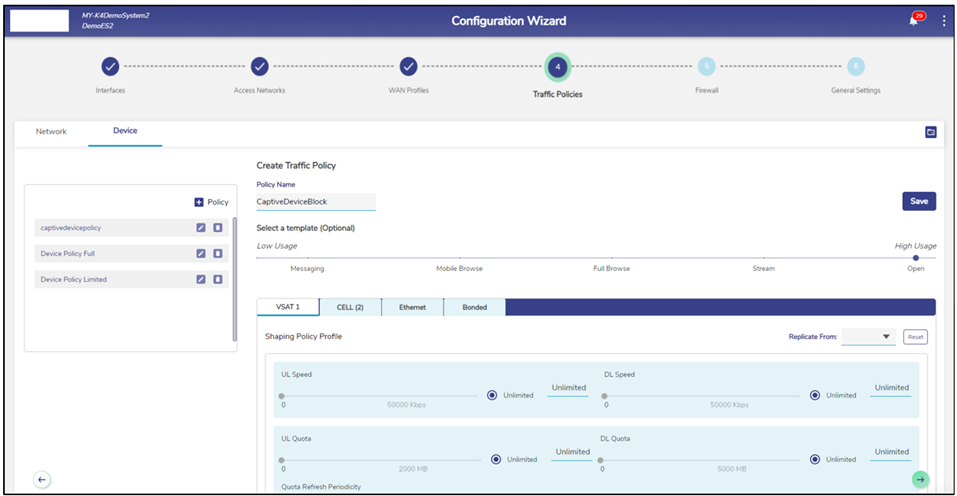
Device Traffic Policy
Enable Captive Access Network
Open the Configuration Wizard in the EdgeOS Portal.
Click step 2 Access Networks.
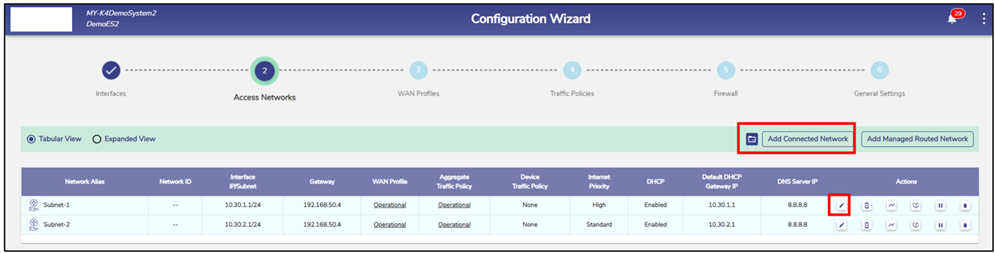
Access Networks
Select the Add Connected Network button to add a new network and configure it as Captive.
Or Click the Pencil icon of the Access Network that the admin wants to make Captive.
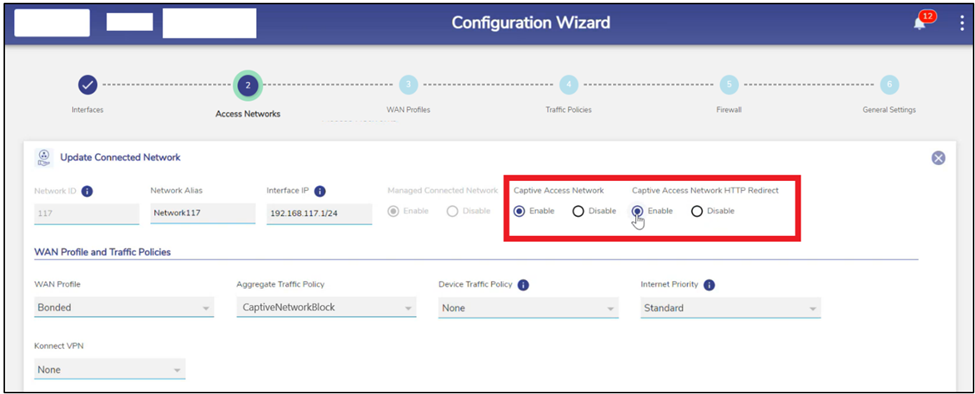
Add Connected Network
Select the Enable radio button under the Captive Access Network field to enable the Captive Access Network functionality.
The Captive Access Network HTTP Redirect field is automatically set to Enable. This is done in order to automatically redirect all HTTP requests from the user to the Captive Access Network User Portal. The user needs to enter their valid credentials to log in and access the internet.
Note: If auto redirection is enabled, HTTPs traffic will be blocked and the HTTP traffic will be redirected to the Captive Access Network User Portal.
In the Aggregate Traffic Policy field, select CaptiveNetworkBlock from the dropdown menu.
Set the Device Traffic Policy to None.
Click Save button. The Captive Access Network will be created. This will show up with a Captive Access Network icon next to it on the Access Network list.
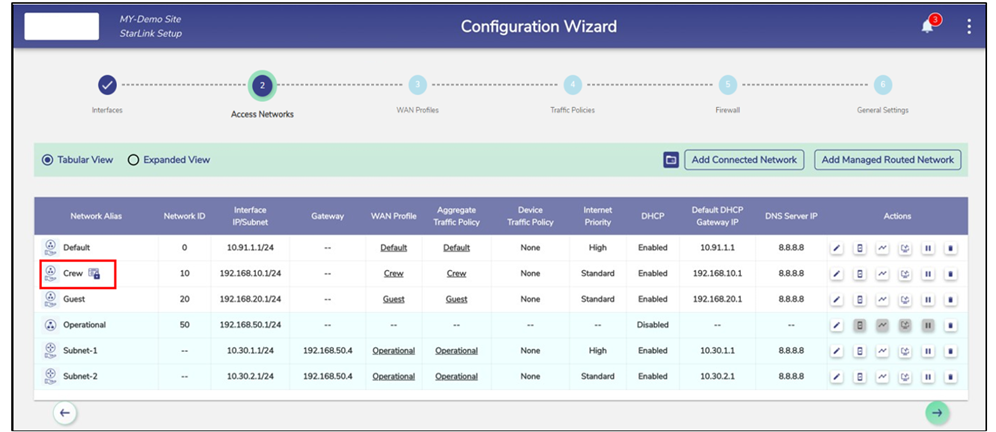
Captive Access Network Icon