
Overview
This user manual provides detailed instructions for setting up Microsoft Azure Active Directory (Entra ID) to enable secure authentication for the Captive Portal.
The steps include registering an application, collecting required credentials, and optionally restricting login access to specific users or groups.
Note:
All setup steps must be performed by a user with Administrator access to the Azure portal.
Prerequisites
Before you begin, ensure that you have:
-
Administrator access to your organization’s Azure Portal
-
Access to the Captive Admin Portal where Azure AD integration will be configured
-
A valid Microsoft Entra ID tenant
Creating an App Registration
-
Sign in to the Azure Portal.
-
Navigate to:
Azure Active Directory → App registrations → + New registration
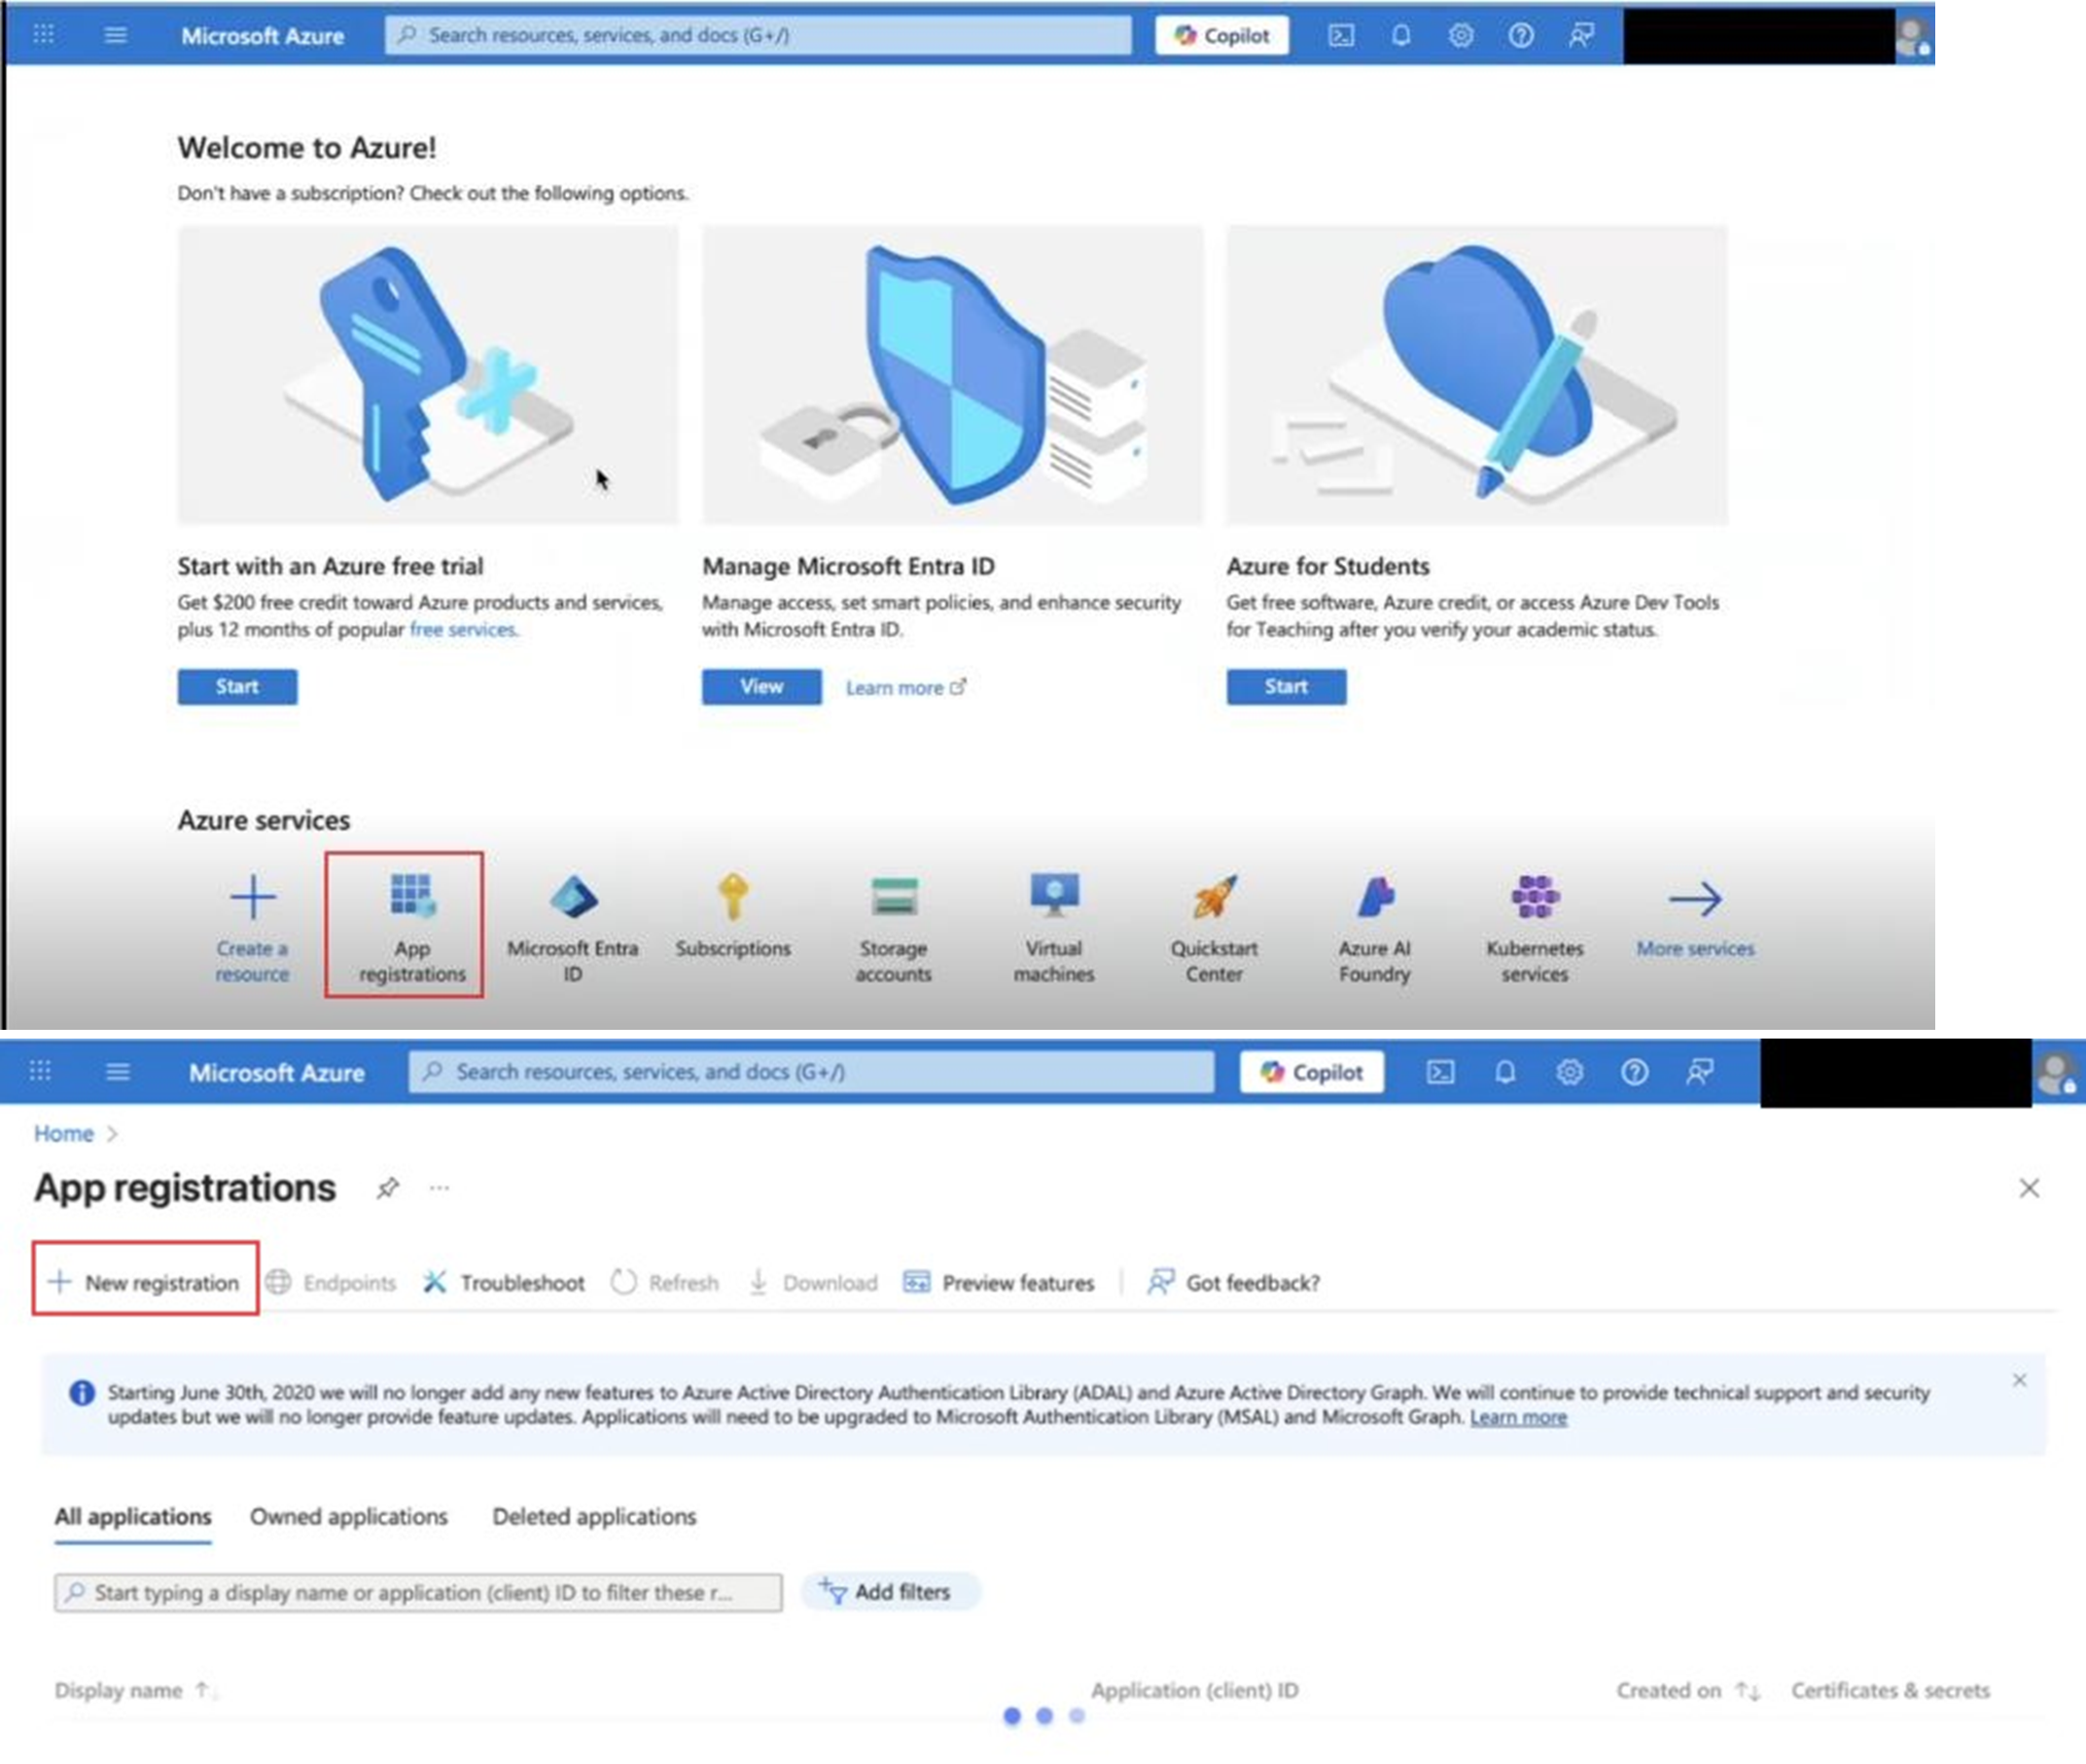
-
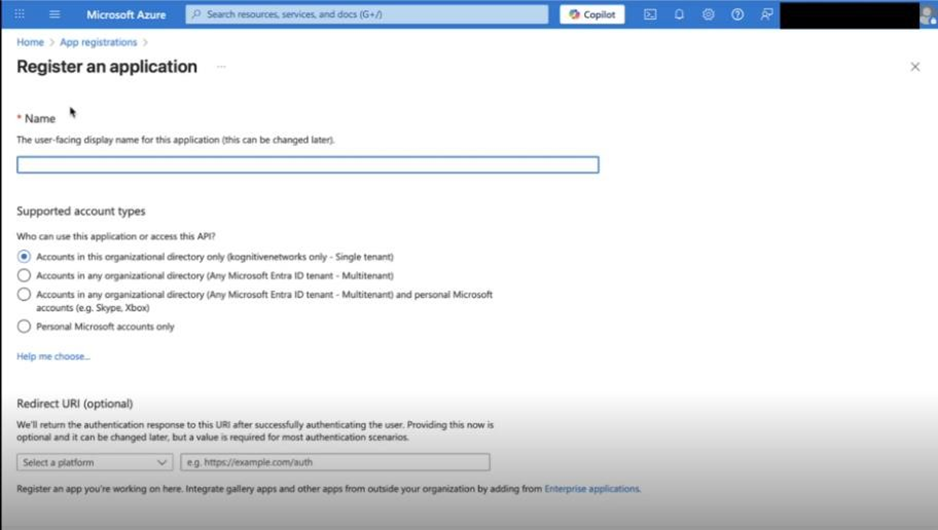
Fill in the following details:
-
Name: Enter your application name (e.g., Captive Login).
-
Supported account types: Select Accounts in this organizational directory only (Single tenant).
-
Redirect URIs (optional):
-
Choose Web as the platform.
-
Enter the following URI:
https://api.k4mobility.com/captive/all/oauth/openid/callback
-
-
-
Click Register to complete the app registration.
-
After registration, go back to App Registrations.
-
Select the newly created application.
-
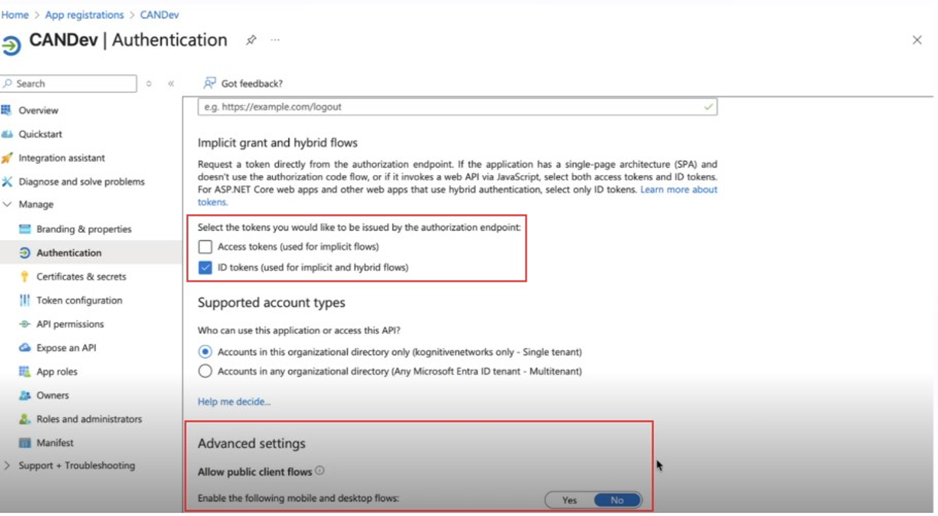
Navigate to Authentication from the left menu bar.
-
Ensure the platform settings are correct.
-
Scroll to Token Configuration and:
-
Enable ID Tokens
-
Under Advanced Settings, set Allow public client flows to No
-
-
Click Save.
Collecting Important Values
After registration, three key identifiers are required to configure authentication in the Captive Admin Portal.
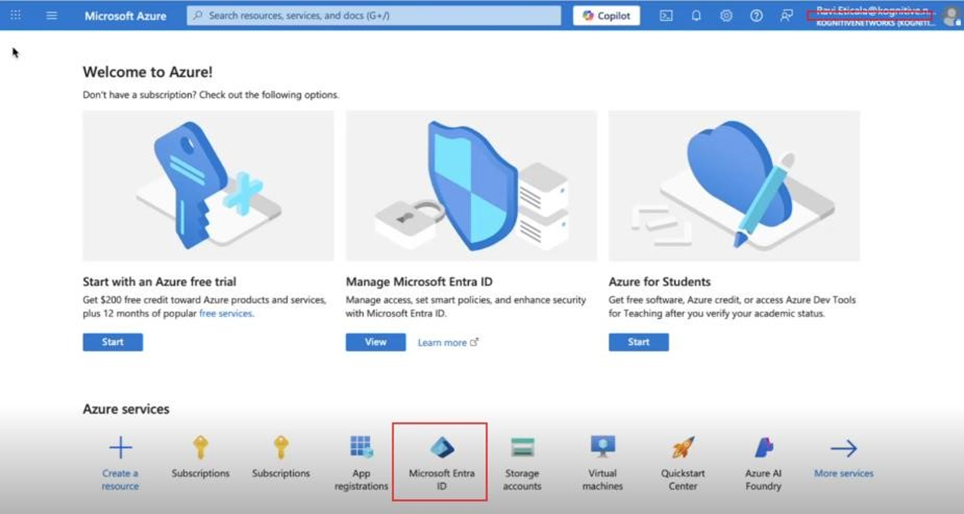
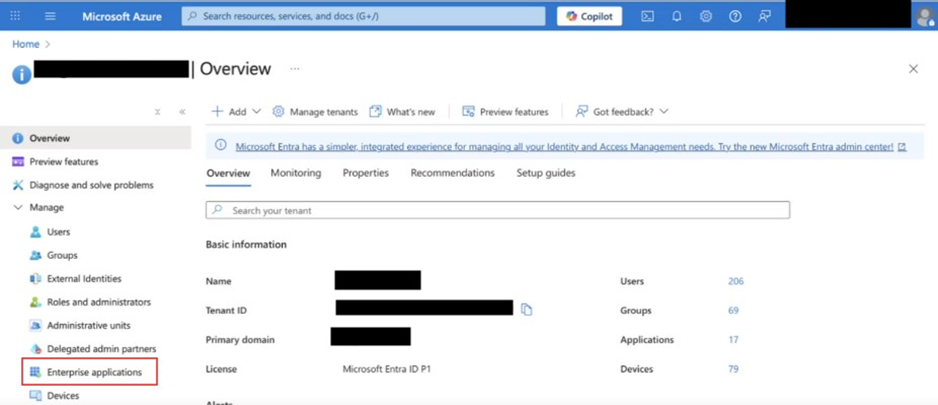
1. Tenant ID (Unique for Organization)
-
From the Azure Portal Home, go to Microsoft Entra ID.
-
Copy the Tenant ID displayed — this uniquely identifies your organization.
-20251030-153741.png?cb=0445285a5ab99baa1baa9cedb75562f4)
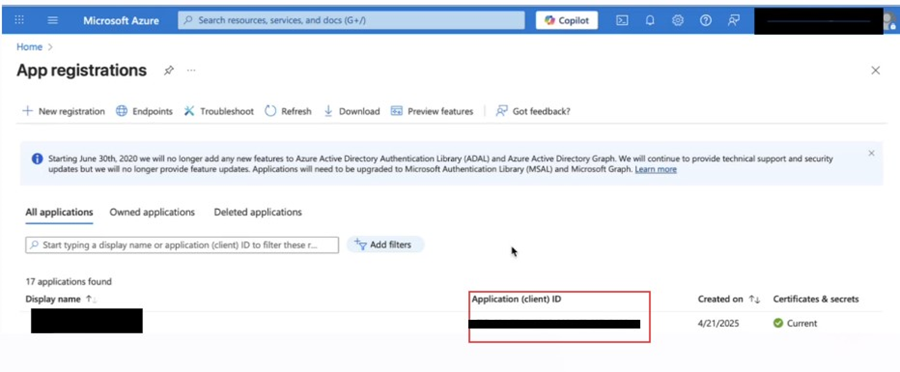
2. Client ID
-
Navigate to Azure Active Directory → App registrations.
-
Select your registered application.
-
Copy the Client ID — this uniquely identifies your application.
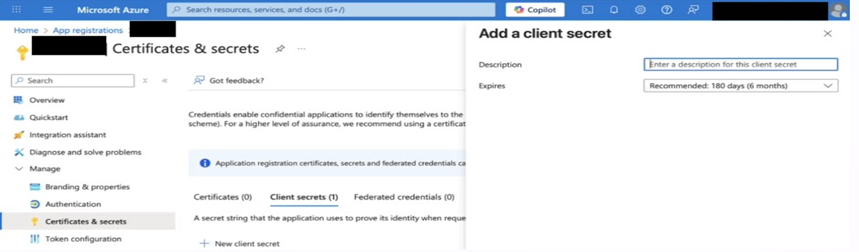
3. Client Secret
-
Open the application, then go to Certificates & Secrets → Client secrets.
-
Click + New client secret.

-
Fill in:
-
Description: (e.g., Captive Auth Secret)
-
Expires: Choose an appropriate duration.
-
-
Click Add.
-
Copy the Secret Value immediately (it will only be visible once).
Captive Admin Portal Configuration
-
Login to the Captive Admin Portal.
-
Select the Portal Tab.
-
Select the Third Party Signup Page option from the left menu bar.
-
Enter the following values in the Captive Admin Portal’s Azure AD authentication section:
-
Tenant ID
-
Client ID
-
Client Secret
-
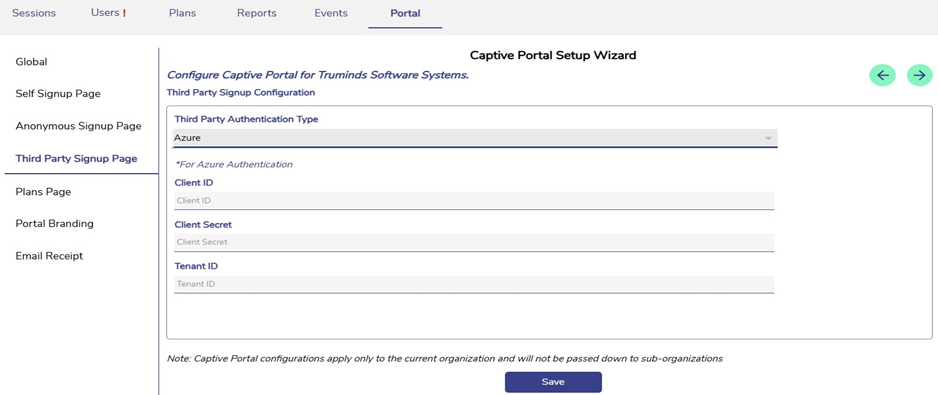
This enables third-party login through Azure AD.
Restricting Application Access to Specific Users or Groups
If you wish to limit login access to selected users or groups, follow these steps:
-
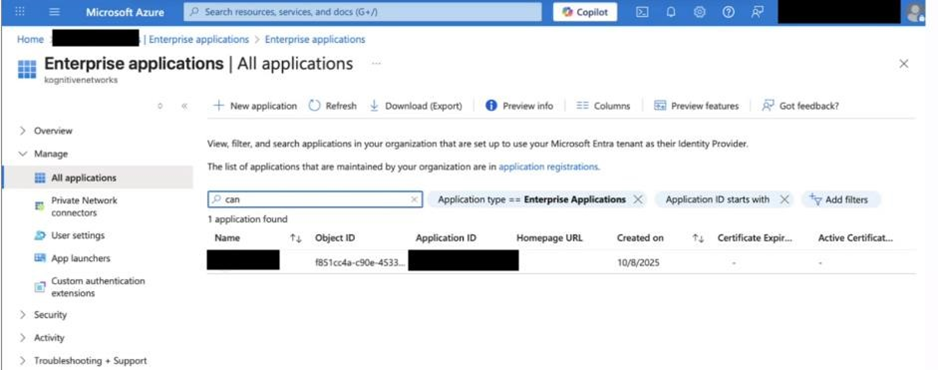
In Azure Portal, navigate to:
Microsoft Entra ID → Enterprise Applications
-
Under Manage → All Applications, select the application used for Captive Login.
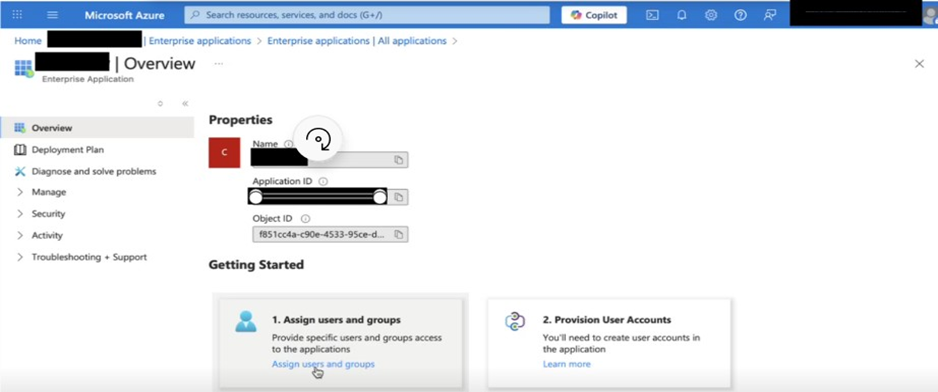
-
On overview, Assign users and groups will be present. On clicking Assign users and groups, it will take you to user assignment settings.
-
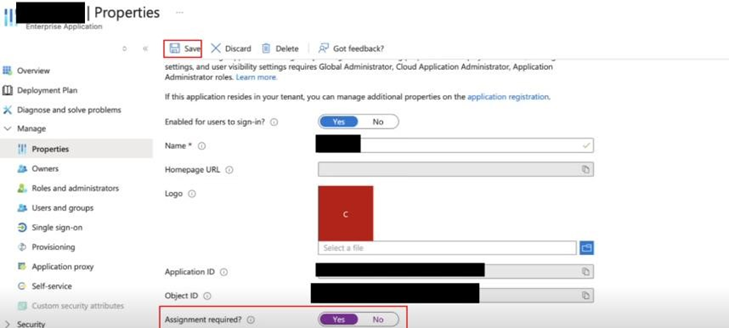
In the application menu, go to Properties.
-
Set Assignment required? to Yes.
-
Click Save.
-
-
Then go to Users and Groups → + Add user/group.
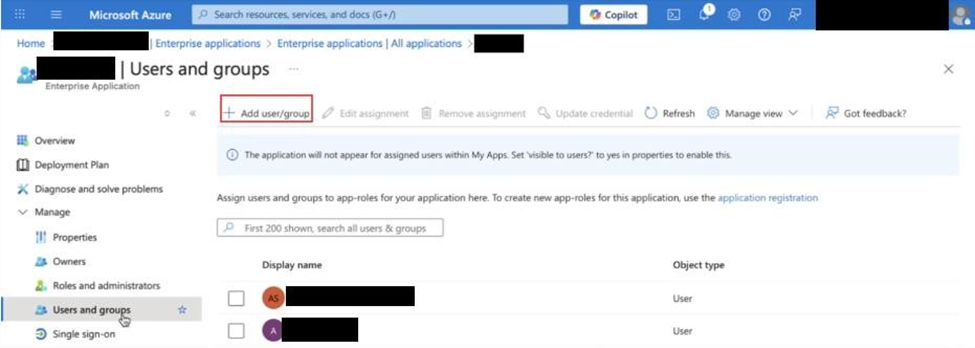
-
In the pop-up window:
-
Click Users and groups.
-
Select the desired users or groups.
-
Click Assign.
-
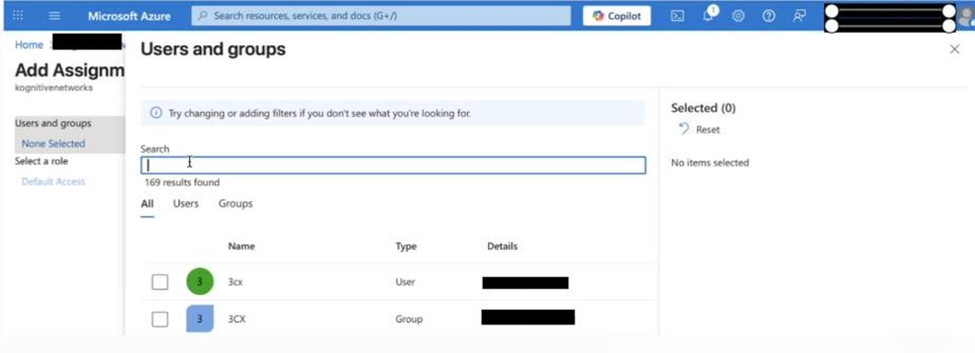
Now, only the assigned users and groups can log in via Azure AD.
Logging in using Microsoft
-
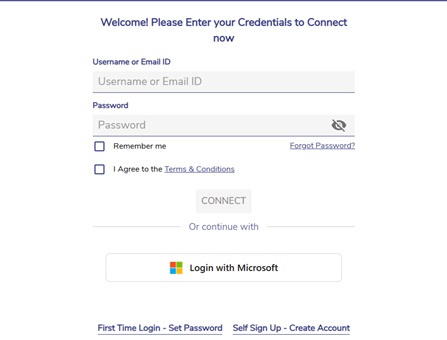
Once the administrator enables Azure AD Third-Party Authentication, users will see a “Login with Microsoft” button on the User Portal login page.
-
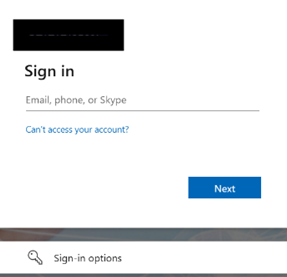
After clicking the “Login with Microsoft” button, if you not already signed in with a Microsoft account on that browser, you will be redirected to the Microsoft sign-in page to complete authentication.
-
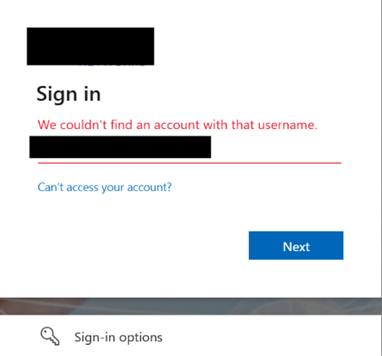
You will be prompted to enter their Microsoft account email. If an incorrect or unauthorized email is entered, the following error message will appear on the same page.
-
If the entered email is valid, you will then be prompted to enter your password to continue.
-
If the entered password is incorrect, an error message will be displayed on the same screen.
-
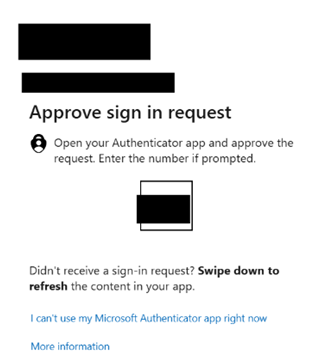
After successful password verification, if two-factor authentication (2FA) is enabled for the account, you will be prompted to complete the 2FA process.
-
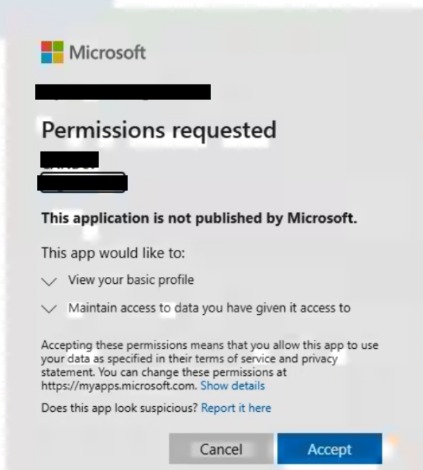
Once all verifications are completed, you will be prompted to grant consent for the Captive application to access your Microsoft account data. This access is required to authenticate and log the user into the User Portal. After consent is granted, the prompt will not appear during subsequent logins.
-
After the consent is granted, you will be successfully logged into the User Portal through Microsoft authentication. From this point onward, you can seamlessly access the portal using the “Login with Microsoft” option without needing to repeat the verification steps, ensuring a secure and convenient sign-in experience.